Easy Sugar Cookie Icing — quick family meals
I have a confession: icing is my kitchen mood ring. Some days it’s glossy and perfect; other days it’s a blob-covered disaster that looks like my toddler painted the neighbor’s dog. But honestly, the recipe for this sugar cookie icing is the kind of tiny victory that turns a chaotic evening into a mini celebration. It’s simple, forgiving, and makes cookies feel like a party even when dinner was leftovers again.
On a rainy Tuesday last winter, after serving yet another round of easy weeknight dinners, I decided cookies were required emotional support. I grabbed powdered sugar, milk, corn syrup, and vanilla — nothing fancy — and whisked like it was a potion. Five minutes later the kitchen smelled like vanilla and I had rainbow blobs on every plate. I did not expect that level of joy from a tiny bowl of icing, but there it was.
This icing is my go-to when I want quick results that still feel lovingly homemade. It’s great for big cookie platters for potlucks, and it’s also forgiving enough for last-minute holiday trays for neighbors. And yes, it plays well with the kind of baking I do when I’ve been elbow-deep in meal prep for the week with meal planning chicken and have one hand on a casserole and the other trying to rescue the icing from turning into a sugar tsunami.
If you’re into budget-friendly recipes and want something that stretches a tiny pantry into festive cookies, this is your jam. And just so you know, I have a soft spot for pairing sweet things with other treats — once you’re done, you might want to try something like a buttery bar or a crisp, nutty cookie for contrast. If that sounds tempting, peek at my take on a nutty treat here: pistachio dream cookie bars.
Why You’ll Love This Recipe
- It’s unbelievably simple: four ingredients and a five-minute mix equals glossy, spreadable icing that sets beautifully. This is great when you need quick family meals energy for dessert.
- Child-friendly and forgiving: kids can join in and the result still looks adorable. Perfect when you need to keep hands busy while you finish meal prep microwave lunches.
- Versatile for decorating: thin it a touch for flooding or keep it thick to pipe borders and dots. I love that flexibility when I’m making trays for neighbors after a long day of cheap meal plans for 2 prep.
- Keeps well: make a big batch and store it; it’ll rescue cookies, cakes, and last-minute gifts.
- Beautiful finish: the corn syrup gives it that glossy sheen that screams “professional” even if your piping is, uh, interpretive.
- Comforting and nostalgic: it smells like vanilla and holiday lights, and no matter how the rest of dinner went, these cookies say “we tried.”
What Makes This Recipe Special?
This icing is the friend who shows up with a casserole and stays to help clean. It’s not delicate or finicky. The secret is the corn syrup — it gives the icing that shiny finish and slows down crystallization so you’re not scraping gritty sugar later. The ratio of powdered sugar to milk is forgiving; you can thin it with more milk or thicken with more sugar without upending the whole thing.
I also love how it pairs with a wide range of cookie textures — crisp sugar cookies, soft thumbprints, even ginger snaps. One time I tried it on a slightly underbaked cookie (oops), and the icing actually helped save the texture by providing a contrasting firm top. That was a happy accident.
If you want a sprinkle of showmanship, split the batch into small bowls and dye in pastels. It’s an easy way to trick guests into thinking you planned ahead. And if you’re browsing for dessert inspiration after prepping healthy comfort food for dinner, trust me: this icing elevates humble cookies into something worth photographing.
For another cookie-style idea that pairs nicely with this icing, check out my other creation: pistachio dream cookie bars.
Ingredients
I’ll be honest: these ingredients are probably already in your pantry. That’s what makes this recipe a small kitchen miracle on nights when you forgot to thaw the chicken for *low calorie chicken meal prep* or when you need something sweet after an evening of *healthy eating for two* planning.
- 2 cups powdered sugar — The foundation. Use the fluffy stuff that dissolves easily. If you have a sifter, use it to avoid lumps.
- 2 tablespoons milk — Whole milk gives a silkier mouthfeel, but any milk works. I once used an overly warm almond milk (because I had no plan) and it still came out fine. For thicker icing, use less; for thinner, add more.
- 1 tablespoon corn syrup — This is the unsung hero. It adds gloss and prevents cracking. Don’t skip it unless you like a matte, possibly cracked finish. If you’re avoiding corn syrup for dietary reasons, swap for a mild-tasting light syrup, but know the sheen may be different.
- 1 teaspoon vanilla extract — The small addition that makes people say “mmm.” Use a good-quality vanilla if you can; the scent is everything.
- Food coloring (optional) — Gel colors give vivid hues without watering down the icing. I keep a tiny tube of gel food coloring in my drawer for emergencies (and rainbow cookies).
Why each ingredient matters: powdered sugar provides structure and sweetness. Milk hydrates the sugar and creates a spreadable texture. Corn syrup gives shine and elasticity. Vanilla adds depth and a familiar cozy scent.
Personal tips: I prefer Domino or generic powdered sugar for consistent texture. For vanilla, a middle-shelf pure vanilla extract works wonders and isn’t bank-breaking. Don’t use water instead of milk unless you want a flatter flavor profile — milk makes the icing taste richer. If you’re tempted to add butter, don’t; this is a royal-ish glaze, not a buttercream.
Don’t-do-this warning: don’t add too much milk at once. You’ll overshoot and have gluey run-off that refuses to cooperate. Add in small increments and test the flow on a spoon or spare cookie.
And one more pro move — if you’re prepping for a cookie exchange (hey, we’ve all been there), label bowls with color names so you won’t end up with “bubblegum-ish lime” frosting on traditional holiday cookies.
For inspiration when you’re pairing cookies with other sweets from your stash, consider this bar recipe I love: pistachio dream cookie bars.
How to Make It Step-by-Step
I’ll walk you through my exact, slightly chaotic method that somehow works even when I’ve been interrupted by a phone call, a spill, and my neighbor asking for sugar.
- Measure your powdered sugar into a medium mixing bowl. I spoon it into the cup and level it — too much sugar and you’ll get a paste. The sound of the sugar scooping in is oddly comforting, like the prelude to a good story.
- Add the milk. Start with 2 tablespoons. Pour slowly while stirring because the powdered sugar will puff up in a soft cloud if you aren’t careful. That puff — yeah, that will probably land on your sleeve at least once.
- Pour in the corn syrup. This glossy little bottle is the secret sauce. Stir it in until the mixture starts to shine. The movement should be smooth and have a little resistance — not runny like water and not stiff like paste.
- Add vanilla extract. You’ll get a lovely perfume of vanilla that floods the kitchen — that smell, that exact smell, makes me think of cold windows and holiday tinsel. Stir until the mixture is homogenous. Taste it. If it’s too sweet (rare), try a pinch of salt to balance.
- Adjust consistency. If you want flood icing (thin, smooth surface), add milk a few drops at a time until it flows slowly off a spoon. For piping or thicker accents, keep it dense — add a touch more powdered sugar if it’s too thin. If it’s too thick, a teaspoon of milk fixes everything.
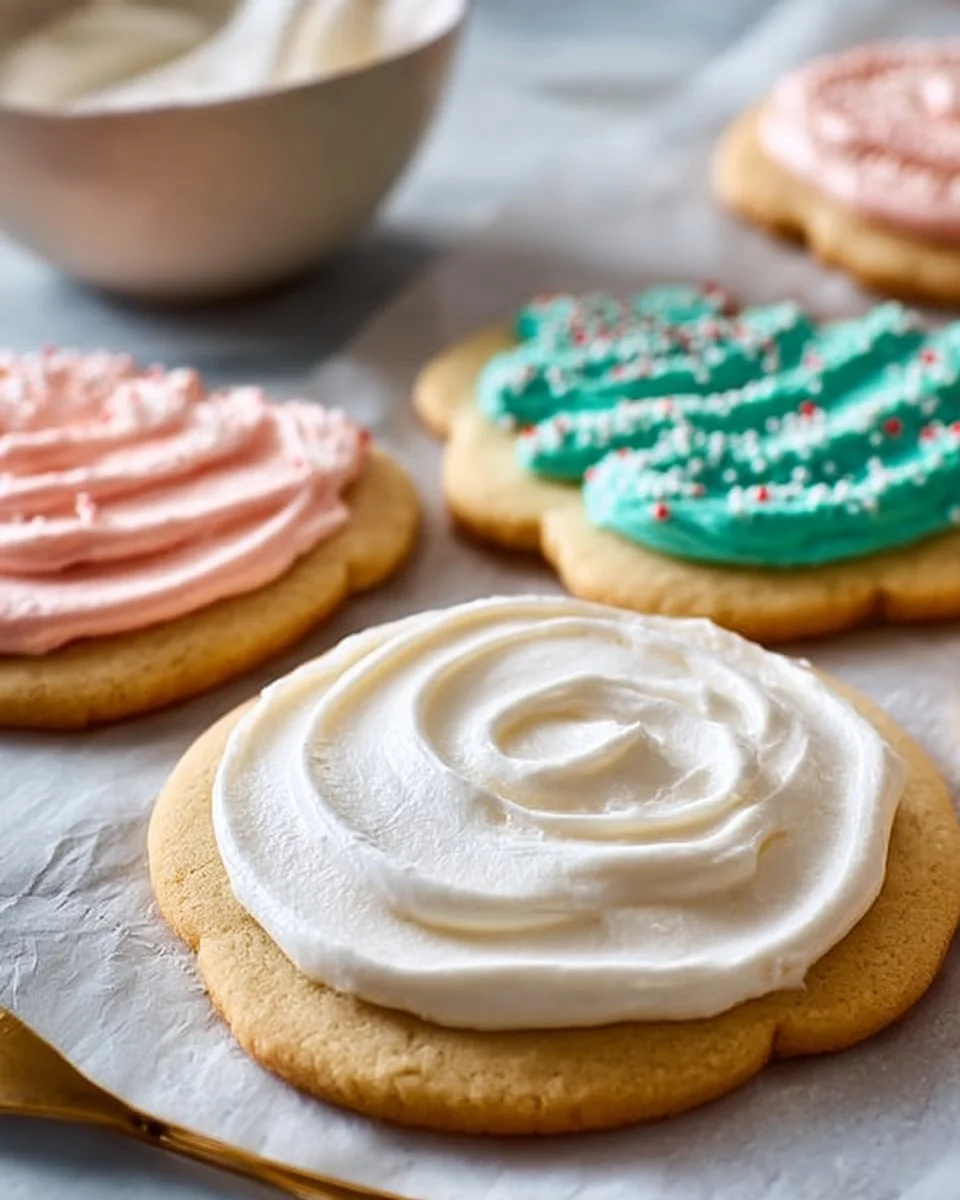
- Divide and color if desired. Use small bowls for each color to keep control. Gel colors are my preference because they don’t water down the icing and you can achieve vibrant hues with tiny dots.
- Transfer to piping bags or use a pastry brush. For tidy cookies, use a piping bag with a small round tip to outline and then flood. For a rustic look, a spoon or small offset spatula works fine. I’ve used a zip-top bag with the corner snipped off — total hack, zero shame.
- Let it set. Place the decorated cookies on a baking rack or parchment-lined tray and let the icing harden at room temperature. The top will dry in 30–60 minutes, but give it a few hours to fully set. If you’re impatient like me, slide them into a single layer and admire them while you make tea.
I learned most of these steps through trial and error — including the time I added too much milk and had to frantically stir in mountains of powdered sugar while my cat watched with judgment. To be real, that batch was slightly lopsided but tasted great.
If you’re exploring dessert ideas after prepping healthy boxed meals, this icing is a delightful reward that doesn’t require a pastry degree. And if you want another sweet to alternate on your cookie table, consider pairing with a denser bar like these: pistachio dream cookie bars.
Tips for Best Results
– Use gel food coloring to avoid watering down the icing. A tiny dot goes a long way.
– Work in small batches if you’re juggling multiple colors. It saves grief and mixing bowls.
– Rest time is sacred. Even if the surface looks set, give it an hour before stacking.
– If your icing crusts while you’re working, cover the bowl with a damp paper towel to keep it pliable.
– For that perfect sheen, don’t overbeat. Stir gently to maintain gloss.
– If you’re short on time, this icing pairs well with slightly warm cookies — warmth melds textures in a magical way.
If you want to experiment with pairing ideas while also prepping easy protein options like high protein ready made meals, small adjustments to your schedule can make dessert time feel like a tiny, well-earned treat.
Ingredient Substitutions & Variations
This recipe is a springboard for creativity. Want a dairy-free variation? Use full-fat coconut milk or your favorite plant milk; the flavor will change, but the texture remains friendly. Need a richer flavor? Replace a teaspoon of the milk with a teaspoon of light corn syrup for extra shine.
If you prefer less sweetness, add a pinch of salt or a few drops of lemon juice to brighten the flavor. For a boozy note, a drop or two of liqueur works, but keep it kid-friendly for cookie swaps.
For festive variations: add peppermint extract for holiday cookies, almond extract for a nutty aroma, or lemon zest for a fresh pop. Colored sprinkles or sanding sugar add texture and that extra sparkle people love on Pinterest.
Swap warnings: don’t replace corn syrup with heavy molasses — the flavor will overpower the icing. And if you try to use straight water instead of milk, expect a flatter mouthfeel and more brittle finish.
Directions

Combine powdered sugar, milk, corn syrup, and vanilla, stirring until smooth. Divide and color if desired. Pipe or brush onto cookies and let set.
For thicker icing, use less milk. For thinner, add milk a teaspoon at a time. Store any leftovers in an airtight container and rewhisk before use.
Pairing Ideas (Drinks, Sides, etc.)
Pour a steaming mug of tea — Earl Grey or chamomile depending on your mood — and you have comfort-level eleven. For a slightly more indulgent pairing, a glass of cold milk (or oat milk) is a classic kid-pleaser and grown-up comfort.
Pair with:
- Warm spiced cider for cozy evenings.
- Espresso for a sweet-and-bitter contrast if you need a dessert pick-me-up after prepping best dinner prep meals.
- Fresh fruit on the side, like sliced apples, to cut through the sweetness.
- A scoop of vanilla ice cream for an ice-cream-sandwich style treat.
For a movie night at home after prepping healthy meal plans for two, these iced cookies plus a rom-com is ridiculous and perfect — trust me.
How to Store and Reheat Leftovers
Leftover icing? Me too. Store in an airtight container in the fridge for up to a week. Before using again, let it come to room temperature and stir; if it’s thickened, thin with a teaspoon of milk at a time.
Cookies with icing should be stored in a single layer or with parchment between layers in an airtight container. If you stack while the icing is still tacky, you’ll get a colorful collage that’s impossible to separate without casualties.
Reheating isn’t really necessary for the icing. If you need it to be pourable, microwave a small bowl for 5–10 seconds and stir; don’t overdo it or the corn syrup will loosen too much and you’ll be back to a runny mess.
Common storage oops: once I stacked a tower of iced cookies and later tried to separate them — tears, glitter, and stickiness ensued. Lesson learned: let them set fully and use parchment.
Make-Ahead and Freezer Tips
You can make the icing ahead and refrigerate it in a sealed container for up to a week. For longer storage, freeze in a freezer-safe container for up to 3 months. Thaw overnight in the fridge, then bring to room temperature and stir.
Cookies themselves freeze nicely without icing. Freeze the baked cookies on a tray, then transfer them to a zip-top bag. When you’re ready, thaw and ice them fresh for the best look and texture.
When you’re prepping for a party and juggling prepared meals for two and treats, this system will save your sanity.
Common Mistakes to Avoid
- Adding too much milk at once — you’ll end up chasing texture with mountains of powdered sugar.
- Overbeating — it can incorporate air and give a duller finish.
- Not letting the icing set before stacking — sticky disaster awaits.
- Using liquid food coloring — it waters down the icing. Use gels.
- Skipping the corn syrup — you’ll get cracking and matte spots.
I’ve made all of these mistakes. Once, in full holiday adrenaline, I mixed the icing in a warm bowl which made it too loose — then I tried to speed-dry it with the oven and created a glossy puddle. Oops. Learn from me: patience, small additions, and a calm playlist.
Frequently Asked Questions (FAQ)
Q: Can I use water instead of milk?
A: You can, but the icing won’t taste as rich. Milk gives a silkier flavor profile.
Q: How long does the icing take to set?
A: The surface can crust in 30–60 minutes, but full setting may take 2–4 hours depending on humidity.
Q: Can I make this ahead of time?
A: Yes — store airtight in the fridge for up to a week. Re-stir before using.
Q: Is corn syrup necessary?
A: For shine and flexibility, yes. If you skip it, expect a matte finish that may crack sooner.
Q: Can I use this on cakes?
A: It’s best for cookies and items where a thin glaze is desired. For layered cakes, a buttercream is usually better.
Cooking Tools You’ll Need
- Medium mixing bowl
- Whisk or spoon (I use a small spatula most days)
- Measuring cups and spoons
- Piping bags or zip-top bags (corner snipped)
- Small bowls for coloring
- Baking rack or parchment-lined tray for drying
Optional but lovely: a small angled spatula for smoothing, a squeeze bottle for precise flooding, and a handful of sprinkles for that extra “I tried” energy.
Final Thoughts
This sugar cookie icing is the dessert equivalent of a warm sweater. It hugs cookies, hides a multitude of baking sins, and still manages to look deliberate. I love it because it’s fast, forgiving, and reliably makes people smile — which, in my kitchen, is the ultimate metric.
There’s something deeply satisfying about simple things done well. A bowl of glossy vanilla icing, a cookie cooling rack, and a playlist with songs you hum off-key — those are the kitchen moments I remember. I hope this recipe gives you a tiny slice of that comfort, whether you’re icing after prep for high protein frozen meals week or sneaking cookies at midnight.
If you enjoyed this recipe, don’t forget to save it on Pinterest or share it with a friend!
Conclusion
If you want a few more takes on sugar cookie icing from other trusted sources, here are some helpful references to compare techniques and get fresh inspiration: Easy Sugar Cookie Icing – Live Well Bake Often offers a straightforward, approachable version that’s great for beginners. For step-by-step photos and piping tips, check out Sugar Cookie Icing – Preppy Kitchen which is fantastic for visual learners. If you’d like a slightly different frosting note and a family-tested approach, see Sugar Cookie Icing Recipe | Your Homebased Mom. And for another professional-feeling tutorial with tips on consistency and shine, I recommend Sugar Cookie Icing – Handle the Heat.
If you enjoyed this recipe, don’t forget to save it on Pinterest or share it with a friend!

Easy Sugar Cookie Icing
Ingredients
Icing Ingredients
- 2 cups powdered sugar The foundation. Use the fluffy stuff that dissolves easily.
- 2 tablespoons milk Whole milk gives a silkier mouthfeel, but any milk works.
- 1 tablespoon corn syrup This adds gloss and prevents cracking.
- 1 teaspoon vanilla extract Use a good-quality vanilla if possible.
- to taste food coloring (optional) Gel colors give vivid hues without watering down the icing.
Instructions
Preparation
- Measure the powdered sugar into a medium mixing bowl.
- Add the milk slowly while stirring to prevent a powdered sugar puff.
- Pour in the corn syrup and stir until shiny.
- Add vanilla extract and mix until homogeneous.
- Adjust the consistency by adding more milk for thinner icing or more powdered sugar for thicker icing.
- If desired, divide into small bowls and add gel food coloring.
- Transfer the icing to piping bags or use a spoon to apply onto cookies.
- Let the decorated cookies sit on a baking rack or parchment-lined tray to dry.