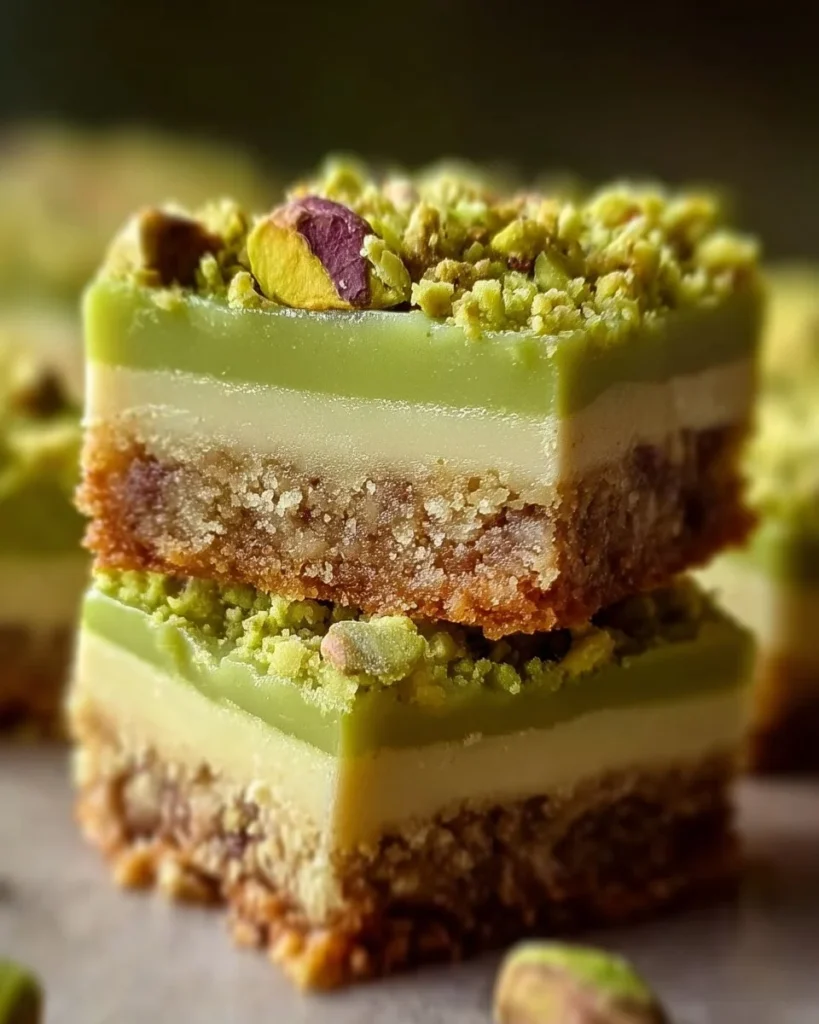
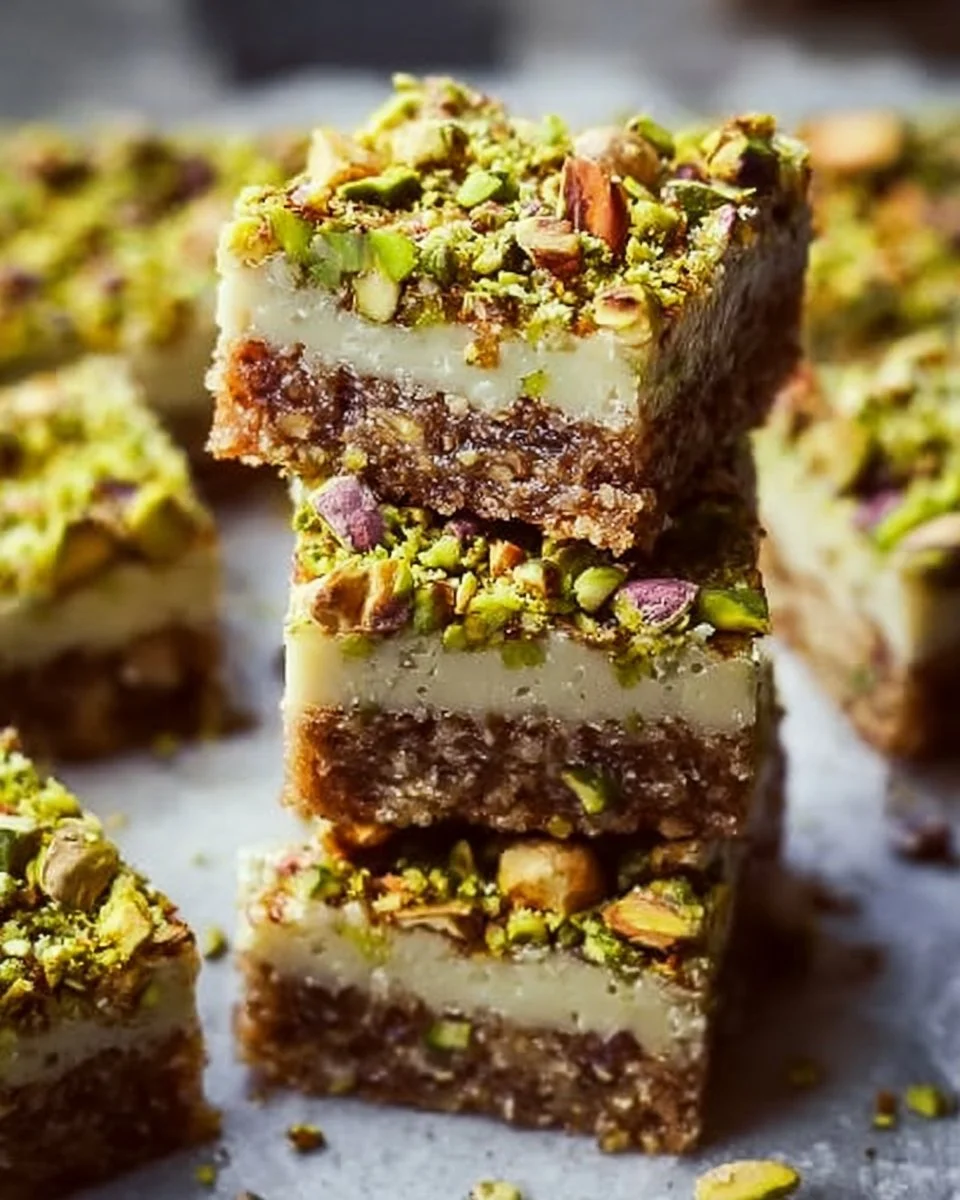
Easy Pistachio Dream Cookie Bars
If you love budget-friendly recipes that feel indulgent yet unpretentious, you’re in the right place. Honestly, these Pistachio Dream Cookie Bars started as a glorified kitchen experiment — part desperate snack attack, part “I have a bag of pistachios and nowhere to go” moment — and turned into a keeper I make when I want something both comforting and a little fancy.
To be real, my first attempt was a disaster. I over-crumbled the dough, burned the edges, and ate about five raw pistachios as emotional support. Oops. But after a few iterations (and one dinner party rescue where I stared down a very picky sweet-toothed cousin), this recipe landed in the sweet spot: buttery, nutty, and just chewy enough to feel homemade — not like something out of a bakery case. The kitchen smelled like browned butter and toasted nuts even though I hadn’t browned anything. That kind of deceptive magic is my kind of cooking.
There’s something cozy about a pan of cookie bars cooling on the counter. They’re the right thing to make on a rainy Thursday easy weeknight dinners night when the oven’s already warm from roasting veggies, or to toss in a lunchbox for a friend who needs a sugary pick-me-up. They’re surprisingly versatile: serve them as a teatime indulgence, a late-night snack, or tuck them into a picnic basket with some fruit and a thermos of coffee. The vanilla rounds everything out, the pistachios bring a crunchy, slightly savory lift, and the optional white chocolate chips give that soft sweet pop in every bite.
This recipe matters to me because it’s the one I brought to my sister’s engagement party the year we had to downsize dessert options to “transportable only.” People ate the whole pan. My cheeks hurt from smiling. And that first messy-attempt memory? It turned into a reminder that half the fun of baking is the glorious mess you make getting there.
Why this works: the bars are forgiving, quick to throw together, and ridiculously crowd-pleasing. They feel like comfort and a tiny celebration all in one square. Plus they play nicely with easy meal planning and can slide into a rotation of quick family meals when you want dessert that doesn’t require a stand mixer or a heroic time commitment.
Why You’ll Love This Recipe
- It’s an absolute breeze to make — real quick family meals energy but in dessert form.
- These bars are perfect for meal prep because they store well and travel like a boss.
- They’re a crowd-pleaser: crunchy pistachios and soft, buttery cookie base satisfy picky eaters and snack fiends alike.
- Versatile for substitutions — swap white chocolate for dark, or add citrus zest to fancy things up.
- Great for budget-friendly recipes — simple pantry staples plus one cup of nuts make a lot of happy people.
- Leftovers (if there are any) are next-level with coffee, tea, or milk — feels like a warm hug in bar form.
What Makes This Recipe Special?
This isn’t just another cookie bar. The magic is in the texture contrast and the pistachio’s whisper of savory that cuts through the sugar. I love that these bars are imperfectly homey: edges get crisp, the middle stays tender, and bits of pistachio peek out like tiny green surprises.
A little trick I learned: rough-chopping the pistachios (not pulverizing them) gives each bite a tiny “snap” and keeps the bars from getting gummy. Also, using both brown and granulated sugar creates a caramel-y depth while keeping the crumb light. I once tried swapping all the sugar for coconut sugar to be “healthy,” and they tasted like regret. So I rolled back, laughed, and embraced regular sugar. Worth it.
Another reason these bars own their title of “dream” is how flexible they are. Add white chocolate chips for soft pockets of creaminess, sprinkle flaky sea salt on top for a grown-up twist, or press sliced almonds in for an extra crunch. This recipe is a base — a runway for your kitchen creativity.
Ingredients
Here’s what you’ll need and why each ingredient matters.
- 1 cup unsalted butter, softened — Butter is the backbone here. It melts into that tender, slightly crumbly texture I adore. I prefer European-style butter for richness, but standard is fine. Don’t skip unsalted; it gives you control over the salt level.
- 1 cup granulated sugar — For sweetness and structure. Granulated helps create a slight crisp at the edges.
- 1 cup brown sugar, packed — Brown sugar adds moisture and that gentle caramel note that turns plain cookies into something nostalgic. Dark brown brings more depth; light brown keeps it mellow.
- 2 large eggs — Eggs bind everything and add lift. If you bake often, use room-temperature eggs so the batter mixes evenly.
- 2 teaspoons vanilla extract — Always use good vanilla. It’s cheap luxury. If you have vanilla bean paste, use a teaspoon and a half for the prettiest flecks.
- 3 cups all-purpose flour — This gives structure. Spoon and level your flour to avoid dense bars. I’ve ruined a batch by eyeballing a cup and ended up with hockey-puck bars. Don’t be me.
- 1 teaspoon baking powder — For a slight lift so the bars aren’t flat as a pancake.
- 1/2 teaspoon salt — Essential. Salt balances the sweetness and brings out the pistachio’s flavor. I use fine sea salt.
- 1 cup pistachio nuts, chopped — The star. Roasted, unsalted pistachios are my pick because they’re flavorful without too much salt. Toast them lightly in a skillet if you want to deepen the nutty aroma.
- 1/2 cup white chocolate chips (optional) — For those soft melting pockets of sweetness. If you prefer less sweet, skip or replace with dark chocolate chips.
Personal tips and substitutions:
- I always roast my pistachios for 3–5 minutes in a dry pan until fragrant — trust me, it wakes them up. But don’t burn them. I once walked away and came back to smoke alarm theatrics; lesson learned.
- For a nuttier profile, replace 1/4 cup of flour with finely ground pistachios. That adds richness but can make the dough tender, so don’t overdo it.
- Want a slightly healthier swap? Use half browned butter and half unsalted butter for deeper flavor without changing the texture much. It’s not lighter, but it tastes like a bakery stole your recipe.
- Don’t use salted butter unless you reduce the added salt. I say this because I’ve gifted bars that were pleasantly salty and then realized they were too salty for most. Awkward.
How to Make It Step-by-Step
I’ll walk you through the process like I’m standing right there in the kitchen watching you over my shoulder, probably with flour on my sleeve and a spoonful of batter stuck to my chin.
Start by preheating the oven to 350°F (175°C). Grease a 9×13 inch baking dish or line it with parchment paper for easy removal. I use nonstick spray plus a parchment sling — it’s the lazy person’s magic trick.
Cream together the butter, granulated sugar, and brown sugar until light and fluffy. I use a handheld mixer because I am not a wizard. Creaming gets air into the dough which helps the bars rise a little and gives them a tender crumb. You’ll know it’s ready when the mixture looks paler and silkier, and when it smells like caramel-fied happiness.
Beat in the eggs, one at a time. Don’t rush this. Pause, scrape down the sides of the bowl, and then add the vanilla. Mixing everything gently makes for a consistent batter. Once, in a heroic display of impatience, I chucked both eggs in at once and ended up with streaks of white egg in my batter. It’s fixable, but why introduce adventure to a simple recipe?
In a separate bowl, whisk the flour, baking powder, and salt. I like to give the dry ingredients a little spa treatment — a gentle whisk to distribute the leavener and salt so you don’t get pockets of one very salty bite. Gradually add the dry mix to the wet, stirring until just combined. Overmixing equals toughness. A little resistance in the batter is okay; it means it will be tender after baking.
Fold in the chopped pistachios and white chocolate chips if you’re using them. This is the stage where the dough starts to look like dessert. The pistachios should be visible and inviting. I always lick the spatula here. Don’t judge me.
Spread the batter evenly in the prepared pan. Use an offset spatula or the back of a spoon dipped in water to smooth the top. If you want those beautiful golden edges, gently press a few extra pistachio pieces into the top so they stick out after baking.
Bake for 25–30 minutes. The smell will be intoxicating — nutty, buttery, warm vanilla — and if you have neighbors, they’ll start to wander by suspiciously. Insert a toothpick into the center; it should come out mostly clean with a few moist crumbs. Don’t overbake; you want a slight chew in the middle. One time I left the pan in for an extra ten minutes because I got distracted by a phone call, and we learned the hard lesson of "crispy is not the same as done." The bars were still edible, but they lost their dreamy texture.
Allow the bars to cool completely in the pan before cutting into squares. This is tough, I know. I stand by the oven and try to look stern with myself. Cooling lets the bars set so they cut cleanly. When you finally slice them, the tops should crack slightly and you’ll see green pistachio bits — it’s photographer-worthy if you care to stage it.
A few of my mistakes and what they taught me:
- Clumping flour = dense bars. Measure properly.
- Overbaking = sad, hard bars. Set a timer, and maybe hide your phone.
- Too-finely ground pistachios = greasy bars. Keep them roughly chopped.
Above all, have fun and don’t be afraid to tweak. If you want more texture, add oats. If you want chocolate heaven, fold in dark chocolate chunks. I once dropped in a handful of chopped candied ginger and it was surprisingly delightful. Kitchen bravery pays off.
Tips for Best Results
- Use room-temperature butter and eggs for even mixing. Cold ingredients = lumpy batter.
- Toast pistachios briefly to amplify their aroma. Don’t walk away from the skillet. Trust me.
- Don’t overmix once the flour is added; stop when everything is combined. Overworking gluten leads to tough bars.
- Line your pan with parchment for easy removal and cleaner slices. It’s the lazy pro move.
- If you’d like clean cuts, chill the pan for 20–30 minutes before slicing. It firms everything up nicely.
- Use a serrated knife and a gentle sawing motion for the neatest squares.
Ingredient Substitutions & Variations
- Swap white chocolate chips for dark chocolate chips or chopped dark chocolate for a more sophisticated, less sweet profile.
- For a citrusy twist, fold in 1 tablespoon of orange zest — it brightens the nutty flavor.
- Use almond flour to replace up to 1 cup of all-purpose flour for a nuttier, slightly denser bar; this can work well if you want to lean into the nut-forward vibe.
- Make them gluten-free: use a 1-to-1 gluten-free flour blend, though the texture will be a touch different. Add a binder like a teaspoon of xanthan gum if your mix doesn’t include it.
- For a lower-sugar option, reduce granulated sugar to 3/4 cup and brown sugar to 3/4 cup; keep expectations realistic — it’ll be less sweet but still delightful.
- Add-ins: shredded coconut, dried cherries, or a sprinkle of flaky sea salt on top for contrast.
Directions
Preheat your oven to 350°F (175°C). Grease a 9×13 inch baking dish or line with parchment. Cream together 1 cup unsalted softened butter, 1 cup granulated sugar, and 1 cup packed brown sugar until light. Beat in 2 large eggs one at a time, then stir in 2 teaspoons vanilla extract. Whisk 3 cups all-purpose flour, 1 teaspoon baking powder, and 1/2 teaspoon salt; gradually add to creamed mixture until just combined. Fold in 1 cup chopped pistachios and 1/2 cup white chocolate chips if using. Spread batter in pan and bake 25–30 minutes until golden and a toothpick comes out clean. Cool completely before slicing into bars. 
Pairing Ideas (Drinks, Sides, etc.)
These bars are flexible partners. Morning coffee or a latte brings out the buttery notes. With tea, I go for an Earl Grey or a mellow green tea. For a dessert pairing, serve with a spoonful of mascarpone or a dollop of whipped cream if you want decadence. They’re also great beside fresh fruit like sliced pears or clementines, and they’re surprisingly good with a scoop of vanilla ice cream for an after-dinner treat.
For a lighter snack, plate a couple of bars with a small bowl of mixed berries and sparkling water. For a cozy movie night, this and a rom-com is perfection — crumbly fingers, buttery crumbs on your lap, the world softened by pistachio.
How to Store and Reheat Leftovers
Store bars in an airtight container at room temperature for up to 4 days. If the weather’s humid where you are, I recommend refrigerating — the bars keep up to a week in the fridge and taste fresh. For travel or gifting, layer parchment between bars to prevent sticking.
To reheat, pop a bar in the microwave for 8–12 seconds for a warm, melty bite (especially nice if you added chocolate chips). Or reheat in a 300°F oven for about 5-8 minutes until warmed through. Don’t overdo it — you want them warm, not vaporized.
Common mistake: sealing still-warm bars in a container. This creates condensation and soggy tops. Let them cool fully first. Learned that on a hot summer afternoon when my “fresh” bars turned droopy overnight. Lesson learned: patience = texture.
Make-Ahead and Freezer Tips
These bars freeze beautifully. Slice them first or leave the whole pan wrapped tightly in plastic and a layer of foil. For individual slices, wrap each in plastic wrap and place in a freezer bag to protect from freezer burn.
To thaw, let at room temperature for a couple of hours or microwave briefly. If reheating from frozen, warm in a 325°F oven for 10–15 minutes until heated through. The freezer stash is a lifesaver for last-minute gifts or unexpected company.
Common Mistakes to Avoid
- Overmixing after adding flour — stops being tender.
- Using finely ground pistachios — keeps bars oily; rough chop instead.
- Baking too long — the bars will dry out. Check at 22–25 minutes if your oven runs hot.
- Cutting while too hot — bars will crumble. Chill for tidy edges.
- Using salted butter and not adjusting salt — can become overwhelmingly salty.
Frequently Asked Questions (FAQ)
Q: Can I use roasted salted pistachios?
A: You can, but I recommend unsalted. If you use salted nuts, reduce or omit the added 1/2 teaspoon salt in the recipe.
Q: Can these be made vegan?
A: Yes with swaps: use vegan butter, replace eggs with flax eggs (2 tbsp ground flax + 6 tbsp water), and use vegan white chocolate or skip the chocolate. Texture will be slightly different but still tasty.
Q: Can I halve the recipe for an 8×8 pan?
A: Yes. Bake time will be shorter — check around 20–25 minutes.
Q: Why are my bars crumbly?
A: Likely underbaked or overfloured. Ensure proper measuring and full bake time, then cool completely before cutting.
Q: Can I use salted butter?
A: Yes, reduce the added salt accordingly to avoid over-salty bars.
Cooking Tools You’ll Need
- 9×13 inch baking dish (or 8×8 for halved recipe)
- Mixing bowls (one large for wet, one for dry)
- Hand mixer or stand mixer (optional but helpful)
- Spatula and wooden spoon for folding
- Measuring cups and spoons (spoon-and-level for flour)
- Parchment paper (recommended)
- Offset spatula or the back of a spoon for smoothing
Final Thoughts
These Pistachio Dream Cookie Bars are the kind of recipe that teaches you something about baking of the heart: patience for cooling, the pleasure of toasting nuts, and the way small accidents turn into favorite flavors. They’re forgiving, transportable, and ridiculously comforting. I love that they’re simple enough for a last-minute sweet craving yet special enough to bring to gatherings.
I still laugh thinking about my first scorched-baked attempt. The smoke alarm that night was dramatic, but it led me to be more attentive and toasting pistachios properly. That tiny act of attention makes a huge difference in aroma and depth.
If you try them, tweak them, or add something wild like chili flakes for a salty-spicy-sweet surprise, I want to hear about it. Food stories are my favorite kind of stories — messy, generous, and full of crumbs.
If you enjoyed this recipe, don’t forget to save it on Pinterest or share it with a friend!
Conclusion
If you want some inspiration for similar nut-forward bars or want to explore variations, check out Baker by Nature’s Brown Butter and Honey Pistachio Cookie Bars for a browned-butter twist, take inspiration from The Girl Who Ate Everything’s Pistachio Cookie Bars for bright pistachio flavor ideas, peek at Eat Cake For Dinner’s Pistachio Sugar Cookie Bars for a classic spin, or try Dash of Sanity’s Dark Chocolate & Pistachio Cookie Bars if you’re craving a richer chocolate-pistachio combo.
Pistachio Dream Cookie Bars
Ingredients
For the cookie base
- 1 cup unsalted butter, softened Preferably European-style butter for richness.
- 1 cup granulated sugar For sweetness and structure.
- 1 cup brown sugar, packed Adds moisture and caramel notes.
- 2 large eggs Should be at room temperature.
- 2 teaspoons vanilla extract Use good quality vanilla.
- 3 cups all-purpose flour Measure properly to avoid dense bars.
- 1 teaspoon baking powder For a slight lift.
- 1/2 teaspoon salt Balances sweetness and enhances flavor.
For the mix-ins
- 1 cup pistachio nuts, chopped Roasted and unsalted preferred.
- 1/2 cup white chocolate chips (optional) Can substitute with dark chocolate chips.
Instructions
Preparation
- Preheat the oven to 350°F (175°C) and grease a 9x13 inch baking dish or line it with parchment paper.
- Cream together the butter, granulated sugar, and brown sugar until light and fluffy.
- Beat in the eggs, one at a time, then stir in the vanilla extract.
- In a separate bowl, whisk together the flour, baking powder, and salt.
- Gradually add the dry ingredients to the wet ingredients, stirring until just combined.
- Fold in the chopped pistachios and white chocolate chips if using.
Baking
- Spread the batter evenly in the prepared pan.
- Bake for 25 to 30 minutes until golden. A toothpick inserted in the center should come out mostly clean with a few moist crumbs.
- Allow the bars to cool completely in the pan before slicing into squares.