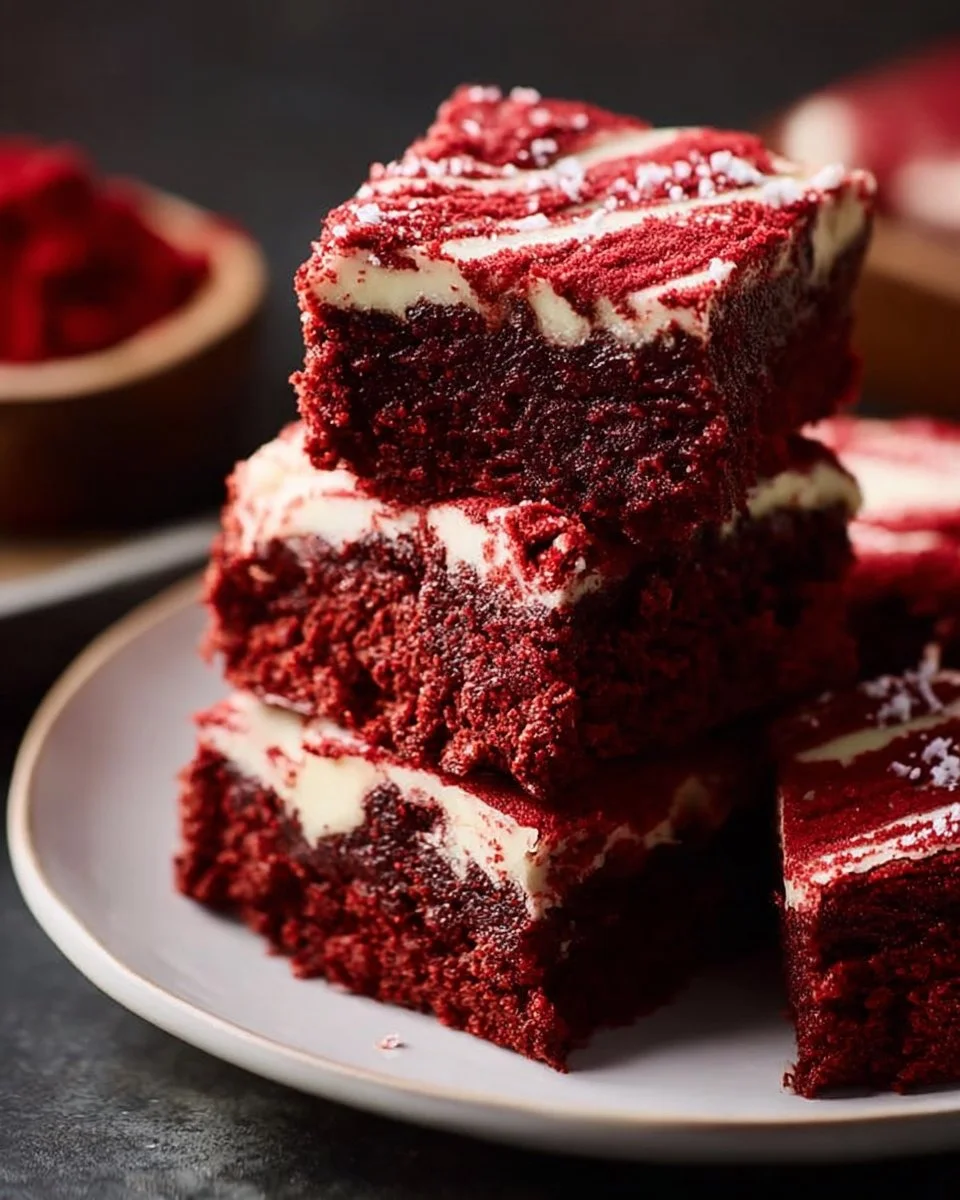
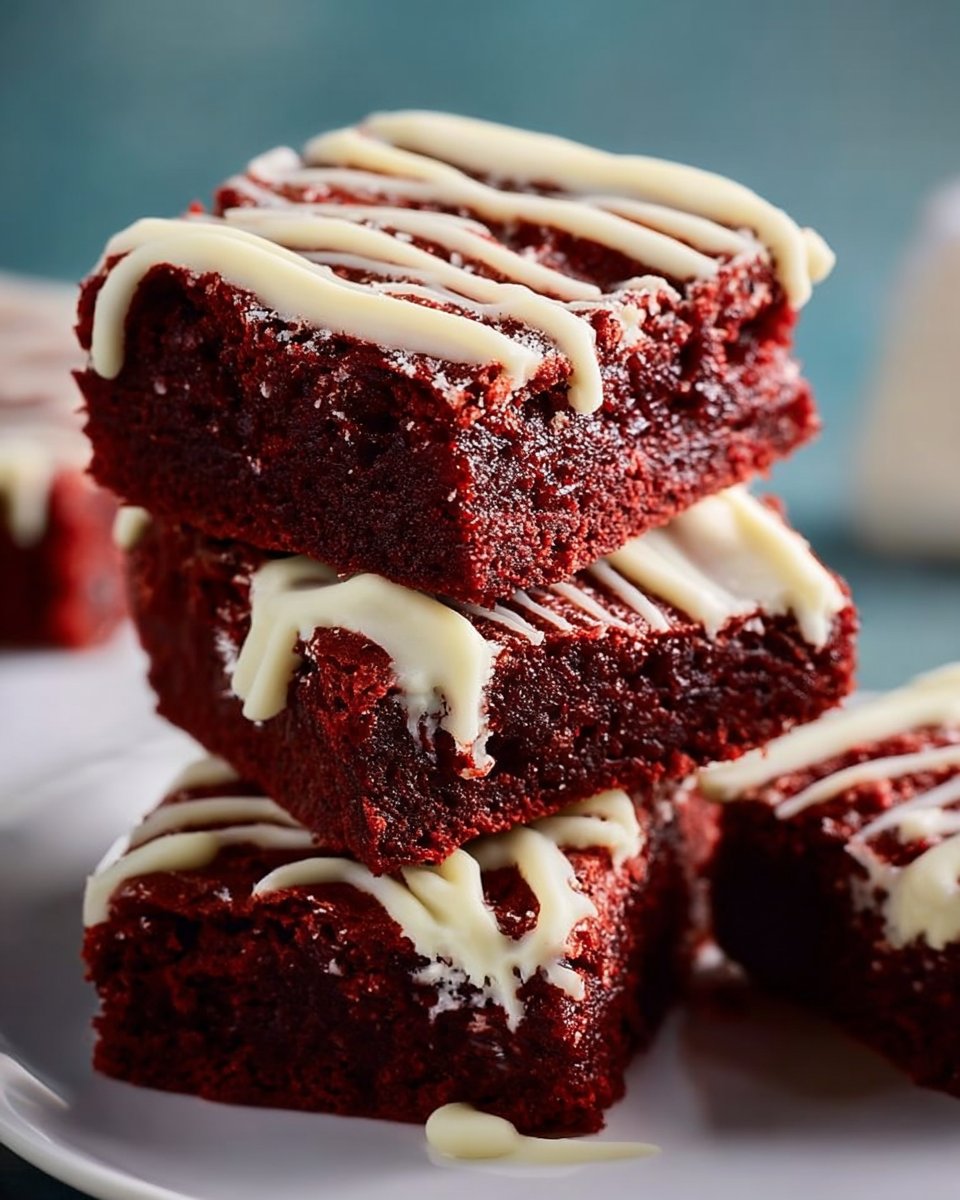
Easy Fudgy Red Velvet Brownies
Honestly, if you’d told me ten years ago that I’d be crying happy tears over fudgy brownies while standing in mismatched socks at midnight, I’d have laughed and asked for more cocoa. But here we are. This recipe for Fudgy Red Velvet Brownies is one of those accidental masterpieces that snuck into my life between a burnt cookie sheet and a sad boxed cake. If you’re looking for a dessert that feels like a warm hug and doubles as an impressive (but easy) dessert for easy weeknight dinners or a last-minute potluck, this is it.
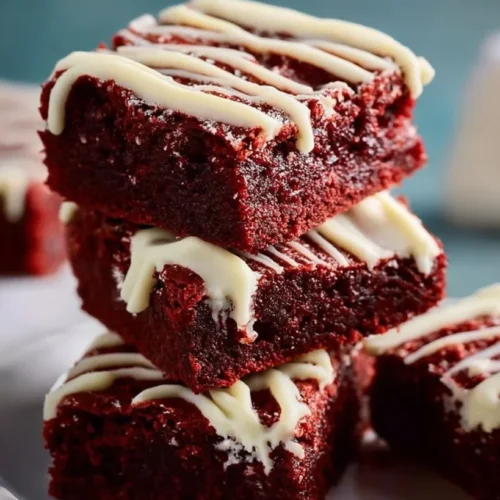
I remember the first time I tried these: the oven timer beeped, I opened the door, and a wave of chocolate-and-vanilla air hit me like a cozy blanket. The edges had that perfect crackle, the center was gooey and dense, and the color—oh the color—made my kitchen lights look romantic even though it was just fluorescent. I was supposed to bring something fancy to a friend’s dinner, and instead I brought something honest. People asked where I bought them. I didn’t tell them about the messy counter, the flour on my cheek, or the fact that I’d almost swapped cocoa for extra sugar by mistake. Oops.
These brownies are comfort on a budget—rich, luxurious, and fierce on the flavor while being totally doable on a weeknight. They’re a dessert that makes picky kids grin, earns you nods of approval from the in-laws, and hides beautifully in the freezer for when you need a chocolate fix at 2 a.m. Whether you drizzle them with white chocolate, swirl on a little cream cheese, or keep them plain and honest, they deliver. They also play nicely with meal-prep ethos: make a batch, slice into squares, and you’ve got a stash of dessert that fits right into budget-friendly recipes plans or a surprising treat for quick family meals.
This recipe matters to me because of the first time I made it for my sister after a hard week. We sat on the floor in the living room, plates on our knees, and the world softened for an hour. That’s the kind of magic food is allowed to make—the kind you can’t buy, only bake. So let’s dive in: messy spoon, flour-dusted apron, and all. I promise it’s forgiving. And if you burn one batch, I’ll tell you my disaster story too—because I’ve got plenty.
Why You’ll Love This Recipe
- It’s unbelievably simple—perfect for easy weeknight dinners when you need dessert but not an emotional breakdown.
- The texture is fudgy, not cakey; bites are dense, rich, and melt-in-your-mouth like healthy comfort food for your soul.
- Uses pantry basics—budget-friendly recipes energy right here—no weird ingredients you’ll never use again.
- Makes great leftovers and freezes well, making it a stellar option for meal prep microwave lunches or a sweet addition to prepared meals for two.
- Picky eaters (and critics) love it: color and chocolate win almost every time.
- Quick to throw together and forgiving of kitchen chaos—trust me, I’ve tested this while juggling a toddler and a wobbling phone.
What Makes This Recipe Special?
This isn’t just another brownie. The interplay of deep cocoa with a pop of food coloring gives the brownies that nostalgic red velvet vibe without the fuss of complicated techniques. The melted butter keeps the crumb dense and the center fudgy while the cocoa lends a bittersweet backbone that’s perfectly countered by a white chocolate drizzle or tangy cream cheese topping.
My secret? I don’t overmix. That tiny act of restraint yields a tender, fudgy crumb. Also, I love a slightly underbaked center—don’t freak if the toothpick comes out with a few moist crumbs. That’s exactly the point. And if you’re into high protein meals or high macro meals for your day-to-day, these can be adapted (more on that later) to fit in with high protein pre made meals or the idea of snackable bites that feel indulgent but won’t derail your whole week.
Now let’s get to the good part: the making. Expect clumsy stirring, a quiet moment of pride when the tray hits the oven, and that glorious waft when they’re done.
Ingredients
Here’s what you’ll need and why each item matters. I list my go-to brands and swaps because I’m that friend who tells you to buy the good cocoa.
- 1 cup all-purpose flour — provides structure; don’t overmeasure. Scoop and level or weigh if you can.
- 1/2 cup unsweetened cocoa powder — use Dutch-process for deeper flavor, but natural cocoa works fine. I swear by a good mid-range cocoa; it makes a difference.
- 1 cup sugar — granulated is classic. If you’re trying to cut back, swap half for coconut sugar for a caramel edge, but expect a slightly denser brownie.
- 1/2 cup butter, melted — butter equals flavor. Melted butter makes these extra fudgy. You can use a neutral oil for a dairy-free swap, but the flavor will change.
- 2 large eggs — for richness and structure. If you’re into high protein meals, you can add one extra egg white for a touch more protein without disrupting texture too much.
- 1 teaspoon vanilla extract — tiny but essential. Use pure vanilla if you have it; it’s magic.
- 1 teaspoon red food coloring — this gives the red velvet look. Gel color gives more punch without watering down the batter.
- 1/2 teaspoon baking powder — just a whisper to give a slight lift; we don’t want cake.
- 1/4 teaspoon salt — balances sweet and enhances chocolate.
- 1/2 cup white chocolate chips (for drizzle) — melts into glossy ribbons. Swap for a white chocolate bar chopped for a smoother drizzle.
- 2 oz cream cheese (optional, for topping) — softened and whipped with a touch of sugar makes a tangy, luxe finish. Use full-fat for best texture.
Don’t do this: dump the flour straight from the bag, eyeball measurements, and toss in more food coloring like you’re painting a masterpiece. That was me, once. It turned the batter into an oddly neon puddle. Also, don’t forget to grease the pan—speaking from too-many-sad-stick-to-the-bottoms experiences.
Brand notes: I’m partial to King Arthur flour for consistent results and Ghirardelli cocoa if I want reliable chocolate depth without breaking the bank. For white chocolate, Guittard melts smoothly. But honestly, most grocery brands will do.
How to Make It Step-by-Step
I’ll walk you through this with everything I do, including the faceplants and the tiny wins. This section is long because I believe in describing smells and textures—cooking is sensory, after all.
Start by preheating your oven to 350°F (175°C). Grease a 9×9 inch baking dish. I use a light smear of butter and then a quick parchment sling so the edges come out in neat squares. Pro tip: parchment is forgiving; butter-only is charming but can lead to heroic scraping later.
Melt the butter in a microwave-safe bowl. I do 30-second bursts and stir between each to avoid hot spots. Pour the warm butter into a mixing bowl and add the sugar. The first few stirs look grainy and odd, but keep going—this is the stage where the sugar dissolves slightly in the warm butter. It smells buttery and promising. Add the eggs, one at a time, and whisk. The batter will look glossy and thick; that’s a good thing.
Stir in the vanilla and then, with a flourish if you like, the red food coloring. Gel is my preference because you don’t need much. Add slowly—you can always darken, but you can’t take color away. I once added too much and made the batter look like a theatrical production, and my oven behaved like an overexcited audience. It still tasted fine, but the color was… dramatic.
In another bowl, whisk together the flour, cocoa powder, baking powder, and salt. Sifting isn’t necessary, but I often do it to feel fancy and remove lumps. Gradually add the dry ingredients to the wet mixture, stirring until just combined. That “just” is crucial—overmixing means more gluten, which can lead to cakier brownies. I’ll say it again: stop when the streaks of flour mostly disappear. It’s okay if a few floury bits remain.
Pour the batter into your prepared pan and smooth the top with a spatula. The batter is thick, glossy, and smells like chocolate crossed with a hint of vanilla. Pop it in the oven and set a timer for 20 minutes. At 20 minutes, check with a toothpick—if it comes out with a few moist crumbs, you’re done. If it’s looking too gooey (remember, fudgy is the goal), give it another 3–5 minutes. I recommend erring on the slightly underbaked side. You’ll lose that beautiful fudgy center if you overbake.
While the brownies cool, melt the white chocolate chips. I microwave in 15-second bursts, stirring in between. Drizzle over cooled brownies with a spoon or fork. If you want the cream cheese topping, beat the cream cheese until smooth and spread thinly over the slightly cooled brownies. I like a little swirl of white chocolate on top of the cream cheese because contrast is pleasing.
Cool completely before slicing for the cleanest squares. But let’s be real—there will be a square stolen warm, probably by you, and that first warm bite is magical: the center sticky, the edges slightly crisp, and the white chocolate punctuating each mouthful.
I’ve learned the hard way to let them set. The first time I tried to rush the cooling, I ended up with a sticky knife and crumbly squares. Patience makes prettier pieces.
Tips for Best Results
- Don’t overmix. Fold until mostly combined; then stop. This keeps the brownies fudgy, not cakey.
- Use gel food coloring. It gives vibrant color without thinning the batter.
- Slightly underbake for that melt-in-your-mouth center. A toothpick with moist crumbs = perfection.
- Let them cool completely for clean slices. A warm brownie is irresistible, but for Instagram-worthy squares, chill first.
- Grease and parchment the pan. Saves you from heroic scraping and preserves edges.
Ingredient Substitutions & Variations
- Dairy-free: swap the butter for coconut oil and use dairy-free white chocolate chips. The texture shifts a bit but remains delightful.
- Lower-sugar: replace half the sugar with a sugar substitute that measures like sugar. Expect a denser result.
- Protein boost: fold in a scoop of chocolate-flavored protein powder (about 1/4 cup) and reduce flour slightly; this helps create easy high protein high calorie meals style bites if you want a snackable treat for active days.
- Nutty twist: swirl in peanut butter before baking for a decadent mashup (hello, Thick and Fudgy vibes).
- Boozy twist (non-alcoholic alternative advised): a teaspoon of almond extract instead of vanilla adds a grown-up nuanced flavor.
- Fancy swirl: mix the 2 oz cream cheese with 1 tablespoon sugar and a splash of vanilla, dollop over batter, and swirl before baking for marbled red velvet cheesecake brownies.
Directions
- Preheat oven to 350°F (175°C) and grease a 9×9 inch baking dish with butter or line with parchment.
- Combine melted butter and sugar; whisk in eggs and vanilla until glossy.
- Stir in red food coloring until evenly distributed.
- Whisk flour, cocoa, baking powder, and salt in another bowl; fold into wet mix until just combined.
- Pour batter into the pan and bake 20–25 minutes until toothpick shows moist crumbs.
- Cool; melt white chocolate chips and drizzle over brownies. Optionally spread whipped cream cheese topping.
- Slice and serve.
Pairing Ideas (Drinks, Sides, etc.)
These brownies are dramatic in their simplicity and pair beautifully with:
- A big mug of black coffee or espresso—bitter cuts the sugar.
- Cold milk or non-dairy oat milk for nostalgia vibes.
- A scoop of vanilla ice cream for an easy warm-and-cold dessert.
- Fresh berries or a simple raspberry coulis to add tart contrast.
- Bake alongside a tray of cookies for a dessert spread that screams “I care, but I didn’t overdo it.”
Pair with a cozy rom-com and dim lights for maximal comfort. Honestly, this and blanket-mode is perfection.
How to Store and Reheat Leftovers
Store cooled brownies in an airtight container at room temperature for up to 3 days. For longer life, refrigerate up to a week. I often cut squares and freeze them in a single layer on a sheet pan, then transfer to a freezer bag—great for surprise chocolate emergencies.
Reheat from frozen in the microwave, 20–30 seconds, until warm. From fridge, pop a square in the microwave for 10–15 seconds. Be cautious: the white chocolate drizzle can get very hot in the center.
Common mistake: sealing warm brownies. That steams them and makes the edges soggy. Always cool first.
Make-Ahead and Freezer Tips
Make the brownies, cool completely, then freeze individual squares on a baking sheet before transferring to bags. They keep well for up to 3 months. Thaw at room temperature or zap in the microwave for an instant dessert. If bringing to a gathering, bake the day before and store in an airtight container—gifting time saved.
Common Mistakes to Avoid
- Overbaking: gives you cake, not the desired fudgy center.
- Overmixing: will develop gluten and make them chewy.
- Skipping the parchment: you’ll mourn sticky edges.
- Using too much food coloring: it can affect flavor and create a neon result.
- Cutting too soon: they’ll crumble unless set.
Frequently Asked Questions (FAQ)
Q: Can I make these gluten-free?
A: Yes—use a 1:1 gluten-free flour blend and check the cocoa is gluten-free. Texture is close but slightly different.
Q: Can I add nuts?
A: Absolutely. Fold in 1/2 cup chopped walnuts or pecans for crunch.
Q: How can I make these less sweet?
A: Reduce sugar by 1/4 cup and use a darker cocoa to balance flavors.
Q: Is the cream cheese necessary?
A: No. It’s optional and adds a tangy contrast, but they’re fantastic plain.
Cooking Tools You’ll Need
- 9×9 inch baking dish (square pan)
- Mixing bowls (one for wet, one for dry)
- Whisk and spatula
- Measuring cups and spoons or a scale for accuracy
- Microwave-safe bowl for melting chocolate
- Toothpick for testing doneness
Final Thoughts
I love how a simple tray of brownies can hold so much warmth. This recipe isn’t about being fancy; it’s about being reliable, forgiving, and a little bit celebratory. It’s the dessert you make when you want to say “I love you” without writing a note. It’s also the dessert you make when the week has been long and your kitchen is a battlefield. It forgives burnt edges, forgotten timers, and last-minute guests.
If you try it, take a photo—please—and tell me what you swapped or messed up. There’s something deeply human about sharing food flubs and victories. This recipe is for all of us who want to eat something that tastes indulgent without needing a pastry degree. So preheat your oven, grab a bowl, and let the little kitchen miracles happen. And remember: that first warm square? Eat it standing at the counter. It’s tradition.
If you enjoyed this recipe, don’t forget to save it on Pinterest or share it with a friend!
Conclusion
If you want more variations or inspiration, check out this Fudgy and Easy Red Velvet Brownies – Frosting and Fettuccine recipe for another approachable take. For ideas on texture and density tweaks, I found this Thick and Fudgy Red Velvet Brownies – Peanut Butter + Chocolate post super helpful. If you’re curious about technique and how other bakers achieve that ultra-fudgy center, this Fudgy Red Velvet Brownies – Mike Bakes NYC guide is a great read. And for a weekend-baking moodboard and easy step visuals, see this Fudgy EASY Red Velvet Brownies – two sugar bugs post.
If you enjoyed this recipe, don’t forget to save it on Pinterest or share it with a friend!
Fudgy Red Velvet Brownies
Ingredients
Main Ingredients
- 1 cup all-purpose flour provides structure; don’t overmeasure.
- 1/2 cup unsweetened cocoa powder use Dutch-process for deeper flavor.
- 1 cup sugar granulated is classic; swap half for coconut sugar for a caramel edge.
- 1/2 cup butter, melted butter equals flavor; can swap for neutral oil.
- 2 large eggs adds richness and structure.
- 1 teaspoon vanilla extract use pure vanilla if possible.
- 1 teaspoon red food coloring gel gives more punch without thinning the batter.
- 1/2 teaspoon baking powder just a whisper to give a slight lift.
- 1/4 teaspoon salt balances sweet and enhances chocolate.
- 1/2 cup white chocolate chips (for drizzle) can swap for white chocolate bar for a smoother drizzle.
- 2 oz cream cheese (optional, for topping) softened and whipped with sugar for a tangy finish.
Instructions
Preparation
- Preheat oven to 350°F (175°C) and grease a 9x9 inch baking dish or line with parchment paper.
- Melt the butter in a microwave-safe bowl, using 30-second bursts and stirring in between.
- Combine melted butter and sugar in a mixing bowl; whisk in eggs and vanilla until glossy.
- Stir in the red food coloring until evenly distributed.
Mixing
- In another bowl, whisk together the flour, cocoa powder, baking powder, and salt.
- Gradually fold the dry ingredients into the wet mixture until just combined — do not over mix.
Baking
- Pour the batter into the prepared pan and smooth the top with a spatula.
- Bake for 20–25 minutes, until a toothpick inserted comes out with a few moist crumbs.
Finishing Touches
- While the brownies cool, melt the white chocolate chips and drizzle over cooled brownies.
- If using, beat the cream cheese until smooth and spread thinly over the brownies.
- Allow to cool completely before slicing into squares.