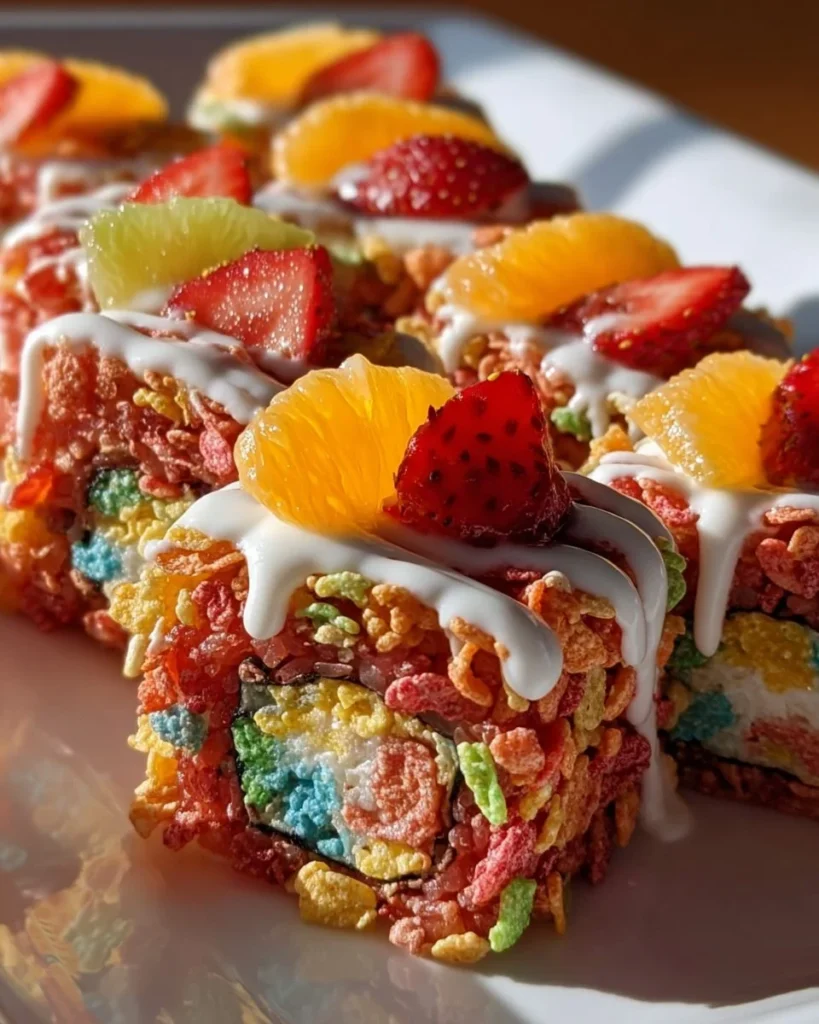

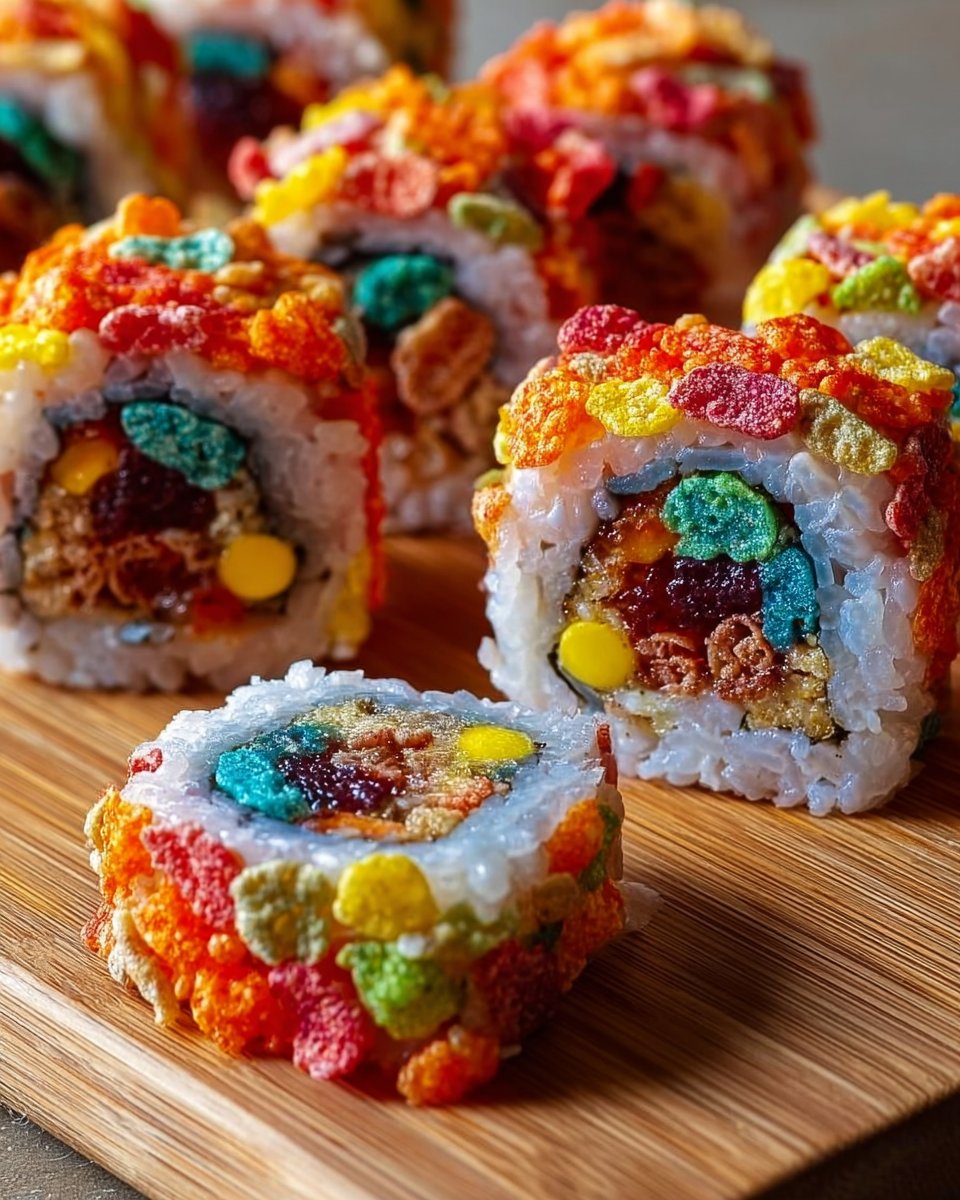
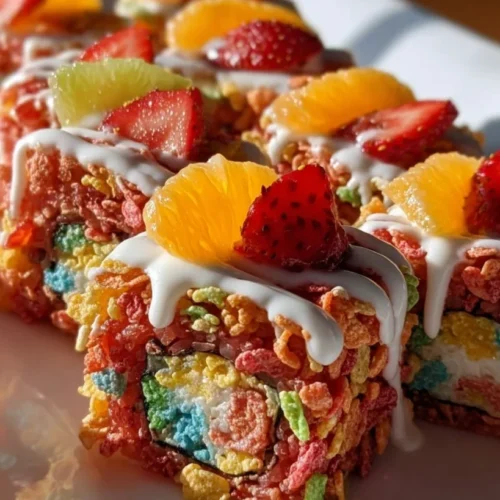
Easy Fruity Pebbles Sushi Rolls
I am not kidding when I say the first time I made Fruity Pebbles sushi, my kitchen looked like a cartoon exploded. Honestly, that’s part of the charm. In the middle of a rainy Saturday, with fairy lights half-off the counter and a kiddo begging for something colorful, I pulled out a bag of Fruity Pebbles, marshmallows, and a sticky jar of peanut butter. I wanted a quick, joyful treat—something that felt like easy weeknight dinners dessert crossover and screamed budget-friendly recipes in a playful way. It felt like a sugar-dusted hug, to be real.
The first 100 words of any post are sacred for search and pins, so here’s the truth: this recipe checks boxes for quick family meals, cheap meal plans for 2, and even pops up in searches for meal prep microwave lunches if you’re stretching reality (and your Pinterest board). I know that sounds wild, but people pin cereal sushi like it’s a life hack, and I’ve learned to lean into it.
I learned this from trial, error, and a significant sticky-hand incident. My first attempt? I overheated the marshmallows, turned them grainy, and had to re-melt them with butter like a small confectioner fighting a sugar war. Oops. My second attempt exploded with crumbs because I didn’t press the mixture firm enough before rolling. By the third try, I was an enthusiastic, if slightly sticky, convert. The smell of melted butter and marshmallows filled the apartment—a vanilla-sweet cloud that made my whole kitchen feel like a carnival booth. It’s playful, nostalgic, and forgiving.
This recipe lives at the intersection of dessert and craft project. It’s absurd and comforting. It’s the kind of thing you make when you want to cheer someone up, bribe a child into homework, or just show off a colorful plate on Instagram without sweating over a souffle. And yes, it’s absolutely fine to call a bowl of cereal “dinner” on nights when life is busy—the point is joy. So let’s roll into why this fruity, crunchy, creamy treat has taken over my snack drawer and a dozen of my friend’s party tables.
Why You’ll Love This Recipe
- It’s easy weeknight dinners friendly—no stove combat, just a saucepan and good vibes.
- Kid-approved and fantastic for picky eaters who live for bright colors and fun textures.
- A total budget-friendly recipe—you probably already have most ingredients in your pantry.
- The combination of crisp Fruity Pebbles, gooey marshmallow, and creamy peanut butter or Nutella is like a nostalgic flavor hug.
- Makes a show-stopping plate for parties, potlucks, or sleepy Sunday breakfasts turned dessert.
- Leftovers (if there are any) travel well—great for quick family meals on the go.
What Makes This Recipe Special?
There’s a small magic trick here that you don’t expect until you bite into one of these rolls: the marshmallow acts like sushi rice, binding the cereal into a pliable sheet that rolls up without cracking. The peanut butter or Nutella becomes the “fish”—rich, creamy, and offering contrast to the crunchy cereal. When I first rolled one up in my pajamas, I honestly expected it to fall apart. It didn’t. It held together with the proud dignity of a snack that knows it is ridiculous and delicious.
This is nostalgic food theater. It’s not haute cuisine, and thank goodness for that. You don’t need perfect knives or a sushi mat—wax paper, a spatula, and a little elbow grease will do. Plus it’s colorful. I mean, the thing practically screams Pinterest. And yes, that matters when your goal is to make something that looks like a party even when you’re alone with a mug of coffee.
Ingredients
3 cups Fruity Pebbles cereal
4 cups mini marshmallows
3 tablespoons butter
1/2 cup creamy peanut butter or Nutella (pick your team)
1/2 cup additional Fruity Pebbles for coating
I know ingredients lists can read like a grocery app, so here’s why I use each item and what I recommend.
Fruity Pebbles cereal — This is the star. I pick the big, crunchy box (not the mini single-serve) because you want a little tooth on each bite. It provides color, crunch, and that unmistakable citrusy sweetness. Don’t sub it with something savory unless you hate joy.
Mini marshmallows — They melt down into a malleable glue that holds everything together. I prefer mini because they melt more evenly. If you only have large marshmallows, chop them up. Don’t microwave the marshmallows dry—if they seize up, add a splash of butter and reheat gently.
Butter — Just a tablespoon or three coats the pan and helps the marshmallows melt smooth. I always use unsalted so I control the sweetness. If you use salted, reduce spit-sparkle sensibility (aka add less butter next time).
Creamy peanut butter or Nutella — This is your filling. Peanut butter gives a savory, nutty warmth that plays beautifully with the sugary cereal. Nutella makes it decadently chocolate-hazelnut. Both choices are crowd-pleasers. If you’re allergic—or feeding someone who is—use a sunflower seed butter as a swap.
Additional Fruity Pebbles for coating — This is optional but 100% worth it for the extra color and texture. I keep them in a shallow bowl and press the roll gently to coat.
Don’t do this: try to roll the mixture when it’s hot and floppy like lava. You’ll burn yourself and the roll will stretch weirdly. Let it cool until it’s pliable but not molten. Also, don’t skimp on butter—under-buttering can cause marshmallows to burn or stick to the pan.
Brand notes: I tend to grab store-brand marshmallows when I’m in a mood to save pennies, but when I want a glossy finish I reach for Jet-Puffed. For peanut butter, a smooth variety spreads easier for rolling and creates fewer lumps.
How to Make It Step-by-Step — quick family meals
I’ll go into full detail, with my mistakes and triumphs, because this is where the real kitchen lesson is. Put on a playlist. I say that every time, and it makes the marshmallow melting less like a chore and more like a small ritual.
Step 1: Gather everything. Lay out your cereal in a big bowl, butter measured, marshmallows counted, and a sheet of wax paper on the counter. I like to set the peanut butter or Nutella in a ramekin so it’s ready. You’ll be grateful for the small order when the marshmallows are singing in the pan.
Step 2: Melt butter over low heat. This is where I learned restraint. Use low heat. I once cranked it up on accident and the butter browned before the marshmallows even hit the pan. Not ideal. Add the mini marshmallows to the butter and stir with a heatproof spatula. The marshmallows will get glossy, then gather into a single cloud. Keep the heat low; patience is your friend.
Step 3: When the marshmallows are smooth and silk-like (no grainy bits), remove the pan from heat. Stir in the Fruity Pebbles a cup at a time. You need to fold gently but thoroughly so each pebble gets coated with marshmallow. The mixture should cling in clusters—if it’s too dry, add one teeny bit more butter and stir. Trust me, I’ve learned this by adding more marshmallows and creating a syrupy disaster.
Step 4: Transfer mixture to wax paper. Spoon the warm mixture out onto the sheet and use another sheet of wax paper on top, then press down with a rolling pin or your hands (use a dab of butter on your hands if you don’t want it to stick). Aim for a rectangle about 1/2 inch thick. I like mine a bit rustic, but if you want perfect edges, use a bench scraper.
Step 5: Spread the filling. Scoop 1/2 cup of peanut butter or Nutella and spread it over the cereal rectangle. If your filling is thick and resistant, warm it for 10 seconds in the microwave so it becomes spreadable but not runny. Spread to within an inch of the edge—leave a small border so the seam can hug together when you roll.
Step 6: Roll it up. Using the wax paper, start rolling tightly from one end to the other. I learned on attempt three that a loose roll falls apart; a tight roll holds shape. Don’t roll so tight that it squeezes out all the filling. Balance is key. Once rolled, press gently along the seam to seal.
Step 7: Coat the outside. Pour the additional Fruity Pebbles into a shallow dish. Roll your sushi log in them, pressing gently so the pebbles stick. For visual drama, add a few whole pebbles on the seam. If you see the seam opening, you can dab a tiny bit of melted marshmallow as glue.
Step 8: Chill, slice, serve. Pop the roll into the fridge for 20–30 minutes to firm up—this makes slicing cleaner. Use a sharp knife (I sometimes wet the blade lightly between cuts) and slice into 1-inch pieces. Revel in the rainbow.
The first time I served these at a neighborhood potluck, my son called them “rainbow dinner” and ran. The second time, I wrapped them in parchment for a bake sale and they vanished in thirty minutes. Each time, someone asks if I used a sushi mat. No. I used wax paper and stubborn optimism.
Directions
- In a large saucepan over low heat, melt the butter and mini marshmallows together, stirring until smooth.
- Remove from heat and add in the Fruity Pebbles cereal, mixing until well combined.
- Place a sheet of wax paper on a flat surface and spread the cereal mixture onto it, shaping it into a rectangle about 1/2 inch thick.
- Spread the creamy filling of your choice (peanut butter or Nutella) over the cereal rectangle.
- Roll the rectangle tightly from one end to the other using the wax paper to help.
- Once rolled, coat the outside with additional Fruity Pebbles, pressing gently to adhere.
- Slice into pieces and serve as fun, colorful sushi rolls.

Tips for Best Results — meal planning chicken, best meal prep plans
The small stuff makes a big difference here. Cool the marshmallow mixture just enough so it’s pliable but not hot. I’ve burned my tongue and the inside of a hand too many times to count—learn from me and be patient. Press the cereal firmly into the rectangle so the roll doesn’t crumble when slicing. If you want neater slices, chill the roll for at least 30 minutes.
If your kitchen is humid, pack the mixture a touch firmer and chill longer—moisture can make the outside sticky. For cleaner knife work, use a serrated knife and a damp towel to wipe between cuts. And yes, a dab of shortening on the knife will also prevent sticking if you’re fancy.
For a gluten-free swap, double-check that your Fruity Pebbles are labeled gluten-free if needed. And if you’re prepping for an event, make the rolls the day before and store in an airtight container—just don’t stack them wet.
Ingredient Substitutions & Variations — best vegan meal prep
Want to tweak the recipe? Here are some swaps.
- Nut-free: Use sunflower seed butter in place of peanut butter. It spreads similarly and has a neutral flavor.
- Vegan: Use vegan mini marshmallows and a plant-based butter. Some vegan marshmallows don’t melt as smoothly, so stir a little longer and add a touch more butter.
- Chocolate twist: Mix a tablespoon of cocoa into the marshmallow mix for a subtle chocolate base—then use peanut butter or Nutella as the filling.
- Adult version: Add a teaspoon of espresso powder to the peanut butter for a grown-up flavor note.
- Gluten-free: Check cereal packaging; many fruity cereals are gluten-free but read labels.
- Crunch upgrade: Fold in chopped toasted nuts under the filling for extra texture—again, keep allergies in mind.
If you do a seasonal twist, try swapping in holiday-themed cereals for themed parties—just be ready for the internet to explode with pictures.
Pairing Ideas (Drinks, Sides, etc.)
These sushi rolls are sweet and playful, so pair them with simple drinks that balance the sugar.
- Cold milk or a creamy iced latte—classic pairing for cereal-based desserts.
- Sparkling water with a splash of citrus if you want something light and refreshing.
- Vanilla bean ice cream on the side for an over-the-top dessert plate.
- For brunch, serve with plain yogurt and fresh berries to bring a tart contrast.
- If you’re feeding kids at a party, mini hot chocolates or fruity punch are cute and easy.
For an emotional touch: these and a rom-com is perfection. I once made a tray of these for a rainy-night movie marathon, and between bites and scene gasps, my kitchen felt like the coziest theater.
How to Store and Reheat Leftovers
Store the rolls in an airtight container at room temperature for up to 48 hours. If your house is humid or it’s a scorcher of a summer day, refrigerate to keep them firm. Cold dulls the flavor slightly, so let refrigerated slices sit for 10 minutes before serving.
Reheating isn’t necessary; these are best at room temp. If the peanut butter stiffens too much in the fridge, microwave a slice for 5–7 seconds to soften (don’t overdo it—you’ll melt the marshmallow glue). Avoid freezing whole rolls—the marshmallow texture becomes grainy when thawed. If you must freeze, slice first and flash-freeze on a tray, then store in a freezer bag and thaw gently.
I once froze an entire log because I thought I was being clever. The thawed texture was sad and sadder still. Don’t be me.
Make-Ahead and Freezer Tips
You can make the cereal sheet ahead and refrigerate it without the filling for up to 24 hours, then warm slightly to spread the filling and roll. I like this for hosting: pre-press the rectangle, store it wrapped, then finish the assembly when guests arrive.
If freezing is unavoidable, slice and flash-freeze slices on a tray, then transfer to a sealed bag. Thaw on the counter for 10–15 minutes. Again, freezing changes the texture a tad; best eaten fresh.
Pro tip: If you plan to transport these for a bake sale or picnic, line your container with parchment and keep slices single-layered with paper dividers to avoid smeared peanut butter faces.
Common Mistakes to Avoid
- Overheating marshmallows. This causes graininess or burning. Keep heat low and be patient.
- Rolling while piping hot. You’ll either burn yourself or make a misshapen roll that expels filling.
- Under-pressing the cereal. If it’s too airy, the roll will crumble when sliced.
- Using too little butter. The marshmallows need fat to melt smooth—don’t try to cut corners here.
- Stacking slices while warm. They’ll stick together in a colorful mess.
I once tried a “healthier” version with half the marshmallows and it fell apart. The moral: some things need their sugar to work.
Frequently Asked Questions (FAQ)
Q: Can I use other cereals?
A: Yes—swap in Cocoa Pebbles or similar puffed cereals, but be aware flavors will shift. Crunchy cereals like Rice Krispies work structurally but change the taste.
Q: Is this suitable for parties with nut allergies?
A: You can use sunflower seed butter or a chocolate-hazelnut spread without nuts to accommodate allergies—just label accordingly.
Q: How long will they stay fresh?
A: Up to 48 hours at room temperature in an airtight container. Refrigerate if it’s warm.
Q: Can I make mini versions?
A: Absolutely. Press the cereal into a silicone mat and roll tight, then slice thinner for bite-size pieces.
Q: Can I omit peanut butter/Nutella?
A: You can, but the filling provides contrast and moisture. Without it, the rolls are still tasty but denser.
Cooking Tools You’ll Need
- Large saucepan (non-stick helps)
- Heatproof spatula
- Wax paper or parchment paper (two sheets)
- Sharp knife (serrated helps for slicing)
- Rolling pin or flat-bottomed glass for pressing
- Shallow bowl for coating
Nothing fussy here. I’ve made this on a dorm hot plate and in a fancy kitchen—the tools are forgiving.
Final Thoughts
This recipe is one of those rare things that blends nostalgia, ridiculousness, and comfort without pretension. Every time I make it, I get that sticky-finger grin and the same little burst of pride when someone takes a bite and their eyes widen. It’s perfect for a rainy afternoon, a last-minute party contribution, or a kitchen project when you need something quick and cheerful.
If you enjoyed this recipe, don’t forget to save it on Pinterest or share it with a friend! Also, tell me about your first sticky kitchen disaster—I’ll trade you mine for yours.
Conclusion
If you want a classic reference for this playful dessert, check out this take on the concept at Best Fruity Pebbles Sushi Recipe – Delish.
For a whimsical comparison and festival food spin, this write-up offers an entertaining look at cereal-coated novelty foods: Maki sushi corn dog vs. Fruity Pebbles corn dog @ CNE 2025.
And if you want to see another archived recipe variation, here’s one to peruse: Fruity Pebbles Sushi | Punchfork.
Fruity Pebbles Sushi Rolls
Ingredients
Main Ingredients
- 3 cups Fruity Pebbles cereal Use a big, crunchy box for best texture.
- 4 cups mini marshmallows Mini marshmallows melt evenly; chop large ones if necessary.
- 3 tablespoons butter Use unsalted butter for control over sweetness.
- 1/2 cup creamy peanut butter or Nutella Pick your favorite as the filling.
- 1/2 cup additional Fruity Pebbles for coating Optional but adds color and texture.
Instructions
Preparation
- Gather everything: lay out your cereal, butter, marshmallows, and a sheet of wax paper.
- Melt butter in a saucepan over low heat, then add mini marshmallows and stir until smooth.
- Remove from heat and fold in Fruity Pebbles gently until well combined.
- Transfer mixture to wax paper and shape into a rectangle, about 1/2 inch thick.
- Spread your choice of peanut butter or Nutella over the cereal rectangle.
- Roll tightly from one end to the other using the wax paper.
- Coat the outside of the roll with additional Fruity Pebbles, pressing gently to adhere.
- Refrigerate the roll for 20-30 minutes to firm up before slicing.
- Slice into 1-inch pieces and serve.