
Easy Turtle Lasagna Dessert — budget-friendly recipes
The first time I made this No-Bake Turtle Lasagna Dessert, I thought, “How hard can it be?” Famous last words. I was hosting a last-minute movie night, the lights were fairy-ish, the popcorn was burnt, and I had exactly thirty minutes to throw something together that wasn’t sad boxed cookies. Spoiler: it turned into one of those glorious kitchen victories where the mess looks worse than the result tastes. Honestly, if you like easy weeknight dinners and desserts that feel like a celebration without the fuss, you’ll get this.
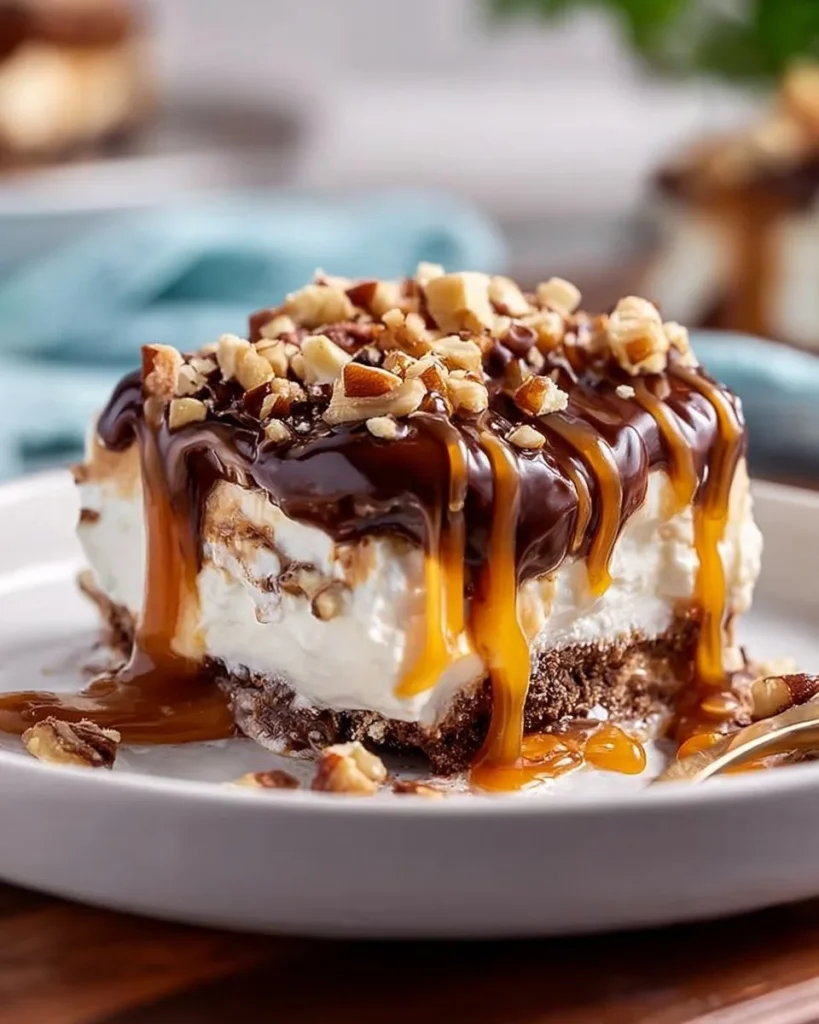
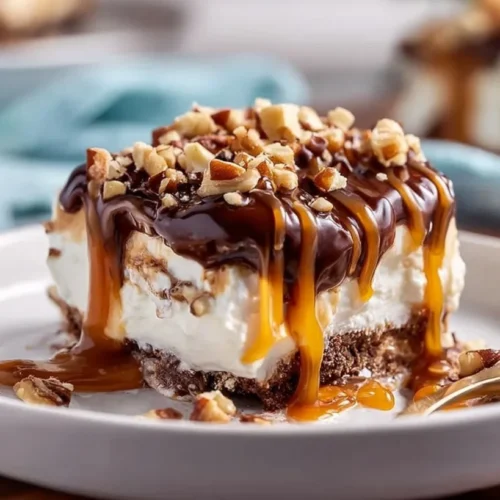
The smell when I first opened the cookie crust was the kind of deep cocoa whiff that makes you forget everything else for a second — that clean, almost chocolaty thunder. Then the cream cheese made everything feel velvety, the vanilla pudding gave a playful, custardy whisper, and the whipped topping? Cloud city. I drizzled caramel like I was auditioning for a food commercial and, predictably, dripped more on the counter than on the pan. Oops. The pecans clinked like tiny cymbals as I chopped them, and you could tell by the sound they were firmly toasted (or at least hopeful about it).
This dessert matters to me because it’s one of those recipes that shows up in life at the exact right time — after a long day, a chaotic sleepover, or when you want to impress someone without admitting you panicked. It’s also incredibly forgiving. My first attempt had a runaway caramel puddle that required a spatula rescue, but the people who ate it didn’t care. They only wanted the next slice. It’s my go-to when I’m dreaming of dessert but don’t have an oven-night left in me.
If you’re into budget-friendly recipes and want something that plays well with leftovers, picky eaters, and last-minute hosting, this is it. It’s got layers of textures — crunchy base, creamy middle, soft pudding, and that signature gooey caramel-chocolate pecan crown. It feels luxurious, but it’s low-drama. And to be honest, isn’t that the dream? Also, if you love exploring dessert ideas along with savory meal strategies like healthy comfort food or planning quick family meals, this sweet treat fits nicely into the same playbook: reliable, crowd-pleasing, and not judge-y.
I even used it as a bridge recipe when I was working on a dinner menu that included some meal prep microwave lunches for the week — because balance, right? Make a giant batch of practical lunches and reward the end-of-week hero with a tray of something cuddly and chocolatey. Also, if you’re pin-happy (I am), this is a major Pinterest moment. Layered desserts photograph like a dream. 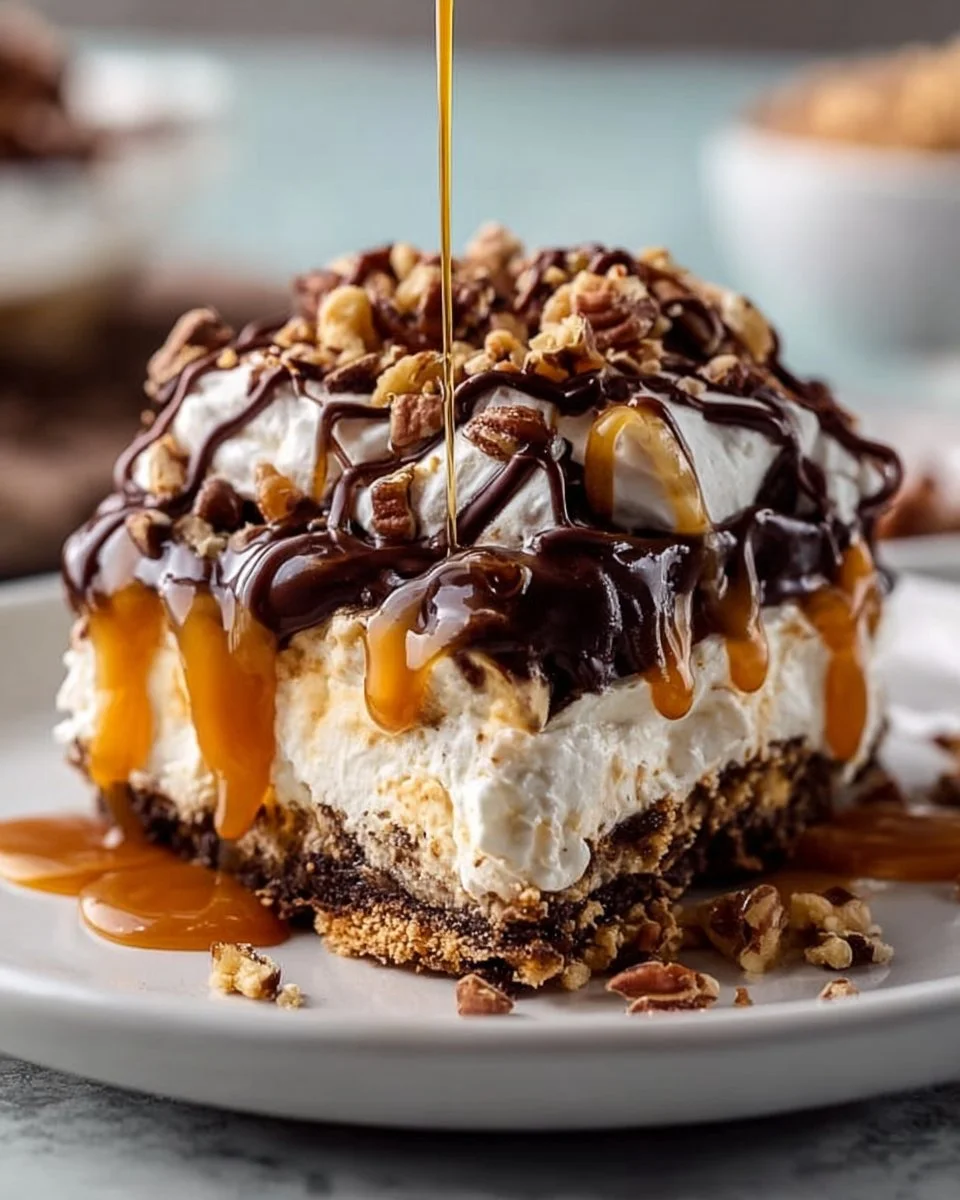
Explore more dessert recipes here
Why You’ll Love This Recipe
- It’s a no-oven champion: perfect for busy nights when you want a dessert but not a sweat session. Think easy weeknight dinners energy translated into dessert form.
- Crowd-pleaser status: picky eaters, kids, and that one in-law who acts unimpressed — all come around for seconds.
- Make-ahead magic: it gets better after a few hours in the fridge, so dinner + dessert timing suddenly becomes chill instead of frantic.
- Textural heaven: crunchy cookie crust, silky cream cheese, pillowy whipped topping, and glossy caramel with pecans. It’s like a tiny orchestra of textures.
- Budget-friendly and flexible: uses pantry-friendly ingredients and swaps well if you’re following a meal planning chicken habit or simply improvising with what’s on hand.
- Leftovers (if they exist) are delightful: slice, serve, and watch people ask for the recipe as if you were a culinary genius.
What Makes This Recipe Special?
This is not just another layered dessert. The marriage of buttered chocolate cookie crust with a tangy cream cheese layer and smooth vanilla pudding sings. And then—if you’re paying attention—the caramel and chocolate drizzle lock everything into a nostalgia-laced, show-stopping top layer with pecans for crunch. The trick is contrast: sweet vs. slightly tangy, soft vs. crunch, cold vs. slightly sticky. That contrast is what makes every bite feel like a new discovery.
I learned early that the cream cheese needs to be at room temperature. I once tried to force it and mixed in half the kitchen with an electric whisk. The result? Lumpy, determined creaminess that looked suspiciously like ricotta. Lesson: patience tastes better.
This dessert pairs like a dream with savory meal plans too. If you’re prepping ready meals for 2 or making cheap meal plans for 2 during the week, stash this for the weekend reward. I like to mention that because dessert is part of the broader rhythm of cooking: lunches and dinners sustain you, desserts are punctuation.
If citrus desserts are your thing, this key lime pie post is a must-read
Ingredients
Here’s the cast that makes this dessert a legend. I’ll also tell you why each one matters and what to do (and not do) with it.
- 1 package chocolate sandwich cookies (about 14–16 oz), crushed — The cookie crust gives structure and that deep chocolate backbone. I prefer a brand with rich cocoa crumbs; if you’re short on time, pre-made cookie crusts from the store work fine too. Don’t use stale cookies — they make the crust desolate.
- 6 tablespoons butter, melted — Binds the crumbs into a scoopable, sliceable base. Use unsalted and add a pinch of salt if the cookies are super sweet.
- 8 oz cream cheese (full-fat), room temperature — Smooth, tangy, and luxurious. Full-fat for flavor and texture. Pro tip: don’t try to hot-fix cold cream cheese; it clumps and sulks.
- 1 cup powdered sugar (adjust to taste) — Sweeten gently. Taste the cream cheese mix before committing to the full cup — I sometimes dial back to 3/4 cup.
- 2 cups vanilla instant pudding mix (or 2 small boxes), prepared with milk according to package — The pudding layer adds creaminess and structure; I whisk it just till it thickens. If you want it firmer, use slightly less milk.
- 2 cups cold milk (for the pudding) — I like 2% milk for balance, but whole milk gives silkier results.
- 8–12 oz whipped topping (like store-bought whipped cream), divided — This keeps the whole dessert light as a cloud. If you want, you can whip fresh cream with a touch of vanilla and powdered sugar.
- 1 cup caramel sauce (store-bought or homemade) — The caramel is the soul of "Turtle" flavor. If making your own, be cautious — caramel is a hot, proud beast.
- 1/2 cup chocolate sauce or melted chocolate — Adds depth, a bittersweet counterpoint to the caramel.
- 1 cup shelled pecans, roughly chopped — Toast them lightly for a nutty, crunch-forward top. Pecans are non-negotiable for that classic turtle vibe. If allergic, swap for toasted sunflower seeds.
- Pinch of sea salt — If your caramel is very sweet, a tiny flake of sea salt on top transforms it.
Don’t do this: mix the pudding into the cream cheese. Layering is deliberate — the pudding provides a softer, silkier bite on top of the firmer cream cheese. I once made the rookie move of combining them and the dessert became one generic mousse. It was edible, but I missed the layered drama.
More dessert recipe inspiration here
How to Make It Step-by-Step
This is the part where the panic subsides and joy intensifies. Make sure you have a 9×13-inch dish or a similar pan. I prefer glass so you can admire the layers and lie to your guests about how effortless it was.
-
Prepare the cookie crust. Crush the chocolate cookies in a food processor or by sealing them in a zipper bag and whacking them with a rolling pin. Combine the crumbs with the melted butter until the texture is like damp sand. Press the mixture firmly into the bottom of your pan. Firm pressing matters — use the flat bottom of a measuring cup to compact it. It should hold together when you lift a corner. If it falls apart, you need more butter. I once compacted it so hard my pan looked like it had been used to tamp concrete. It tasted great though.
-
Mix the cream cheese. In a bowl, beat the room-temperature cream cheese until smooth and fluffy. Add powdered sugar gradually. Scrape the sides. Taste. This is your chance to adjust sweetness. I use a hand mixer and sometimes hum to the rhythm of whirring cream cheese; it helps the process.
-
Layer half the cream cheese mixture over the cookie crust. Spread it gently and evenly. You don’t need a perfect top, but aim for coverage. When I’m tired I spread with a spoon; when I’m feeling fancy I use an offset spatula. Both work.
-
Prepare the vanilla pudding. Whisk the pudding mix with milk according to the package. Let it thicken — usually about two minutes. You want it set but not gummy.
-
Add a layer of the vanilla pudding on top of the cream cheese. Spread it into an even layer. The pudding should feel cool and slightly dense.
-
Spread half of the whipped topping over the pudding. Folding gently keeps the airy texture. The contrast between the firm pudding and cloud-like whipped topping is delicious.
-
Repeat the layers. Dollop the remaining cream cheese mixture, then the rest of the pudding, then the whipped topping. I like to finish with whipped topping for a soft canvas to drizzle on.
-
Drizzle caramel and chocolate on top, and sprinkle with pecans. Don’t be shy — zigzags look pretty and are forgiving. If your caramel is thick, microwave it for 10 seconds to make it ribbon-ready. I am not above using store-bought caramel when the oven is occupied making dinner. It’s okay. Be honest with yourself.
-
Chill in the refrigerator for at least 2 hours before serving. Overnight is even better. This step is crucial — the layers set, flavors meld, and you get those clean slices that make people gasp.
A small disaster story: one time my caramel decided to escape its bowl and cascade dramatically onto the countertop while I was filming a quick Instagram reel. It looked devastating, but the caramel on the floor later paired well with vanilla ice cream. Live and learn.
If you love desserts with zesty contrasts, check this key lime pie recipe
Tips for Best Results
- Let the cream cheese warm up to room temperature — no shortcuts. Cold cream cheese makes lumpy filling and a sad-looking layer.
- Press the crust firmly but don’t pulverize it into a cement slab. You want bite.
- Chill long enough: at least 2 hours, ideally overnight. The flavors harmonize better the longer it sits.
- Toast pecans lightly in a dry skillet for 3–4 minutes until aromatic; they’ll taste richer and crispier.
- If you’re short on time, prepare this in a smaller pan for a taller, more decadent dessert per serving.
- For neater slices, dip your knife in hot water and wipe clean between cuts.
Ingredient Substitutions & Variations
- Dairy-free: Use vegan cream cheese and a dairy-free whipped topping. Check the pudding—some are dairy-free or make a chia pudding layer instead.
- Lower sugar: Reduce powdered sugar and use a sugar-free pudding mix; caramel can be swapped for a reduced-sugar sauce.
- Mini parfaits: Layer into individual cups for easy serving at parties or for portion control.
- Nut change-up: Swap pecans for walnuts or toasted almonds if pecans are hard to find.
- Flavor twist: Add a teaspoon of espresso powder to the chocolate crust for a mocha undertone, or fold a tablespoon of bourbon into the caramel if you want grown-up complexity (skip if uncertain).
- Seasonal twist: Stir in grated orange zest to the cream cheese for a bright citrus note.
Directions

- Follow the step-by-step method above. Chill for at least two hours. Slice with a hot, clean knife for glossy edges. Serve cold.
Pairing Ideas
This dessert is a full-stop sweet, so pair it with simple, low-key companions. A strong coffee or espresso cuts the richness. For an afternoon treat, try a light black tea with a lemon slice to offset the caramel’s sweetness. If you want to lean into indulgence, serve with vanilla bean ice cream and a sprinkle of extra chopped pecans.
For dinner party pairing, this plays well after healthy comfort food mains or a batch of meal prep microwave lunches turned into a cozy weekend spread. I once served it after a lineup of family-style roasted chicken and bold greens; the crowd quieted in a universal, blissed-out way.
How to Store and Reheat Leftovers
Store covered in the fridge for up to 4 days. It will soften over time, but honestly, it still tastes excellent on day three. If the whipped topping weeps a little, zap the serving slice for 5–8 seconds in the microwave to renew the cloud if needed.
Do not freeze the whole assembled lasagna — puddings and whipped toppings change texture in the freezer. If you must freeze, freeze individual portions without whipped topping for up to a month. Thaw overnight in the fridge and add fresh whipped topping and drizzle before serving.
Make-Ahead and Freezer Tips
Make this the day before your event for the best flavor and clean slices. As noted, fully assembled and frozen isn’t ideal; instead, freeze the cookie crust in the pan, then assemble on the day if you want to stagger prep. Or freeze the caramel in small portions and thaw quickly when you’re ready to finish.
Common Mistakes to Avoid
- Skipping room-temp cream cheese — it’s the most common culprit for lumps.
- Not pressing the crust enough — it crumbles when you try to slice.
- Assembling and serving immediately — it needs chilling to set properly.
- Over-sugaring the cream cheese layer — balance is everything; too sweet makes everything blur.
- Using watery pudding: follow the package instructions and chill the pudding before layering if you want firmer results.
Frequently Asked Questions (FAQ)
Q: Can I use fresh whipped cream instead of store-bought whipped topping?
A: Yes. Whip heavy cream with a little powdered sugar and vanilla until stiff peaks form for a fresher flavor.
Q: How long does this keep?
A: Up to 4 days in the refrigerator. It’s best within 48 hours.
Q: Can I replace the pecans?
A: Yes, toasted walnuts or sliced almonds are good swaps.
Q: Is this freezer-friendly?
A: Not well once fully assembled. Freeze components separately if you need to prep ahead.
Cooking Tools You’ll Need
- 9×13-inch baking dish (glass recommended)
- Food processor or rolling pin + zipper bag for crushing cookies
- Mixing bowls
- Electric hand mixer (optional, but helpful)
- Spatula and offset spatula (if you have one)
- Measuring cups and spoons
- Knife for slicing and chopping pecans
Final Thoughts
I love this No-Bake Turtle Lasagna Dessert because it’s unapologetically comforting without demanding a standing ovation. It’s one of those recipes that feels like a warm blanket on the inside and a little party on top. Make it when you want to impress without the pressure, and make it when you need a reason to smile after a day of adulting. It’s indulgent in all the right ways — gooey, crunchy, creamy — and somehow, despite my kitchen mishaps and caramel theatrics, it always comes together.
If you enjoyed this recipe, don’t forget to save it on Pinterest or share it with a friend!
Conclusion
For more spins on this layered treat, I love how some blogs add a peanut-butter whisper or swap cookies for graham crackers; for ideas, check this thorough version that inspired my layer technique: 5 Layer Turtle Lasagna – My Heavenly Recipes. If you want a compact, bar-style take on the turtle concept, this recipe is a great reference: No Bake Turtle Dream Bars | 365 Days of Baking and More. For a bright mash-up of flavors and a classic approach, this write-up helped me refine my drizzle technique: Turtle Lasagna Dessert – Princess Pinky Girl. And for a final nod to a beloved no-bake turtle lasagna approach, here’s another lovely example I used for inspiration: Irresistible No Bake Turtle Lasagna Dessert That Everyone Loves.
No-Bake Turtle Lasagna Dessert
Ingredients
Cookie Crust
- 1 package chocolate sandwich cookies (about 14–16 oz), crushed Provides structure and a deep chocolate flavor.
- 6 tablespoons butter, melted Binds the crumbs for the crust.
Cream Cheese Layer
- 8 oz cream cheese (full-fat), room temperature Use full-fat for the best flavor and texture.
- 1 cup powdered sugar Adjust sweetness to taste.
Pudding Layer
- 2 cups vanilla instant pudding mix (or 2 small boxes), prepared with milk according to package For creaminess and structure.
- 2 cups cold milk Use 2% for balance, whole milk for silkier results.
Whipped Topping Layer
- 8-12 oz whipped topping (like store-bought whipped cream), divided Keeps the dessert light.
Toppings
- 1 cup caramel sauce (store-bought or homemade) Key for the 'Turtle' flavor.
- 1/2 cup chocolate sauce or melted chocolate Adds depth to the dessert.
- 1 cup shelled pecans, roughly chopped Adds a crunchy texture; toes briefly for richer flavor.
- pinch none sea salt Balancing the sweetness.
Instructions
Preparation
- Crush the chocolate cookies in a food processor or zipper bag and mix with melted butter. Press firmly into the bottom of a 9x13-inch glass baking dish.
- In a bowl, beat the room-temperature cream cheese until smooth. Gradually add powdered sugar, adjusting sweetness to taste, and mix until fluffy.
- Layer half of the cream cheese mixture over the crust, followed by the prepared vanilla pudding, then half of the whipped topping.
- Repeat the layers with the remaining cream cheese mixture, pudding, and finally whipped topping.
- Drizzle caramel and chocolate sauce over the top and sprinkle with chopped pecans.
- Refrigerate for at least 2 hours, preferably overnight, before serving.