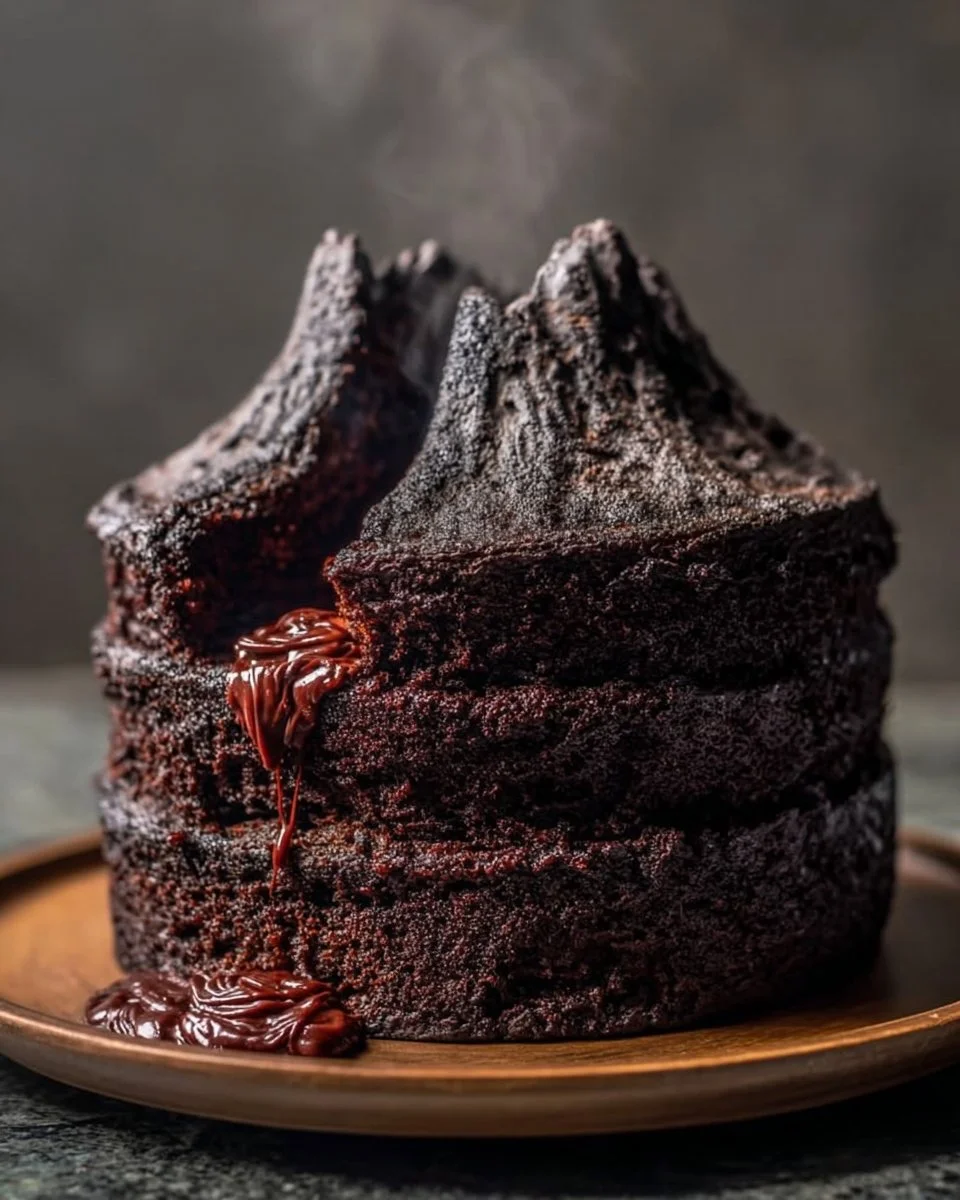
Easy Mount Doom Cake for quick family meals
I still remember the night I decided to make something that felt epic but ended up being a gloriously messy life lesson. It was rainy, the lights were low, and I wanted chocolate—deep, molten, volcanic chocolate. I was craving something that could stand up to a rom-com and a fuzzy blanket, something that could feed a brood of teenagers or get me through a week of easy weeknight dinners when dinner just needs to be… chocolate. So, I made what I now dramatically call Mount Doom Cake. Honestly, this cake is equal parts theatrical and comforting, like a culinary mood swing that says, “Yes, I can do drama and also be your budget-friendly recipe.”
The first time I attempted it, I overfilled the pans because I had ambitions, and the batter bubbled up and split like a tiny lava eruption in my oven. Oops. I cleaned chocolate off the oven light for hours and thought, “Well, that was dramatic.” But the cake itself—moist, deeply chocolate, and unpretentiously rich—was perfect. It had that bakery-but-hug-in-a-bowl quality that makes it a go-to for quick family meals when you want a dessert that feels special without sending your evening into a baking bootcamp.
This recipe is not about being fancy. It’s about big flavor with minimal fuss, the kind of recipe you bring out when company’s coming or when the week has been too long and you deserve something theatrical and forgiving. It’s forgiving because the batter is forgiving, the ganache curls around the cake like warm velvet, and even the burnt edges (speaking from experience) are not tragic—they’re snackable. If you want a chocolate cake that tastes like it came from a cozy, slightly chaotic bakery, and that’ll impress without making you sweat, this is it.
I love how the chocolate scent fills the kitchen—warm, bittersweet, a promise. The batter smells like childhood and midnight fridge raids. I love that it’s such a crowd-pleaser: picky eaters nod appreciatively, teenagers hover like satellites, and adults dissect it with tea or coffee. To be real, I’ve used this cake for birthdays, for “I survived that meeting” celebrations, and for nights when a slice with a spoon was my dinner. It’s dramatic, but in a comforting way.
Why You’ll Love This Recipe
- It’s easy weeknight dinners friendly—simple steps, big payoff, and minimal cleanup.
- Makes a huge impression with zero shaming of your novice baker ego.
- Perfect for leftovers: slices keep well and reheat beautifully for quick family meals.
- Versatile enough for upgrades like espresso, orange zest, or a sprinkle of flaky salt.
- Feels indulgent and luxurious but still counts as a budget-friendly recipe when you compare to bakery prices.
- Picky-eater approved: chocolate is its own language, and this cake speaks fluent comfort.
What Makes This Recipe Special?
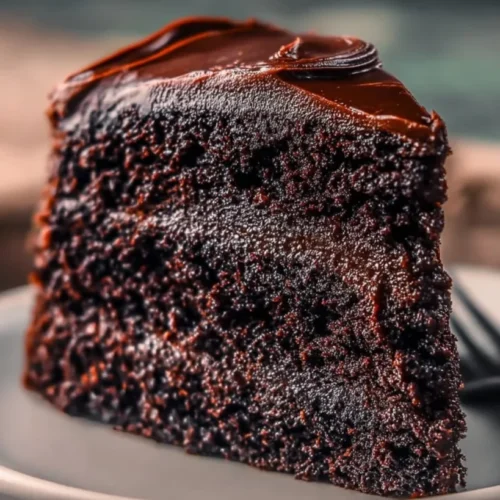
What sets this Mount Doom Cake apart is the balance between rich Dutch-processed cocoa and that surprising lightness from boiling water. The hot water blooms the cocoa powder, unlocking deep, volcanic chocolate flavor without making the cake dense and heavy. The batter is thin—don’t be alarmed—so what bakes up is a moist, tender crumb that seems professionally made even if your kitchen looks like a chocolate war zone afterward.
I also love the ganache finish. It’s glossy, sexy, and forgiving. Pour it on warm and it drips in a civilized lava flow. The combo of tender cake and sharp dark ganache is like a story arc: soft build-up, dramatic climax, cozy resolution. Throw in a tiny pinch of flaky salt on top for contrast and your taste buds will send you a very grateful text.
Ingredients
I prefer to keep the ingredient list straightforward because the magic is in technique, not in a 17-item shopping list. Here’s what you need and why each thing matters, plus my little brand preferences and the “don’t do this” warnings (I’ve earned them).
- 1 3/4 cups all-purpose flour — the backbone. Don’t overmeasure; spoon and level or weigh if you can.
- 2 cups granulated sugar — sweetness and structure. Brown sugar would make it chewier; fine if you want that, but this cake wants classic granulated.
- 3/4 cup Dutch-processed cocoa powder — the soul of the cake. Dutch-process cocoa gives that round, deep chocolate flavor and richer color. Don’t substitute regular cocoa unless you want a sharper, more acidic finish.
- 1 1/2 teaspoons baking powder and 1 1/2 teaspoons baking soda — the leavening duo that gives lift without cake-split drama. Don’t skip either.
- 1 teaspoon salt — essential for flavor balance. I use kosher salt because it’s forgiving.
- 2 large eggs — for structure and richness. Room temperature for best results; I set them in warm water for 5 minutes when I’m rushed.
- 1 cup whole milk — richness and tenderness. I’ve swapped in almond milk in a pinch, and it’s fine, but the cake is more decadent with whole milk.
- 1/2 cup vegetable oil — keeps the crumb moist and forgiving for leftovers. Butter is fine, but oil keeps the texture supple for days.
- 2 teaspoons vanilla extract — warmth and depth. Use pure vanilla for a real flavor boost.
- 1 cup boiling water — trust me. This blooms the cocoa and thins the batter to give that lush, tender crumb.
- FOR THE GANACHE: 1 cup heavy cream and 8 oz chopped dark chocolate (70% is my go-to) — creates a shiny finish that sets just enough to slice cleanly but still pours.
Personal tips: I use a silicon spatula for the final mix because it scrapes better and doesn’t deflate the batter. If you’re nervous about the thin batter, line your pans with parchment circles—one time I tried to be clever and didn’t, and it stuck like a bad relationship.
Don’t do this: don’t overbake because a dry Mount Doom is a sad Mount Doom. Also, don’t skip the boiling water. It looks weird, but it’s the secret.
How to Make It Step-by-Step
I promise this is easier than it looks. Pacing and small rituals help me—music on, oven preheated, and a cup of something warm nearby. I make this with small flourishes and big patience. Once, I forgot to grease the pans and spent 20 minutes whispering apologies to the cake while it clung to the sides. Live and learn.
- Preheat and prep: Preheat your oven to 350°F (175°C). Grease two 9-inch round cake pans and line the bottoms with parchment. You’ll smell the sugar warm in the oven—comforting and anticipatory. This step calms my inner panic, too.
- Dry mix: In a large bowl, whisk together the flour, sugar, Dutch-processed cocoa, baking powder, baking soda, and salt. Do it by hand if you’re in a zen mood; my bowl looks like a chocolate crater every time, and I love it. This is the time to inhale the cocoa. It smells like cozy bookstores and rain.
- Wet add-ins: Add the eggs, milk, vegetable oil, and vanilla extract to the dry ingredients. Using a stand mixer or handheld mixer on medium speed, mix for about 2 minutes. It will look like cake batter but thicker and still deliciously chocolate. I once left it mixing too long because I got distracted by a text—don’t do that. Two minutes gives rise without toughness.
- Boiling water magic: Stir in the boiling water last. The batter will thin out dramatically—do not panic. This is normal and excellent. The hiss and steam when you pour the hot water into the batter smell like a science experiment in the best way.
- Divide and smooth: Pour the thin batter evenly into your prepared pans. I weigh if I’m feeling fancy, but eyeballing is okay. Smooth the tops gently; the batter settles quickly and will look glossy.
- Bake: Bake for 30–35 minutes. A toothpick in the center should come out with a few moist crumbs, not wet batter. Oven times vary; my oven likes 34 minutes. The top should spring back slightly and have a matte finish—if it’s glossy, give it a few more minutes.
- Cool with patience: Let the cakes cool in the pan for 10 minutes. They’ll still be tender, so be gentle. Run a knife around the edges and invert onto a wire rack to cool completely. This whole cooling phase smells like truffle and comfort—don’t skip it.
- Ganache: Heat 1 cup heavy cream until it’s just simmering (tiny bubbles around the edges). Pour over 8 oz chopped dark chocolate and let it sit for 5 minutes. Stir until smooth and glossy. If it looks grainy, warm the mixture gently and stir—patience wins. I occasionally add a teaspoon of espresso or a splash of vanilla here to deepen the flavor.
- Assemble: Place one cake layer on your serving plate, pour a little ganache on top, spread evenly, then add the second layer. Pour the remaining ganache over the top and let it drip down the sides like cinematic lava. If you want a cleaner edge, chill the cake briefly until the ganache firms, then pour another layer for a sleek finish.
I’ve learned that the ganache is forgiving. It hides a multitude of sins. One time I sliced the cake to taste-test before the ganache set and the layers slid—but it still tasted legendary.
Tips for Best Results
- Measure flour correctly: spoon and level or weigh for best texture.
- Room-temperature eggs and milk make for a more homogenous batter and better rise.
- Don’t skip the boiling water. It’s the secret to that tender, moist crumb.
- Rotate pans halfway through baking if your oven runs hot on one side.
- Let the cakes cool fully before ganache or it will melt and run too thin.
- Sprinkle flaky salt on top of the ganache for a sophisticated contrast that makes each bite sing.
Ingredient Substitutions & Variations
I love making this cake a little different depending on the mood. For a coffee kick, add a tablespoon of instant espresso to the boiling water. For orange-chocolate vibes, fold in a teaspoon of orange zest to the batter and a tablespoon of Grand Marnier (or orange extract) to the ganache—alcohol-free options are great too. Want it lighter? Use low-fat milk and reduce oil slightly; it’ll be less rich but still satisfying.
For those looking for a dairy-free or vegan option, swap the milk for unsweetened almond milk and use an egg replacer like flax eggs (1 tablespoon flaxseed meal + 2.5 tablespoons water per egg). Use coconut cream for the ganache and choose dairy-free dark chocolate. The texture will shift slightly, but the flavor remains comforting and intense.
If you’re baking for a big event, double the ganache and finish with toasted nuts or a dusting of cocoa powder. I sometimes layer this as a sheet cake and add a whipped cream side for summer parties. Be creative—this cake loves improvisation.
Directions
Preheat oven to 350°F (175°C) and grease two 9-inch round cake pans with nonstick spray or butter. In a large bowl, whisk together flour, sugar, Dutch-processed cocoa, baking powder, baking soda, and salt. Add eggs, milk, vegetable oil, and vanilla, and beat on medium speed about 2 minutes until combined. Stir in boiling water; batter will be thin. Divide batter evenly between pans and bake 30–35 minutes until a toothpick comes out with a few moist crumbs. Cool 10 minutes in pans, then transfer to wire racks to cool completely. Heat heavy cream to a simmer, pour over chopped dark chocolate, wait 5 minutes, then stir until smooth. Frost cooled cakes with ganache and serve. 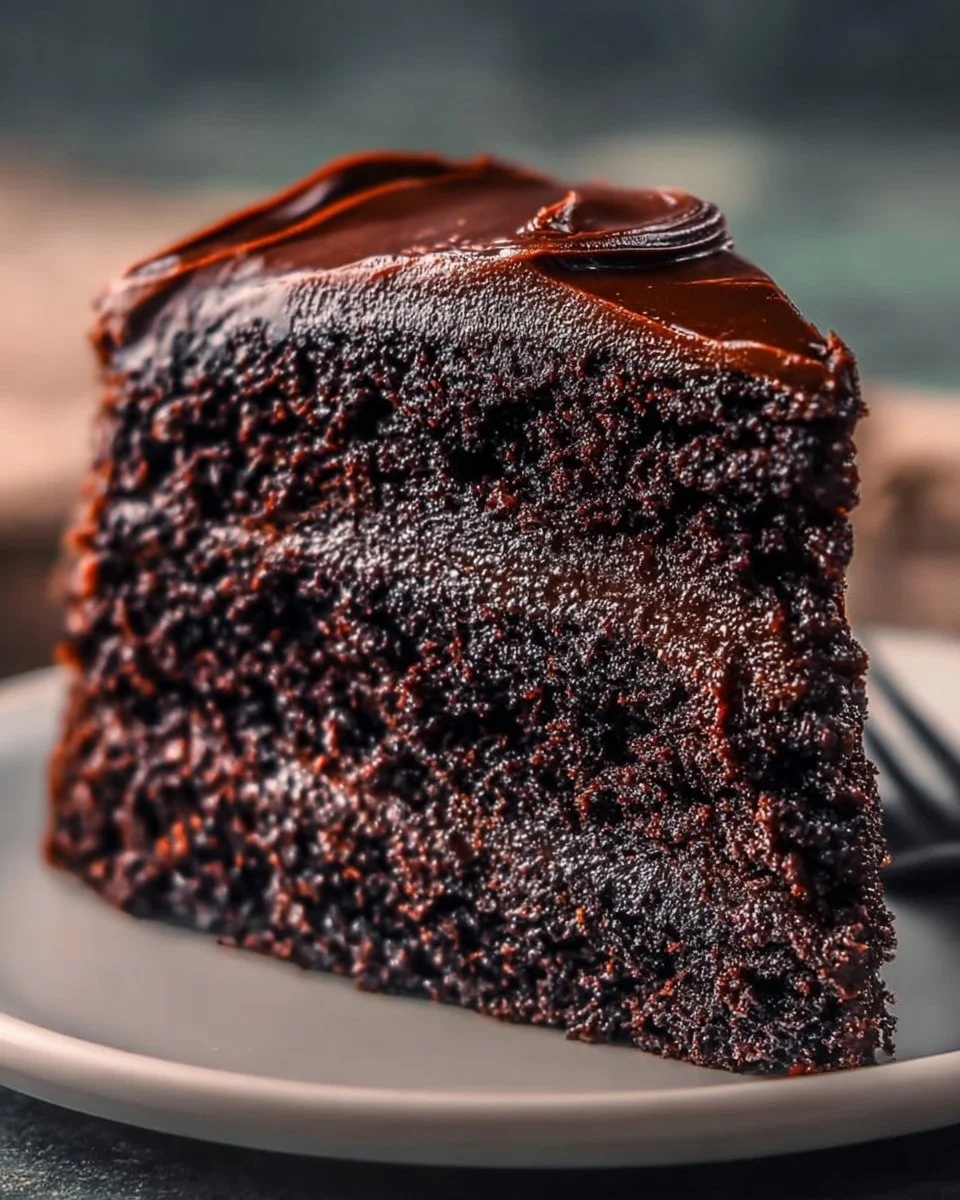
Best Pairings
Pair this cake with a mug of strong coffee or an espresso martini for grown-up vibes. For a cozy night, a cup of hot chocolate or chai is dreamy. If you want contrasting textures, serve with a scoop of vanilla ice cream or whipped cream. For fruit balance, a side of macerated berries or orange segments adds a bright counterpoint to the chocolate. Honestly, this cake shines with anything warm and a little comforting—think cozy socks and an old movie.
How to Store and Reheat Leftovers
Store slices in an airtight container at room temperature for up to 2 days; beyond that, refrigerate for up to 5 days. The ganache helps preserve moisture. To reheat, microwave individual slices for 10–15 seconds until warm but not molten, or place in a 300°F oven for 10 minutes. Be careful not to overheat or the ganache may separate. For day-old slices, a quick toast in a skillet with a butter pat gives the edges a satisfying crisp while keeping the inside tender. Don’t freeze the ganache-topped cake for more than a month; if you must freeze, wrap each layer tightly in plastic and foil, freeze, then thaw slowly in the fridge overnight before assembling.
Make-Ahead and Freezer Tips
You can bake the layers ahead and freeze them unadorned. Wrap individually in plastic and foil; they’ll keep for up to 1 month. Thaw in the fridge overnight, let come to room temp, then pour warm ganache over. Ganache can be made a day ahead and stored in the fridge; rewarm gently in a double boiler or microwave in 10-second bursts while stirring. For parties, I sometimes freeze whole slices for quick dessert-stash. Pro tip: label everything—my freezer once held an undecipherable “cake” that turned into a delightful mystery.
Common Mistakes to Avoid
- Overbaking: it dries out the crumb. Check at 30 minutes and test frequently.
- Skipping the boiling water: the texture will be denser and less tender.
- Frosting too soon: ganache will melt into a puddle if the cake is warm.
- Under-greasing pans: the cake might stick. Parchment circles are your friend.
- Mixing too long: overmixing once the flour’s added can create a tough crumb. Two minutes in the mixer is enough.
Frequently Asked Questions (FAQ)
Q: Can I use regular cocoa instead of Dutch-processed?
A: Yes, but the flavor will be brighter and slightly more acidic. To balance, add 1/4 teaspoon vinegar or swap baking powder/soda ratios carefully. I prefer Dutch-processed for depth.
Q: Can I make this as cupcakes?
A: Absolutely. Bake at 350°F for 18–22 minutes depending on your oven and muffin tin. Fill 2/3 and watch closely.
Q: Is there an egg-free version?
A: Yes—use flax eggs or a commercial egg replacer. Texture will be a touch different but still delicious.
Q: How do I get a glossy ganache?
A: Use good-quality chocolate and don’t overheat. Stir until perfectly smooth and pour while still slightly warm.
Q: Can I halve the recipe?
A: Yes. Bake in smaller pans and reduce baking time slightly. Use an instant-read thermometer—center should read around 200–205°F when done.
Cooking Tools You’ll Need
- Two 9-inch round cake pans (or a sheet pan if adapting)
- Parchment paper and nonstick spray
- Mixing bowls (one large)
- Hand mixer or stand mixer
- Measuring cups and spoons (or scale)
- Rubber/silicone spatula
- Wire rack for cooling
- Small saucepan for heating cream or a microwave-safe bowl
Final Thoughts
This Mount Doom Cake is my little dramatic, comforting friend. It’s not fussy, and it forgives mistakes. It’s for nights when you want to feel fancy without effort, for birthdays that don’t need fanfare, for rainy afternoons that require chocolate and a lit candle. The first bite is always a moment: rich cocoa, a silky ganache finish, and the warm memory of whatever occasion you made it for—because food holds stories, and this cake is full of them.
If you make it, leave a note about your twists—did you add espresso? Orange? Did your teenager demolish half the cake in an hour? Tell me. I’ll probably read it while reheating a slice and texting a friend, because that’s how this cake exists in my life: shared, slightly reckless, and deeply satisfying.
If you enjoyed this recipe, don’t forget to save it on Pinterest or share it with a friend!
Conclusion
If you want to see another fan-made version with a similar dramatic theme, check out A Feast in Mordor: Mount Doom Black Chocolate Cake for inspiration and a beautiful presentation idea. For those into cinematic treats and themed desserts, this Brownie Tower | The Lord of the Rings: The Return of the King feature gives a fun, creative spin you might want to riff off. If you’re gifting this cake with a wink, the playful card “Hotter Than the Fires of Mount Doom by The Cake Thief | Cardly” makes for a great pairing. For more narrative and atmospheric inspiration tied to the Mount Doom motif, see GRNLND Chapter 2: Mount Doom | The Cold Edge for an interesting literary tie-in.
Mount Doom Cake
Ingredients
For the Cake
- 1 3/4 cups all-purpose flour Do not overmeasure; spoon and level or weigh.
- 2 cups granulated sugar Brown sugar can be used for a chewier texture.
- 3/4 cup Dutch-processed cocoa powder Gives deep chocolate flavor; do not substitute with regular cocoa.
- 1 1/2 teaspoons baking powder Essential for lift.
- 1 1/2 teaspoons baking soda Essential for lift.
- 1 teaspoon salt Kosher salt is preferred.
- 2 large eggs Use room temperature for best results.
- 1 cup whole milk Almond milk can be used in a pinch.
- 1/2 cup vegetable oil Keeps the cake moist.
- 2 teaspoons vanilla extract Use pure for better flavor.
- 1 cup boiling water Blooms the cocoa powder and thins the batter.
For the Ganache
- 1 cup heavy cream Heat until just simmering.
- 8 oz chopped dark chocolate 70% cocoa is preferred for richness.
Instructions
Preparation
- Preheat your oven to 350°F (175°C). Grease two 9-inch round cake pans and line the bottoms with parchment.
- In a large bowl, whisk together flour, sugar, cocoa powder, baking powder, baking soda, and salt.
- Add eggs, milk, vegetable oil, and vanilla; mix on medium speed for about 2 minutes.
- Stir in boiling water; the batter will thin out.
Baking
- Divide the batter evenly into the prepared pans and smooth the tops.
- Bake for 30–35 minutes until a toothpick comes out with a few moist crumbs.
- Let the cakes cool in the pan for 10 minutes before transferring to a wire rack.
Ganache Preparation
- Heat heavy cream until just simmering. Pour over chopped dark chocolate and wait 5 minutes before stirring until smooth.
Assembly
- Place one cake layer on a serving plate, pour a bit of ganache on top and spread. Add the second layer.
- Pour remaining ganache over the cake allowing it to drip down the sides.