Easy Italian Meringue Buttercream
I still remember the first time I tried to make Italian meringue buttercream — I thought, “how hard can whisking up sugar and egg whites be?” Spoiler: very. That was a humid July evening, the kind that makes anything with sugar feel like a science experiment. My kitchen looked like an abstract art installation of powdered sugar, spatula streaks, and a very sad butter wrapper. To be real, I cried a little. And then I ate the mistakes. It was sweet and oddly consoling. Since then, this frosting has become my go-to for salvaging birthdays, turning boxed cakes into proud homemade desserts, and making easy weeknight dinners desserts feel special.
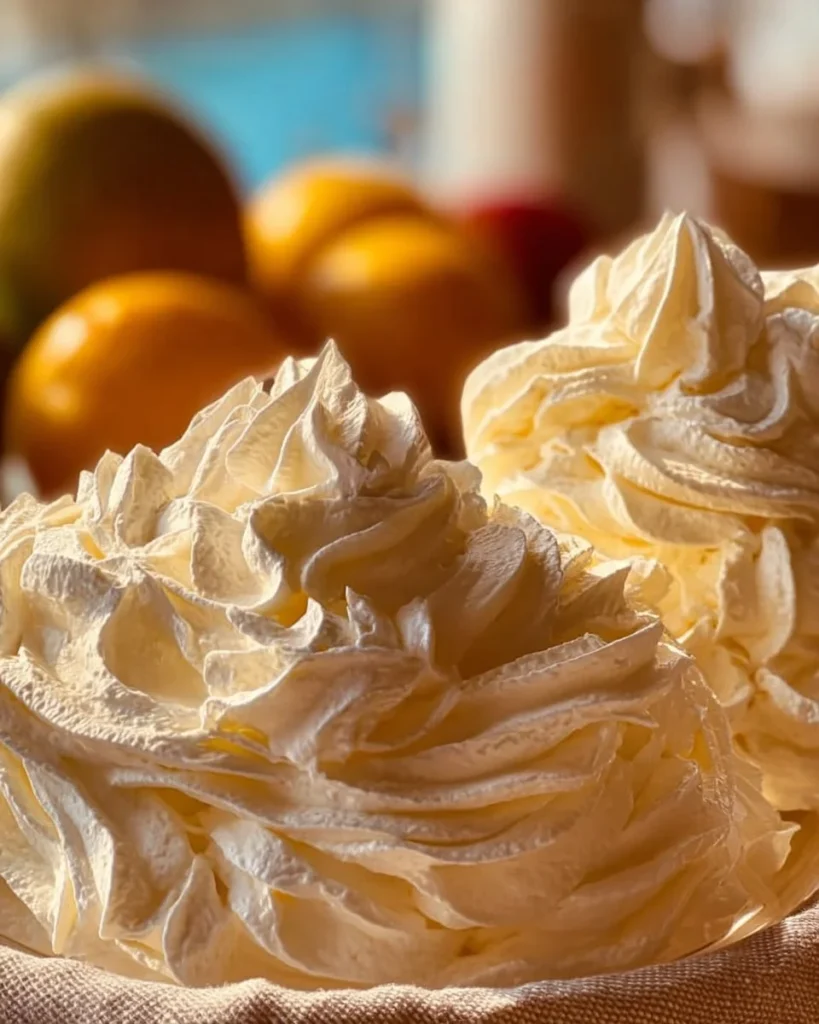
This buttercream is silky and glossy, not the grainy mess you might get if you rush things. It’s one of those recipes that feels fancy but is actually forgiving once you know the tiny tricks. I use it to frost quick cupcakes after whipping up quick family meals or to pipe rosettes for a dessert when I’m short on time but still want it to look like effort. It even made a rainy Tuesday dinner into pure comfort — imagine the smell of warm vanilla and butter filling the kitchen like a cozy blanket. My neighbor knocked on the door halfway through, clutching a spoon. No judgment.
If you’re here because Pinterest convinced you that pro-level frosting is within reach, you’re right. If you’re here because you want to rescue a cake from a frosting fail, also right. This buttercream has that melt-in-your-mouth quality that makes you want to close your eyes and whisper “yes, please” with each bite. It’s adaptable, forgiving, and — after a few oops moments and one near-burned-syrup disaster — I can tell you exactly what to do and what not to do.
I’ll be honest: I sometimes use this to top desserts that followed budget-friendly recipes for the main course, because frosting can elevate anything. I’ve paired it with a bright lemon sponge, a dense chocolate cake, and once, irrationally, toasted almonds and a dash of orange zest — that experiment went better than it had any right to. If you want to see one of my favorite ways to serve a cozy side with dessert for a full meal vibe, check out this air fryer baked potatoes recipe — it’s a weird pairing note, but trust me: spuds then sweets = contentment.
Why this recipe matters to me? Because it’s the frosting that turned small, ordinary moments into celebrations. Because when I mess up a layer cake (and I have), this buttercream steps in and whispers, “we’ve got this.” It’s comforting in a way that tastes like childhood and a little bit like splurging, all at once.
Why You’ll Love This Recipe
- It’s easy weeknight dinners dessert-friendly — quick to whip up after cooking for the family.
- Foolproof gloss and stability: recipes with soft, shiny peaks that hold up for piping.
- Great for meal prep desserts — makes large batches and stores well for quick treats.
- Picky eaters approve: not too sweet, not too heavy — just buttery and vanilla-forward.
- Versatile for flavoring: chocolate, coffee, lemon, or fruit extracts blend beautifully.
- Feels like a hug in a bowl — pure comfort food frosting, especially after a long day.
What Makes This Recipe Special?
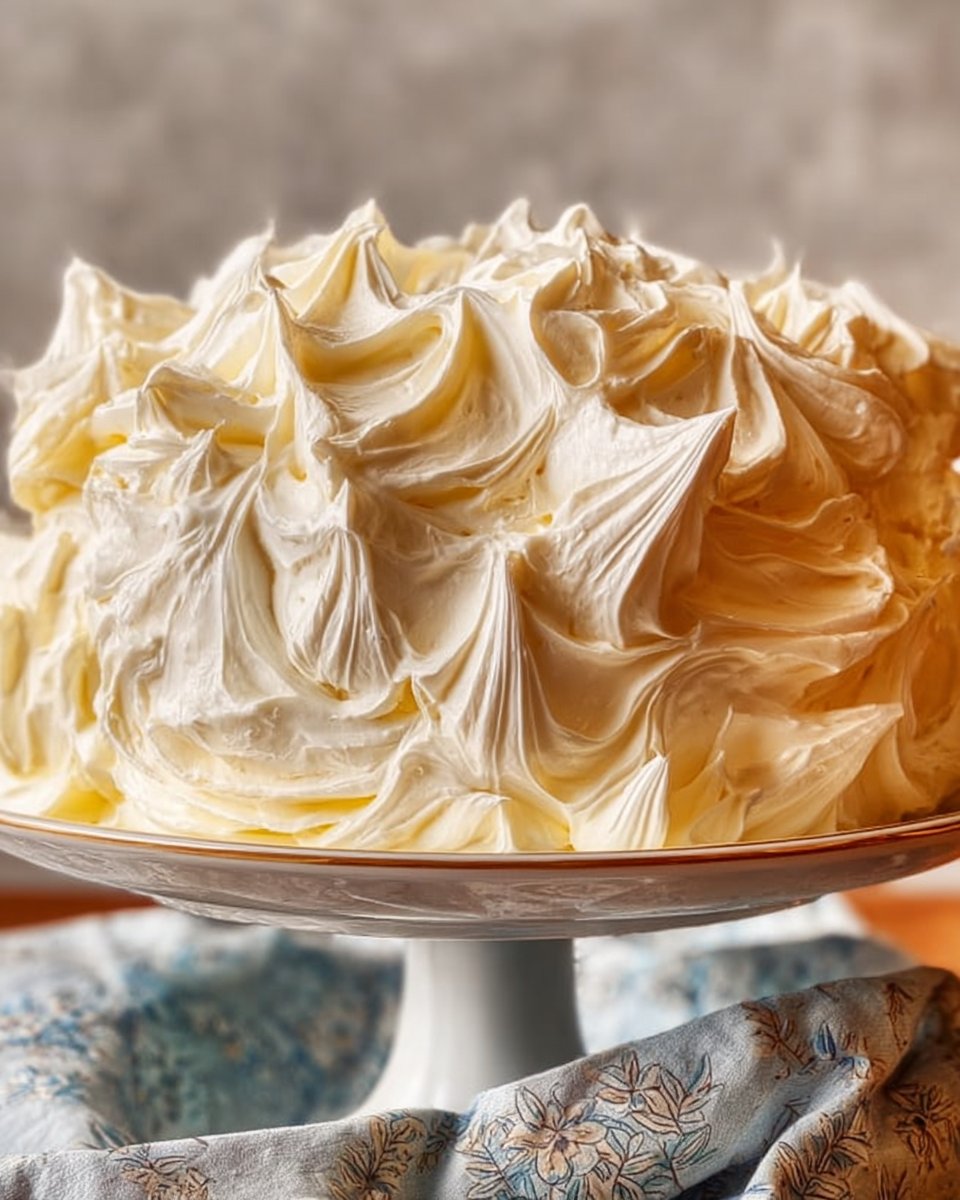
First, it’s built on a hot sugar syrup that cooks to the soft-ball stage, which gives the meringue a glossy, stable body that Swiss meringues envy. It isn’t just whipped egg whites — it’s a silky cloud of sugar-stiffened peaks that, when you fold in butter, becomes the creamiest frosting you’ve probably ever tasted. I love how it smooths out and pipes beautifully, but also how forgiving it is: if it looks a little curdled, a few extra minutes of whipping usually sets it right.
The nuance is everything. The hot syrup denatures the egg whites slightly, giving the meringue structure without tasting like raw egg whites. The butter adds richness and a luxurious mouthfeel. Add a splash of vanilla (or something adventurous like almond or lemon extract) and you’ll find it’s the kind of thing you want to lick off the spoon. That said, the real secret is patience — slow pours, calm whisking, and a willingness to stop and taste along the way.
I also love that it can rescue other recipes — like turning a box cake into something that looks and feels bakery-made. For more inspiration on turning simple baked goods into showstoppers, I’ve tried a gorgeous Italian chocolate chip ricotta cake topped with this buttercream — divine.
Ingredients
This is a short list, but each ingredient plays a very specific role. I like to keep things straightforward: quality butter = better buttercream, and precise syrup temperature = reliable results.
- 4 large egg whites — These create the meringue base. Use room-temperature eggs for easier whipping.
- 1 cup granulated sugar — The sweet backbone. Don’t substitute with brown sugar here unless you want a caramel note.
- 1/2 cup water — Used to dissolve and cook the sugar into syrup.
- 1 1/2 cups unsalted butter, softened — The texture king. I often use European-style butter for a richer flavor, but regular unsalted works fine. If your butter tastes funky, your frosting will, too.
- 1 teaspoon vanilla extract — Classic and comforting. Use pure vanilla for the best aroma.
- Pinch of salt — Balances sweetness and enhances the butteriness.
Why each ingredient matters (and a few of my personal preferences): Egg whites provide air and stability when whipped into meringue. High-quality butter brings a silky mouthfeel that cheap butter cannot mimic — I frequently reach for a good block from the dairy aisle, letting it soften on the counter until slightly springy. Granulated sugar must dissolve fully into the water to avoid a grainy texture; that’s why we cook it to 240°F — the soft-ball stage. Vanilla extract is my non-negotiable; a splash of vanilla makes the whole thing smell like Sunday mornings.
Don’t do this: never pour the hot syrup too fast into the egg whites. I learned that the hard way — one dramatic geyser of hot sugar and a kitchen full of steam later, I had to trash the meringue and start over. Also, don’t try to “save” cold butter straight out of the fridge; cut it into smaller pieces and let it soften, or you’ll end up with lumps. If your buttercream looks curdled after adding butter, don’t panic — keep whipping and it will usually come together. And if it’s too soft, chill briefly and re-whip.
If you’re feeling adventurous, add different extracts or fold in melted, cooled chocolate for a chocolate buttercream variant. For a lighter taste, swap half the butter for a neutral-flavored vegetable shortening — I don’t love that version, but it helps if your climate is too warm.
How to Make It Step-by-Step
Okay, deep breath. This is the part where you’ll feel like a lab technician but also like a pastry chef. I promise it’s worth it.
-
Prep and organize. Start by separating your egg whites into a clean, grease-free bowl. Any trace of fat will prevent proper whipping. I like to wipe out my mixing bowl with a little white vinegar to ensure it’s squeaky clean. Place the softened butter in a bowl, cut into tablespoons. Line up your candy thermometer on the saucepan; this is not the time to improvise with a guess.
-
Make the sugar syrup. In a small saucepan, combine 1 cup granulated sugar and 1/2 cup water over medium heat. Stir gently at first until the sugar dissolves and the liquid becomes clear. Then stop stirring — let it come to a simmer. Watch carefully. That first time I got distracted and the syrup smoked and smelled like regret; don’t be me. Allow it to boil until it reaches the soft-ball stage, about 240°F (115°C). You’ll see a slow rolling boil, and the color should stay pale.
-
Start whipping the egg whites. While the syrup cooks, begin beating the 4 large egg whites in your stand mixer with the whisk attachment on medium speed. They’ll go from cloudy to frothy, then to soft peaks. This takes a few minutes, and it’s okay to watch the sugar carefully while the whites whip.
-
Make the pour — slowly. Here’s where you need a steady hand. With the mixer running on medium-high, slowly drizzle the hot syrup into the whipping egg whites in a thin, steady stream. Do not pour it down the side of the bowl where the whisk hits; aim for the space between the whisk and the bowl. The first time I tried to pour and multi-tasked, I ended up with a glob of sugar on the whisk and shrieks. Keep the stream thin and consistent.
-
Beat to glossy peaks. After all the syrup is added, continue beating until the meringue is glossy and forms stiff peaks — think thick, marshmallow-like clouds. This usually takes about 8–12 minutes. You’ll notice the bowl cooling down and the texture stabilizing. Taste a tiny bit — it’s sweet but airy. That first batch I made felt like a dessert mousse.
-
Add the butter, slowly. Reduce the mixer speed to medium. Add the softened butter a few tablespoons at a time, letting each piece incorporate before adding the next. If you add too much too fast, the mixture may look soupy or curdled. Don’t panic; keep blending and it will come together. The butter should melt into the warm meringue and transform it into satin-like frosting. If your kitchen is cold, the butter might set and create lumps — working in a slightly warmer room or briefly warming the bowl with your hands (really brief!) helps.
-
Flavor and finish. Mix in 1 teaspoon vanilla extract and a pinch of salt. Whip until light and fluffy, about 4–6 minutes. Taste and adjust — more vanilla for aroma, a pinch more salt to cut sweetness. I sometimes whisk in a tablespoon of espresso powder for a mocha twist, or fold in a tablespoon of lemon zest for brightness.
-
Use immediately or store. Use the buttercream right away to frost cakes and cupcakes. It’s ideal for piping because it holds shape well but still feels soft. If you need to store it, place it in an airtight container and refrigerate for up to a week. When chilled, bring it back to room temperature and re-whip to restore the silky texture.
A few of my learned lessons: Don’t rush the syrup. Don’t let the syrup boil too vigorously. And if you end up with a curdled look after adding the butter, keep whipping — it nearly always sorts itself out. Once, I switched mixer bowls mid-way because I thought the first bowl had oil on it; I lost time but the buttercream still turned out. Mistakes are part of the process.
Tips for Best Results
- Use a candy thermometer. Eyeballing syrup is a personal hobby of mine when I’m feeling reckless, but the thermometer is the difference between silky success and grainy sadness.
- Room-temp eggs whip better. Take them out half an hour ahead.
- Softened butter matters. If your butter is too cold, it will clump; too warm and the buttercream will be soupy. Aim for slightly soft but not melty.
- If the buttercream breaks, keep whipping. More often than not it will smooth out. I’ve had it look like butter soup and still transform with patience.
- Work in a warm-ish kitchen if possible. Cold kitchens can make the butter seize and create lumps. If you live somewhere chilly, gently warm the bowl with your hands while whipping.
- Flavor last. Add extracts or zests near the end so their aromas stay bright.
Ingredient Substitutions & Variations
- For dairy-free: Use a high-quality vegan butter substitute that behaves like butter. Note: results vary and may be slightly softer.
- For a chocolate version: Whisk in 6–8 ounces of melted, cooled dark chocolate after the meringue stage and before the final butter additions.
- For citrus: Zest one lemon or orange into the buttercream for bright notes. I once added lemon zest and it turned a heavy chocolate cake into something delightfully sunny.
- For stabilized piping in warm climates: Replace up to 1/3 of the butter with vegetable shortening to hold shape longer (not my favorite taste-wise, but functional).
- For flavored syrups: Swap some of the vanilla for almond or coffee extract, or fold in a thin ganache for texture.
If you’re pairing this with simple cakes for cozy dinner nights, check out this rustic Italian sausage and potato soup — soup for dinner, and sweet buttercream-topped cake for dessert. Chef’s kiss.
Directions
- Combine sugar and water; cook to 240°F.
- Whip egg whites to soft peaks.
- Slowly stream hot syrup into whites; whip to stiff, glossy peaks (about 10 minutes).
- Lower mixer; add softened butter, a few tablespoons at a time, until smooth.
- Add vanilla and a pinch of salt; whip until light and fluffy.
- Use immediately or store in an airtight container in the refrigerator for up to a week.

Best Pairings (Drinks, Sides, Desserts)
This buttercream is a team player. I love it on a dense chocolate cake, on tender vanilla cupcakes, or dolloped on warm fruit cobblers. For drinks, pair slices of buttercream-topped cake with a strong espresso, a creamy latte, or bright herbal tea to cut the sweetness. For a weekend spread, serve little cupcakes frosted with this alongside a cozy bowl of soup or a rich main — the sweet finish turns a simple meal into a small celebration.
If you want to try it with other rustic Italian desserts, I’ve had great success frosting an airy ricotta cake with this buttercream for an indulgent twist — it’s a match made in dessert heaven and will impress guests who expect simple and get sublime. See the recipe I mentioned earlier for that cake inspiration in the ingredients section.
For movie-night vibes: this frosting plus a rom-com and fairy lights is instant mood-lift. For tea-party energy: pipe into roses and let people ooh and aah. For late-night solo indulgence: a spoon, a jar, and no regrets.
How to Store and Reheat Leftovers
Store in an airtight container in the refrigerator for up to one week. The buttercream will firm up when cold; let it come to room temperature for a couple hours and then re-whip for a minute or two to restore fluffiness. If it feels too soft after warming, chill briefly and re-whip. Never heat buttercream in the microwave — that melts the butter unevenly and ruins texture. If you need to warm it a bit, set the container in a warm water bath for a few minutes and then whip.
I once transported a jar of this across town for a potluck; it survived in a cooler with ice packs and re-whipped beautifully once it warmed. Pro tip: keep an extra chilled container nearby in summer to avoid the frosting getting too soft in transit.
Make-Ahead and Freezer Tips
You can freeze this buttercream for up to three months. Spoon into an airtight container, press plastic wrap directly onto the surface to avoid a crust, and seal. Thaw overnight in the refrigerator, then bring to room temperature and whip to refresh the texture. I keep small zip-top bags of frosting in the freezer for emergency cake emergencies. They defrost in a few hours and whip up nicely.
If making ahead for a party, refrigerate up to a week or freeze for long-term storage. Just remember, chilling firms it up so plan time to re-whip before assembling your dessert.
Common Mistakes to Avoid
- Pouring the hot syrup too fast — burns and splatters are real. Take it slow.
- Using a dirty bowl — even a hint of grease prevents egg whites from whipping properly. I learned this after one sad batch that stayed flat.
- Adding cold butter — causes lumps. If lumps happen, keep whipping or warm the bowl slightly.
- Skipping the thermometer — guessing syrup stages can lead to grainy texture.
- Rushing flavor additions — add extracts at the end for true aromatic pop.
If something goes wrong, breathe. Most issues are fixable with patience: more whipping, a slight warm-up, or chilling then re-whipping.
Frequently Asked Questions (FAQ)
Q: Can I use pasteurized egg whites?
A: Yes, pasteurized egg whites work and are a safe alternative for folks worried about raw eggs. They whip up similarly but may take a moment longer.
Q: My buttercream looks soupy after adding butter. Is it ruined?
A: Not at all. Continue beating — often it needs time and warmth to emulsify. If it’s still odd, chill briefly and then re-whip.
Q: Can I flavor it with cocoa powder?
A: Yes. Sift cocoa powder first and add gradually; you may need a touch more butter to maintain texture.
Q: How do I fix grainy sugar?
A: That usually means the syrup wasn’t cooked to the right temperature. It’s tough to reverse. Best approach: start a fresh batch and watch the thermometer closely.
Q: Is this safe to make in summer?
A: Yes, but keep your kitchen cool; warm butter and syrup can make the frosting soft. Use chilled mixing bowls in very hot climates or add a bit of shortening for stability.
Cooking Tools You’ll Need
- Stand mixer with whisk attachment (hand mixers work but require more effort)
- Candy thermometer (non-negotiable for consistent syrup)
- Small saucepan
- Spatulas and offset spatula for frosting
- Clean, dry mixing bowl (no grease allowed)
- Airtight containers for storage
These are basic tools — nothing too fancy — but each plays a role in making your buttercream shine.
Final Thoughts
Making Italian meringue buttercream felt like a rite of passage in my kitchen. There were tears (me), minor burns (me again), and a few triumphant bites that made all the chaos worthwhile. It’s a frosting that rewards patience and forgives hiccups, and it’s versatile enough to feel both everyday and celebratory. I love that a little technique — just a measured syrup and a steady hand — yields a finish that tastes like a bakery but was made in your own cozy kitchen.
If you’re nervous, start small: whip up a batch for cupcakes first, practice piping, then graduate to layer cakes. And remember: frosting is therapy. If you mess up, you can always eat it with a spoon and call it research.
If you enjoyed this recipe, don’t forget to save it on Pinterest or share it with a friend!
Conclusion
If you want step-by-step visual guidance, I like this tutorial on How to make Italian Buttercream – Preppy Kitchen that walks through temperatures and timings clearly. For another detailed walkthrough and troubleshooting tips, check out Italian Meringue Buttercream Recipe – Chef Lindsey Farr. And for a classic, well-loved take with helpful notes, see Homemade Italian Meringue Buttercream Frosting Recipe.
Thanks for staying with me through the sugar steam and whisk-scraped moments — now go make something sweet.