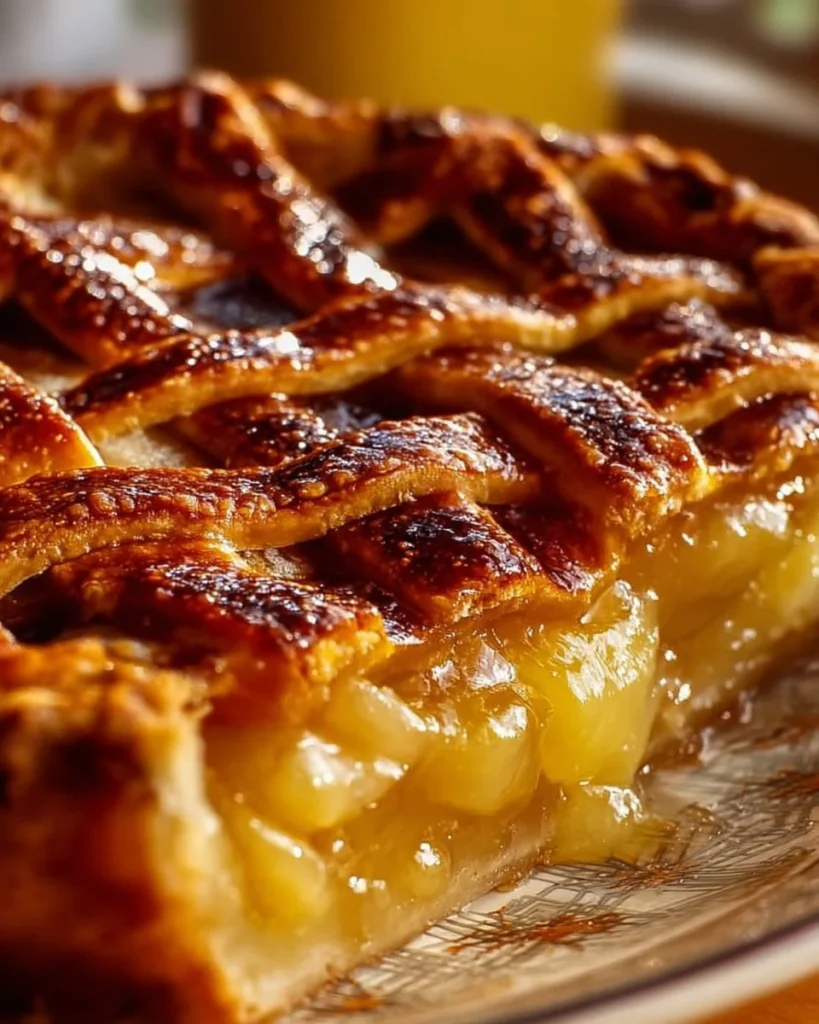
Easy Hillbilly Pie: A Cozy Comfort Food Treat
There’s something uniquely charming about the rustic simplicity of Hillbilly Pie, isn’t there? The moment I say “pie,” my mind is flooded with family memories of lazy Sundays spent with flour-dusted countertops and laughter echoing around the kitchen. Honestly, anything with “pie” in its name feels like a warm hug. It takes me back to my Aunt Lucy’s kitchen – an oasis of homey aromas and flour-covered chaos. I can almost hear her humming and the oven ticking away, as if reminding us that all good things take time.
Now, a few years back, I decided to tackle making Hillbilly Pie on a particularly rainy evening when all I wanted was a comforting dessert. I’d seen countless recipes and thought, “How hard could it be?” Oh, sweet summer child – this was a classic case of overestimating my pie-making prowess. My first attempt ended up being a soupy disaster that barely resembled a pie. I’ll spare you the details, but let’s just say it left a very unappetizing mark on my kitchen floor.
But here’s the beauty of baking: when you fail spectacularly, you earn the right to dust yourself off and try again. And guess what? My second attempt was a glorious success! The rich smell of caramelized sugar mingling with buttery crust made the whole house feel like a cozy haven. That’s when I realized how much I adored this pie – it embodies comfort and simplicity, making it the perfect quick family meal or healthy comfort food treat after a long day. Plus, it’s budget-friendly too, which is a major plus these days.
This pie is not just for special occasions. It’s made of ingredients you likely already have, plus it brings a little southern whimsy to your dinner table. Let’s face it; there’s something lighthearted about a name like “Hillbilly Pie.” It conjures up images of porch swings, fireflies, and laughter echoing in the warm summer air.
Now, let’s get ready to roll up those sleeves and dive into the heartwarming world of Hillbilly Pie, for those cozy evenings when you need a sweet reward.
Why You’ll Love This Recipe
- Easy to Follow: Seriously, if I can do it, so can you! The ingredients are simple, and the steps are straightforward.
- Comfort in Every Bite: This pie has a custardy filling that feels like a warm embrace – perfect for chilly nights!
- Family Approved: Kids love it. It’s a delightful treat that even picky eaters seem to devour happily.
- Delicious Leftovers: If there’s any left (which is a big ‘if’), it makes a perfect breakfast paired with a hot cup of coffee.
- Versatile and Fun: You can experiment with flavors and add a twist, like a sprinkle of nutmeg or a drizzle of honey. It’s all about what makes your tastebuds dance!
- Budget-Friendly: With just a few pantry staples, you can whip up a dessert that feels indulgent without breaking the bank.
What Makes This Recipe Special?
Hillbilly Pie has its roots in southern cooking and shares the love-for-the-simple-life philosophy. This custard pie is not just about taste; it’s about making memories. Each bite tells a story. As simple as it is, there’s something utterly rewarding about watching it transform from a simple mixture to a golden-brown dessert.
The filling is light and creamy, with just the right amount of sweetness. Honestly, the vanilla hits you first, followed by a whisper of that buttery goodness, and the dusting of flour holds everything together just right. It’s a nostalgic journey through flavors that warms your heart, especially during family gatherings or cozy evenings at home.
Ingredients
Here’s what you’ll need to make this delightful pie:
- 1 pie crust: Store-bought or homemade, this serves as the cozy blanket for our filling.
- 3/4 cup sugar: This adds the right amount of sweetness you’d expect from a comforting dessert.
- 1/4 cup all-purpose flour: This helps in thickening the filling. Don’t skip it!
- 2 cups milk: Whole milk is preferred for creaminess, but you can use alternatives like almond or oat if needed.
- 3 large eggs: These are the magic ingredients that bind everything together.
- 1 teaspoon vanilla extract: Because vanilla makes everything better!
- 1/4 teaspoon salt: It enhances all the flavors, trust me on this.
- 1 tablespoon butter: To dot on top before baking, giving a lovely richness to the pie.
Make sure you’re fully stocked because trust me, the comforting smell that fills your kitchen will have everyone in the house wandering in like hungry kittens.
How to Make It Step-by-Step
Now that we’ve got our ingredients lined up like good little soldiers, it’s time to get cooking!
-
Preheat the Oven: Set your oven to 350°F (175°C). This is crucial so that you don’t end up with a cold, gooey mess.
-
Mixing the Dry Ingredients: In a mixing bowl, combine the 3/4 cup sugar and 1/4 cup flour. Whisk them together until they’re well combined. This step is super important as it ensures your sugar is evenly dispersed and not just plopped into the mix.
-
Incorporate the Milk: Gradually add in the 2 cups of milk, whisking until smooth. You’ll want this mixture to have a creamy, dream-like texture – it should feel like you’re making a delicious milkshake!
-
Adding the Eggs: Beat in the 3 large eggs, 1 teaspoon of vanilla extract, and 1/4 teaspoon of salt. Do this until it’s perfectly mixed and a little frothy. The kitchen should start smelling amazing already!
-
Pour into the Crust: Now, gently pour the mixture into your prepared pie crust. If you’re feeling fancy, you can place the crust in a pie dish beforehand.
-
Dot with Butter: Take that tablespoon of butter and dot it all over the top of the pie filling. This will melt while baking and add an incredible richness.
-
Baking Time: Pop it into the oven for about 40-45 minutes, or until the top is golden brown and the filling is set. I usually check around the 40-minute mark. You want it to have a little jiggle but not be completely wobbly.
-
Cooling Down: Let your masterpiece cool for at least 30 minutes before serving. This helps it set and makes it easier to cut. Just try not to poke at it too much; I speak from experience on this one – it leads to a messy first slice.
Each step in this process is a sensory delight. You’ll see the colors change, smell the sweet aroma wafting through your kitchen, and even experience the excitement of watching the filling rise and set. Honestly, it’s all those little details that make the effort worthwhile.
Tips for Best Results
- Avoid Overmixing: When blending in your eggs, don’t go overboard. You want a smooth mixture, but too much air can cause puffing while baking.
- Use Room Temperature Ingredients: If you can, let your eggs and milk sit out for a bit before starting. Room temperature ingredients mix more easily.
- Watch the Time: Every oven is different. Keep an eye on your pie as it bakes. If it starts browning too quickly, cover it with foil.
Ingredient Substitutions & Variations
Feeling adventurous? Here are a few ideas to jazz things up:
- Milk Alternatives: Try coconut or almond milk for a slightly nutty twist.
- Experiment with Flavors: A dash of nutmeg or a splash of lemon juice can elevate the flavor profile. You could also consider adding chocolate chips for a richer dessert!
- Sweetener Swaps: If you want to cut back on sugar, you can substitute with honey or a low-calorie sweetener.
Directions
- Preheat the oven to 350°F (175°C).
- In a mixing bowl, combine sugar and flour.
- Gradually add milk, whisking until smooth.
- Beat in eggs, vanilla, and salt until well combined.
- Pour the mixture into the pie crust.
- Dot the top with butter.
- Bake for about 40-45 minutes until golden and set.

Pairing Ideas (Drinks, Sides, etc.)
What better way to enjoy a slice of Hillbilly Pie than with a side that complements its comforting warmth? A scoop of vanilla ice cream is always a classic match. Or, if you want something a little different, serve it with whipped cream and a sprinkle of cinnamon.
For drinks, imagine curling up on the couch with a glass of sweet tea or a creamy coffee. This suggests cozy, lazy evenings, doesn’t it? A slice of Hillbilly Pie and a good rom-com? You’ve got an evening to remember.
How to Store and Reheat Leftovers
Okay, real talk. If you somehow have any leftover pie (which is a miracle), store it in the fridge, covered with plastic wrap. It stays good for about 3-4 days. When reheating, I suggest 20-30 seconds in the microwave. You’ll want that filling warm and inviting, after all!
Make-Ahead and Freezer Tips
You can prep the filling ahead of time! Just keep it in the fridge for a day or two before pouring it into the crust. As for freezing, well, I wouldn’t recommend it since the texture might get a bit wonky upon thawing.
Common Mistakes to Avoid
- Skipping the Butter: Don’t forget to dot butter on top! It adds that richness that makes it feel indulgent.
- Not Letting it Cool: For the love of all that is pie, let it cool before slicing! It ensures a clean cut and reduces gooeyness.
- Ignoring Cooking Times: Keep an eye on it towards the end. If it’s browning too fast, cover it up.
Frequently Asked Questions (FAQ)
Q: Can I make this pie without a crust?
A: Absolutely! You can bake it in a greased pie dish, and it’ll still be delicious!
Q: How do I know if the pie is done?
A: Look for a golden top and a filling that’s slightly set without excessive jiggle.
Q: Can I use less sugar?
A: Sure, but be cautious! Reducing sugar may alter the texture slightly.
Q: What if I don’t have milk?
A: You can use alternatives like oat or almond milk. Just remember that it may change the flavor a bit.
Q: How about adding fruits?
A: Try mixing in some berries or peaches! They layer perfectly and add a refreshing twist to the custard.
Cooking Tools You’ll Need
To create this delightful pie, you’ll need:
- A mixing bowl
- Measuring cups and spoons
- A whisk
- A pie dish
- An oven mitt (trust me, you’ll want this!)
Final Thoughts
Hillbilly Pie brings a slice of joy that is rooted in homey goodness. It’s more than an easy dessert; it’s packed with memories and the perfect addition to any gathering. So gather your loved ones, get messy in the kitchen, and enjoy the process.
If you enjoyed this recipe, don’t forget to save it on Pinterest or share it with a friend! And for more delicious comfort food ideas, check out these posts on Key Lime Pie and Quick Chicken Pot Pie Pasta. It’s time to spread the love!
Feel free to adapt it to your taste and make it your own. Happy baking!

Hillbilly Pie
Ingredients
For the Pie
- 1 pie crust 1 pie crust: Store-bought or homemade This serves as the cozy blanket for our filling.
- 3/4 cup 3/4 cup sugar Adds the right amount of sweetness for comfort.
- 1/4 cup 1/4 cup all-purpose flour Helps thicken the filling.
- 2 cups 2 cups milk Whole milk preferred for creaminess; alternatives like almond or oat milk can be used.
- 3 large eggs 3 large eggs Bind everything together.
- 1 teaspoon 1 teaspoon vanilla extract Enhances the flavor.
- 1/4 teaspoon 1/4 teaspoon salt Enhances flavors.
- 1 tablespoon 1 tablespoon butter To dot on top before baking for richness.
Instructions
Preparation
- Preheat the oven to 350°F (175°C).
- In a mixing bowl, combine the sugar and flour.
- Gradually add milk, whisking until smooth.
- Beat in the eggs, vanilla, and salt until well combined.
- Pour the mixture into the pie crust.
- Dot the top with butter.
- Bake for about 40-45 minutes until the top is golden brown and the filling is set.
- Let it cool for at least 30 minutes before serving.