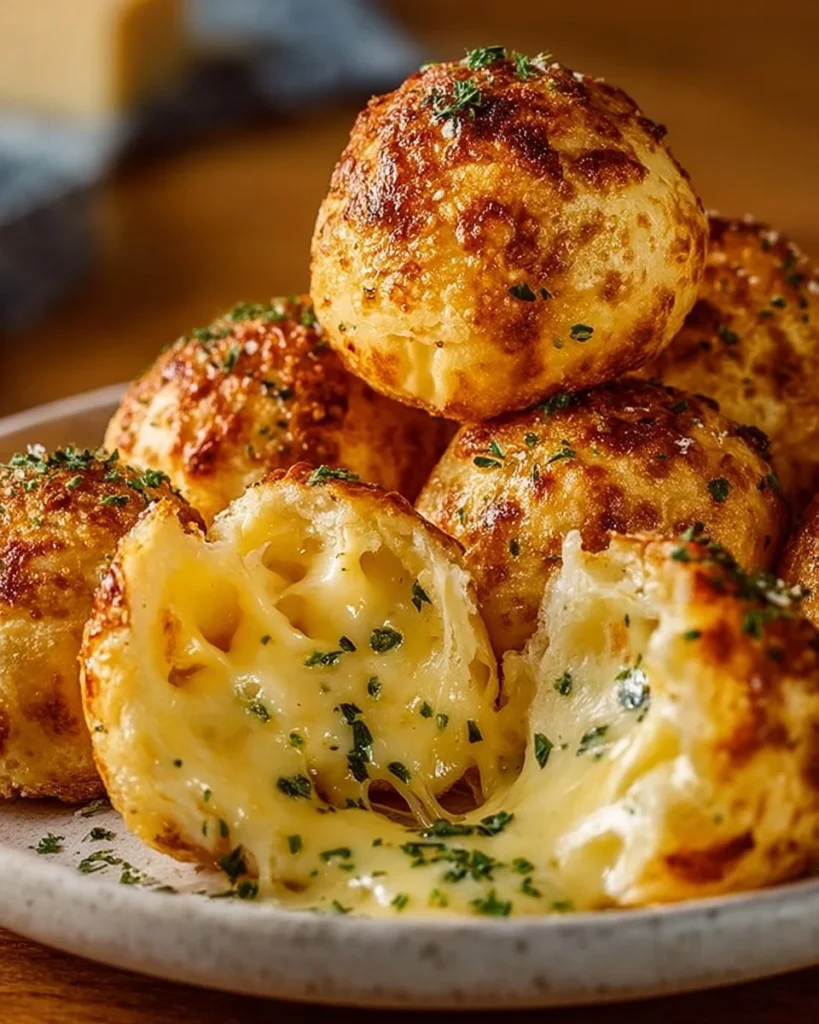

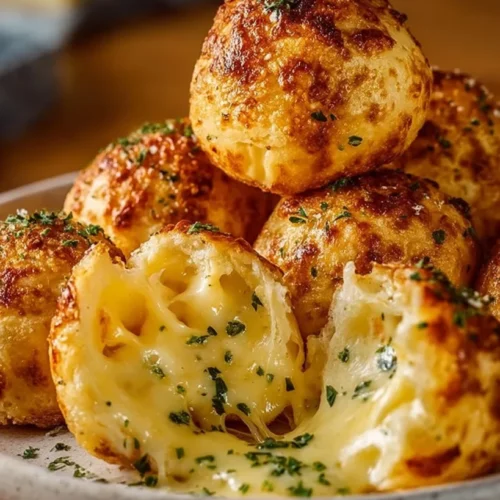
Easy Garlic Butter Cheese Bombs
Introduction
If you’re anything like me, some nights I want dinner that feels like a warm hug but didn’t require three hours, a deli run, or culinary therapy afterward. Enter these little pillows of joy—Garlic Butter Cheese Bombs—that scream comfort and whisper “I’ve got this” when you pull them out of the oven. In my kitchen, this recipe has saved more evenings than I can count: last-minute movie nights, a kids’ soccer team crash landing at my kitchen table, and those “I forgot to plan dinner” Mondays. They’re the kind of easy weeknight dinners that feel bougie but behave like budget-friendly recipes.
When I first tried making them, I learned quickly that this is a recipe that rewards speed and a lack of pretense. I used refrigerated biscuit dough because, honestly, there are nights when I am not in the mood to chase yeast. The smell of butter and garlic hitting hot oven air? That sound of a golden crust cracking open to reveal molten mozzarella? Pure comfort. These amps up even the dreariest midweek slump and doubles as a party trick for unexpected guests. They’re not just snacks; they’re a reason to gather.
To be real, my first batch exploded. Oops. Cheese everywhere, the oven light smeared with butter, and a rueful laugh that turned into a triumph the second time around. I learned about sealing edges properly, generous garlic butter brushing, and the perfect dough-to-cheese ratio that yields a gooey center without turning into a lava cake of mozzarella onto the baking sheet. Now, they’re my go-to for quick family meals, and I make them whether it’s a lazy Friday or I need something that’ll please picky eaters without a negotiation.
This recipe is simple, forgiving, and perfect for creative riffing. Swap in herbs, add a dab of marinara for dipping, or make a whole tray for a game day crowd. It’s the type of food that evokes childhood pizza nights but grown-up buttery garlic vibes. The result is a golden, shiny, herby exterior and the satisfying pull of warm, stringy mozzarella on the inside—so good you won’t care about the crumbs on your sweater.
Why You’ll Love This Recipe

- It’s one of those quick family meals that delivers maximum comfort with minimal effort. Perfect for chaotic evenings.
- Picky eaters flip for the gooey cheese center; it’s a secret weapon for feeding kids and adults alike.
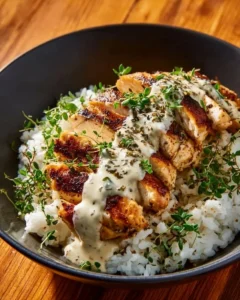
- These are fantastic for meal planning chicken nights when you want an indulgent starter or a cheesy side that helps stretch protein-centered mains.
- They’re budget-friendly but feel like a splurge—great when you want a treat that won’t blow the grocery budget.
- Leftovers (if there are any) reheat beautifully, making them a winner for leftover hacks and best meal prep plans.
- They pair with almost anything: soup, salad, or a rom-com. Seriously, this and fuzzy socks = perfection.
What Makes This Recipe Special?
There are a lot of cheese-stuffed things in the world, but what sets these apart is the combination of simplicity and that bright garlic-parsley butter. The butter does more than baste; it creates a glossy, seasoned crust that delivers savory hits in every bite. The refrigerated biscuit dough gives you a tender, slightly flaky bite without the effort of pastry. Also, the ritual of rolling each one—pressing the dough around a cube of mozzarella—offers a little therapy. Fingers get buttery, kitchen smells get nostalgic, and the oven does the heroic transformation.
I love that this recipe is forgiving. Want more garlic? Add it. Want herbs? Throw in chives or rosemary. Want to make them into a party platter? Line them up on a sheet, brush them in garlicky goodness, and everyone will form a polite-yet-anxious queue for the first warm one.
Ingredients
Let me tell you about each item on this short and mighty list, because every ingredient plays its small but vital role.
- Refrigerated biscuit dough: This is the backbone. I use a standard store-brand biscuit can because it browns nicely and gives that cozy little pocket. If you prefer a flakier texture, use croissant dough or crescent roll dough. For sturdier pockets (and less oozing), try a biscuit with a slightly thicker dough.
- Mozzarella cheese: Fresh is lovely, but for this recipe I cut low-moisture mozzarella into small sticks or cubes—perfect meltability and less water release. Pro tip: if your mozzarella is super wet, pat it dry with a paper towel before wrapping.
- Butter: Unsalted is my default because I can control the salt level with the added pinch. Butter carries that deep, comforting flavor and helps achieve that shiny, golden crust.
- Garlic, minced: Fresh is best. Jarred is ok in a pinch, but fresh garlic gives that bright, pungent pop that perfume the whole kitchen.
- Fresh parsley, chopped: It adds color and a fresher lift to balance the butter. I sometimes use basil if I’m leaning pizza vibes.
- Salt & pepper: Just enough to season the butter and balance the rich cheese.
Why each ingredient matters: the biscuit dough gives structure and tenderness; mozzarella provides the stringy, melty center; butter and garlic transform an ordinary biscuit into something irresistible; parsley adds brightness; salt and pepper close the flavor loop.
Don’t-do-this warnings: don’t overfill the dough with too much cheese, or you’ll end up with molten cheese puddles on the tray. Don’t skip the garlic butter brush—this is not optional; it’s the magic. And don’t forget to seal the edges. I learned this the hard way: a slippery cheese escape turns a neat tray into a cheesy crime scene.
How to Make It Step-by-Step
I’ll walk you through my exact method—the messy parts included—so your first batch can skip the drama mine had.
Step 1: Preheat and prep. Follow the biscuit dough package for oven temperature (usually around 375°F to 400°F). Line a baking sheet with parchment or lightly grease it. I choose parchment because cleanup should be the last of my problems.
Step 2: Open the dough and separate the biscuits. Take a breath and remind yourself this is the easy part. If you’re using a can of biscuits that are stacked, separate gently to keep them intact.
Step 3: Flatten each biscuit. Use the palm of your hand or a rolling pin to press each biscuit into a disk about 1/4 inch thick. I like to keep the edges slightly thicker to help seal the cheese inside.
Step 4: Add the mozzarella. Place a small cube or stick of mozzarella in the center of each flattened biscuit. Don’t overstuff; aim for one to two teaspoons worth depending on biscuit size. Too much cheese = explosions. Trust me.
Step 5: Wrap and seal. Fold the dough up over the cheese and pinch seams together tightly. I do a little rosette pinch sometimes for fun—looks fancy without the effort. If seams don’t feel secure, moisten the edge with a bit of water and pinch again.
Step 6: Make the garlic butter. In a small saucepan, melt butter over medium heat. Stir in minced garlic, chopped parsley, a pinch of salt, and a few grinds of black pepper. Let it sizzle for 30 seconds—don’t brown it. The goal is fragrant, not burnt.
Step 7: Brush generously. This is where things start smelling like heaven. Brush each wrapped cheese bomb with the garlic butter. Don’t be stingy; the butter creates that beautiful color and flavor. Save a tablespoon to brush again when they come out of the oven if you want an extra gloss.
Step 8: Bake. Place cheese bombs on the prepared sheet (give them a little room) and bake according to the biscuit package—usually 10–14 minutes—until golden brown on top. Watch them starting at the lower end of the time window; ovens vary and you don’t want a scorched top.
Step 9: Rest briefly and serve. Let them cool a couple of minutes—cheese is lava-hot, and I have the burned-tongue scar to prove it. Then serve warm with marinara for dipping or a green salad for balance.
Kitchen story: the first time I tried doubling the recipe for a neighborhood potluck, I underestimated the assembly time and had burnt fingers from sealing too fast; butter + hot dough is a memorable combo. I’ve since learned to pace myself, put some chill songs on, and assemble in batches. It makes it fun rather than frantic.
Expectations vs. reality: You will get variations in color and shape—don’t stress. The rustic ones are the most beloved. There are always a few perfectly round show-offs and some characterful lopsided ones. Guests will argue over who gets the biggest cheese pull.
Tips for Best Results
- Don’t skimp on sealing: pinch, then pinch again. Moisture will find a weak seam and escape as molten cheese.
- Use low-moisture mozzarella for cleaner melts. Fresh mozzarella works but pat it dry first.
- Brush twice: once before baking, once right out of the oven for that glossy, buttery finish.
- If you want a golden extra-crisp bottom, preheat the baking sheet in the oven and slide the bombs onto the hot surface—it speeds up crusting and gives a lovely sizzle.
- Avoid overly thick dough; it’ll take longer to bake and could overcook the exterior before the center melts.
- Make them bite-sized for a party, or slightly larger for a main with salad alongside.
Ingredient Substitutions & Variations
- Gluten-free: use gluten-free biscuit dough if you need it. Texture may differ slightly, but these still hit the comfort spot.
- Cheese swaps: try provolone or a sharp cheddar blend for more punch. A little parmesan in the butter adds umami.
- Add-ins: tuck in a small spoonful of marinara or a sliver of roasted red pepper with the cheese for a flavor surprise.
- Herb variations: swap parsley for basil, oregano, or chives. For Italian-forward bombs, use a pinch of dried Italian herbs in the butter.
- Make them spicy: stir a touch of red pepper flakes into the butter or add finely chopped jalapeño to the cheese center for heat.
- Lighter option: use reduced-fat cheese and a light buttery spray brush—still indulgent but a bit lighter.
Directions
Preheat the oven per biscuit package and line a baking sheet with parchment or grease it lightly. Flatten each biscuit, center a piece of mozzarella, wrap and seal tightly. Melt butter, add minced garlic, chopped parsley, salt, and pepper; brush over the assembled bombs. Bake until golden and let cool briefly before serving. Brush again with reserved butter for extra shine. 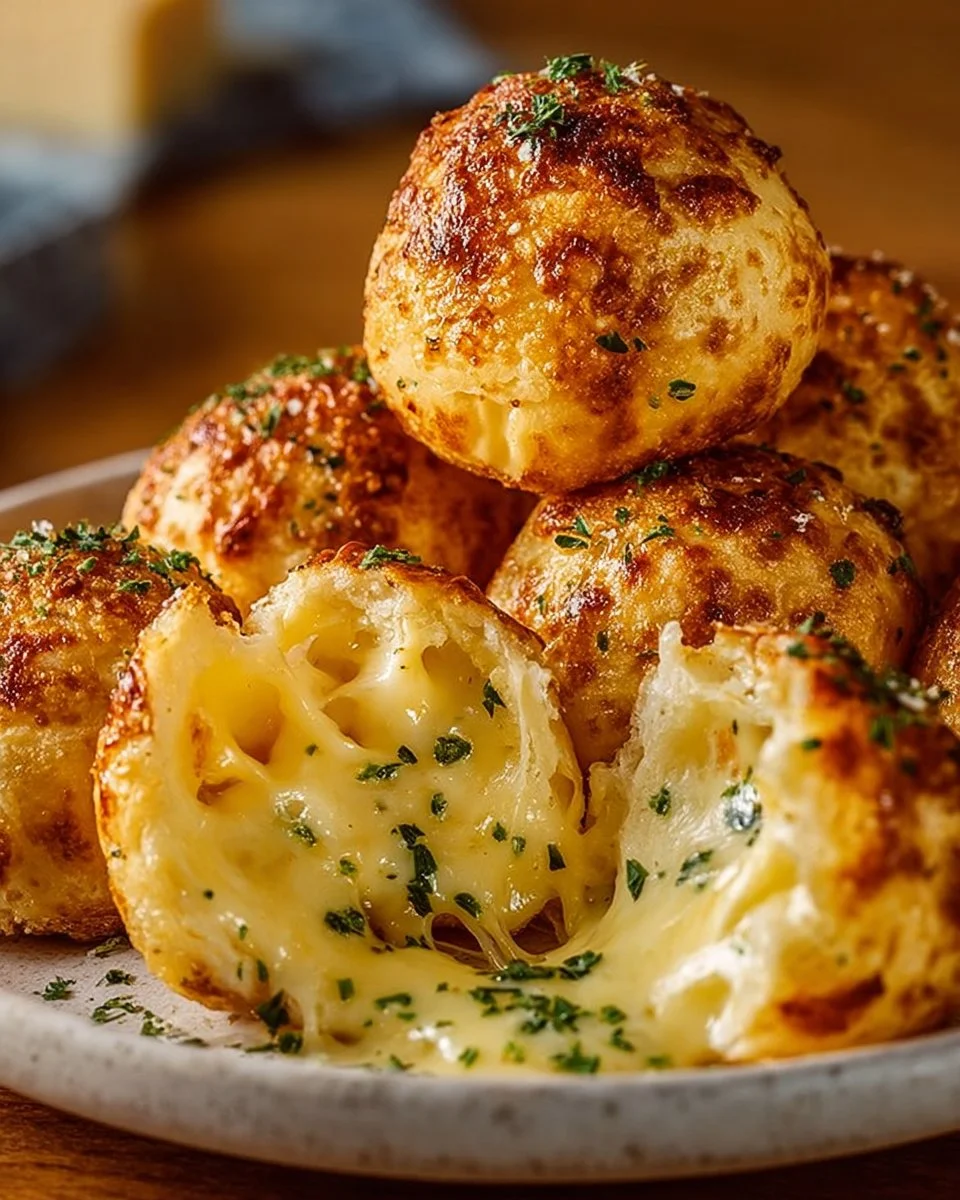
Pairing Ideas (Drinks, Sides, etc.)
These are versatile. Pair them with a big, bright salad for balance—the kind with lemon vinaigrette or balsamic to cut the butteriness. A bowl of tomato soup or marinara for dunking is classic and satisfying. For drinks, a chilled soda or a crisp white wine pairs beautifully; for non-alcoholic options, sparkling water with lemon is a refreshing foil. Serve them next to grilled chicken or a bowl of hearty soup to make a more complete meal.
How to Store and Reheat Leftovers
Store leftovers in an airtight container in the fridge for up to 3 days. To reheat, pop them in a preheated 350°F oven for 6–8 minutes until warmed through; this revives the exterior best. Microwave reheating is faster but makes the texture a bit softer—use for convenience, but if you care about crispiness, go with the oven. If cheese has escaped onto your baking sheet, scrape it off after it cools—bonus crunchy cheese chips for snacking.
Make-Ahead and Freezer Tips
You can assemble these and freeze them unbaked on a tray until firm, then transfer to a freezer bag. Bake from frozen—add a few extra minutes to the bake time and brush with garlic butter halfway through if you’d like a fresher finish. For parties, make a double batch and freeze half; it’s a lifesaver for impromptu guests or hungry teenagers.
Common Mistakes to Avoid
- Overfilling: too much cheese leads to molten escapes. Keep it moderate.
- Under-sealing: weak seams = cheese crime scene. Flour your hands slightly or dampen the edge to help it stick.
- Burning the garlic: garlic turns bitter if browned. Sauté just until fragrant.
- Skipping the rest: if you bite into one right out of the oven, you will regret it. Let them cool for a minute or two.
Frequently Asked Questions (FAQ)
Q: Can I use crescent roll dough instead of biscuit dough?
A: Yes, crescent dough works and yields a flakier result. Adjust sealing to avoid seams unrolling while baking.
Q: How do I stop the cheese from leaking?
A: Use less cheese, seal edges tightly, and consider chilling assembled bombs briefly before baking so the dough firms and holds shape.
Q: Can I prep these ahead for a party?
A: Absolutely—assemble, freeze on a tray, then store in bags. Bake straight from the freezer with extra baking time.
Q: What’s the best cheese for melty strings?
A: Low-moisture mozzarella is ideal for stringy, clean melting. Fresh mozzarella works too if patted dry.
Cooking Tools You’ll Need
- Baking sheet
- Parchment paper or nonstick spray
- Small saucepan for garlic butter
- Pastry brush (or spoon if desperate)
- Sharp knife for cheese
- Rolling pin or your hand to flatten dough
- Tongs for safe handling
Final Thoughts
This recipe feels like a secret handshake in my family: simple, a little messy, and always a crowd-pleaser. It’s one of those dishes that doesn’t demand perfection but rewards attention. Whether you’re feeding a house full of teenagers, prepping snacks for a game night, or making a cozy dinner for two with healthy eating for two in mind (portion control!), these cheese bombs deliver comforting, buttery goodness with minimal fuss. They remind me of my early kitchen days, when I learned to trust shortcuts and make them my own. Try them once, then tweak: more garlic, a different herb, or bite-sized versus meal-size. Each variation tells a little story.
If you enjoyed this recipe, don’t forget to save it on Pinterest or share it with a friend!
Conclusion
If you want a straight-up tutorial with step-by-step photos, I often compare notes with other cooks and found Instrupix’s version helpful for visual learners: Easy Garlic Butter Cheese Bombs – Instrupix. For another blogger’s twist and serving ideas that sparked my bread-and-butter approach, check out Easy Garlic Cheese Bombs Recipe – Crunchy Creamy Sweet. If you like variations and reader feedback, Food Fanatic has a few notes worth considering while you tweak the filling: Garlic Cheese Bombs Recipe – Food Fanatic. And for a buttery, cheesy take that inspired my double-brush finish, I sometimes refer back to The Chunky Chef’s rendition: Buttery Garlic Cheese Bombs – The Chunky Chef.
Garlic Butter Cheese Bombs
Ingredients
Dough and Cheese
- 1 can Refrigerated biscuit dough Standard store-brand for best results.
- 8 oz Low-moisture mozzarella cheese Cut into small sticks or cubes.
Garlic Butter Mixture
- 1/2 cup Unsalted butter For melting and brushing.
- 3 cloves Garlic, minced Fresh garlic is best.
- 1/4 cup Fresh parsley, chopped Can substitute with basil or other herbs.
- to taste Salt and pepper Season to taste.
Instructions
Preparation
- Preheat the oven per biscuit package instructions and line a baking sheet with parchment or grease lightly.
- Open the biscuit dough and gently separate the biscuits.
- Flatten each biscuit to about 1/4 inch thick, keeping the edges slightly thicker.
Assembly
- Place a small cube or stick of mozzarella in the center of each flattened biscuit.
- Wrap the dough around the cheese and pinch seams tightly to seal.
- For added security, moisten the edges with a little water if necessary.
Garlic Butter
- In a small saucepan, melt the butter over medium heat and stir in minced garlic, chopped parsley, salt, and pepper. Let sizzle for 30 seconds.
Baking
- Brush each wrapped cheese bomb generously with garlic butter.
- Place them on the prepared baking sheet and bake according to package instructions (10-14 minutes) until golden brown.
- Once baked, let cool for a couple of minutes before serving, brushing again with reserved butter for extra gloss.