
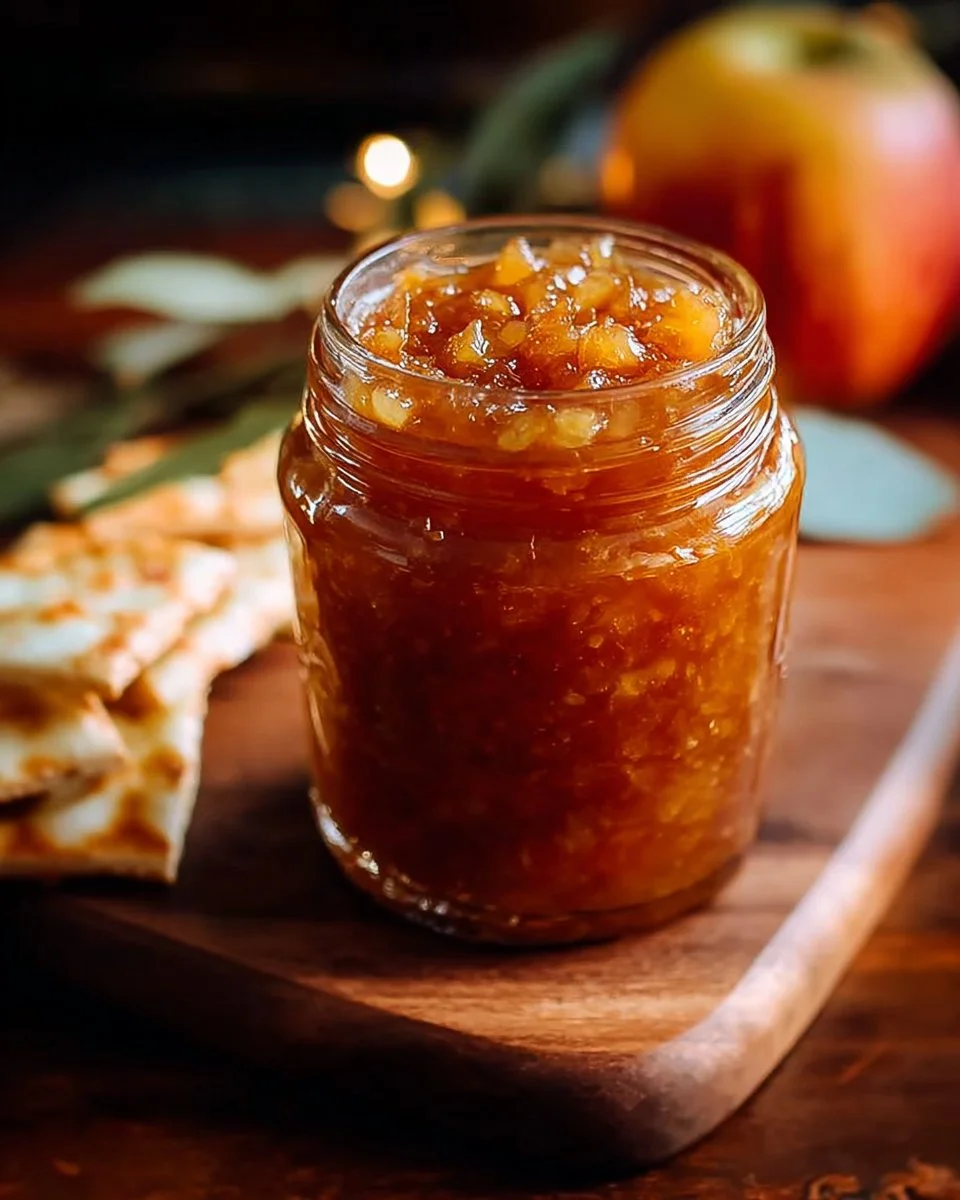
I can still smell it: the first time I tried to make a jam that tasted like an orchard and a caramel shop collided in a single spoonful. The kitchen looked like a small tornado had passed through — apple peels scattered, a sticky pan that would not surrender to the sponge, and me, standing in an oversized sweater, thinking, "This will be fine." To be real, it almost wasn’t. I forgot the lemon juice once and ended up with a floppy, sweet spread that slid off toast like a sticky pancake. Oops. Lesson learned.
This Easy Fall Caramel Apple Jam is the kind of recipe that fixes those early disasters and becomes part of your season. Think warm, bubbling apples perfumed with cinnamon and nutmeg, the gentle tang of lemon, and that swoon-worthy creamy hit of caramel tucked into every jar. It’s cozy. It’s comforting. It’s practically a hug you can spread on toast. And yes, it makes mornings better — and quite possibly your life.
I like simple recipes that feel indulgent but are actually manageable on a weeknight when everything else feels chaotic. If you’re into easy weeknight dinners or looking for budget-friendly recipes that still feel special, this jam behaves like a secret weapon. It’s not just for toast: swirl it into yogurt, fold it into oatmeal, pair with a cheese board, or dollop it over pancakes. And if you love the idea of turning a big bag of apples into something that keeps giving, you’ll get why this felt like magic in my tiny apartment kitchen.
By the way, if you love baking with apple butter vibes, you should check my riff for apple butter muffins that were inspired by sticky, fall mornings. That post came from another jammy experiment gone right — so judge me by the crumbs on the floor. This jam is forgiving, flexible, and surprisingly quick, even if your first attempt looks like a sticky science project. Keep reading — I’ll share all my oops moments, the tiny hacks that save the day, and the one trick that makes store-bought caramel feel homemade.
Why You’ll Love This Recipe
- It’s unbelievably simple: you only need a handful of pantry staples for budget-friendly recipes that taste luxe.
- Comfort factor is through the roof — like healthy comfort food if you pretend the caramel is a vegetable (we won’t pretend).
- The recipe plays nicely with meal planning: use jars for ready meals for 2 or to jazz up breakfasts all week.
- Picky eaters approve — kids, guests, and the neighbor who “doesn’t like fruit” will come back for seconds.
- Leftovers get creative: spoon into pancakes, swirl into oatmeal, or make a decadent grilled cheese spread for quick family meals.
What Makes This Recipe Special?
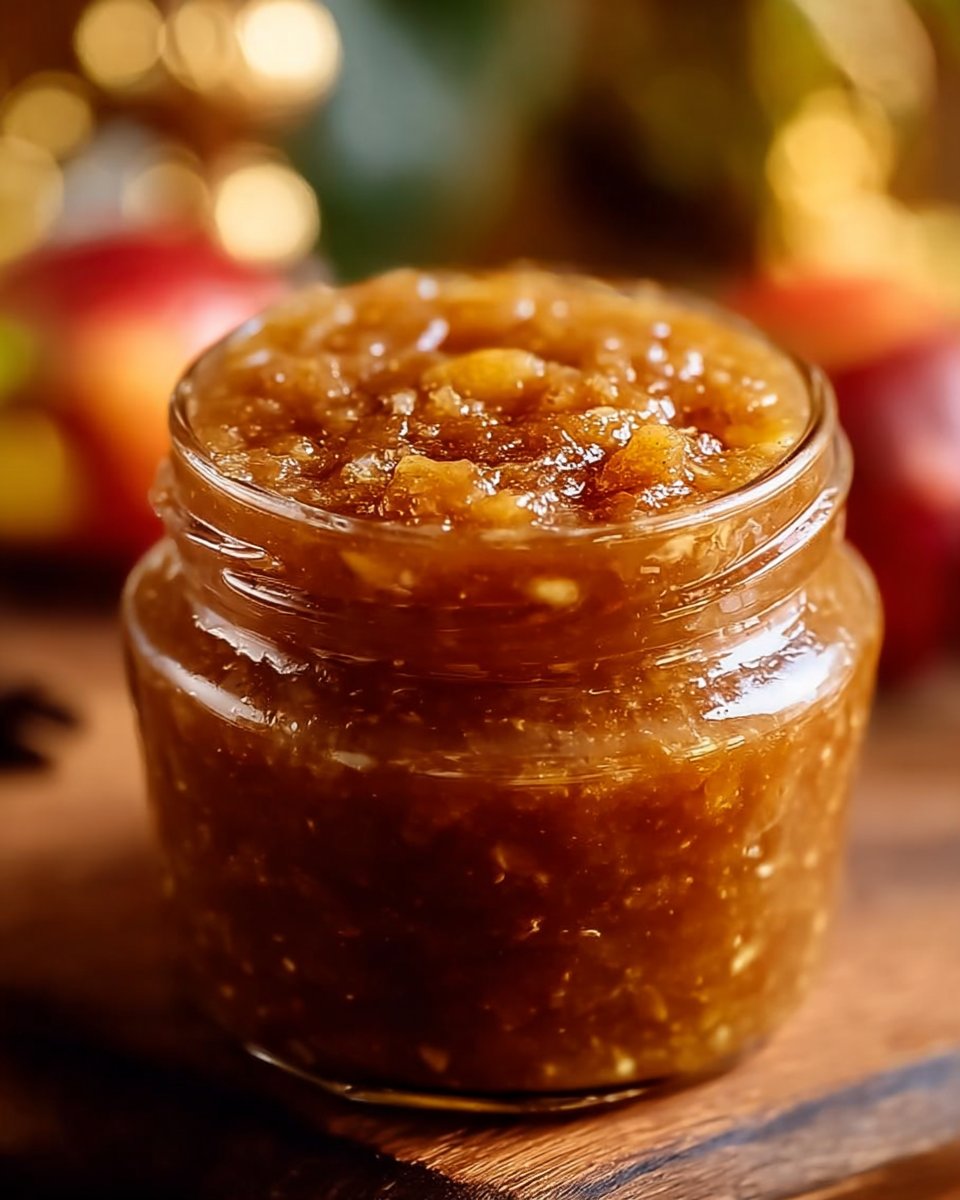
This jam is not just apple jam + caramel. It’s caramel folded into gently simmered apples so the flavor is built in, not slapped on top. The spices (cinnamon, nutmeg, and allspice) are subtle — they nudge the apples into cozy territory without stealing the show. Lemon juice balances the sweetness and helps the jam set without making it sharp. The optional fruit pectin is your play: skip it for a spoonable preserve, use it for a thicker, sliceable jam.
What really makes it special is how it survives kitchen chaos. Burn the first batch? No problem — scrape, add a little water, and you’ve got artisanal “rustic” jam. Over-sweetened? Add extra lemon. Too thin? Stir in the pectin and give it another simmer. This recipe encourages improvisation. I still giggle remembering the time I used salted caramel instead of plain caramel because I misread a jar — turned out to be a lucky accident. Serendipity, people.
Ingredients
Here’s what you’ll need and why I love each thing. I keep my pantry stocked so this jam always gets made when apples start showing up in big, cheap bags at the grocery store.
- 4 cups chopped apples (peeled and cored): I use a mix — Granny Smith for tang, Fuji or Gala for sweetness. The texture of the apples matters; firmer apples hold their shape a bit better, while softer types will break down into a more spreadable jam.
- 1 cup granulated sugar: The backbone of jam. It helps with preservation slightly and balances the tartness.
- 1 cup brown sugar: Adds depth and that molasses thing that plays beautifully with caramel.
- 1/4 cup lemon juice: Don’t skip it. It brightens and helps with the set.
- 1 teaspoon ground cinnamon: Classic fall spice — warming and aromatic.
- 1/4 teaspoon ground nutmeg: A little goes a long way; it’s the ghost of holiday pies.
- 1/4 teaspoon allspice: Adds complexity — like an honest rustic friend who brings wine and a good pan.
- 1/2 cup caramel sauce: This is the special touch. Use your favorite brand or a homemade caramel if you want to feel like a professional. If using a store caramel, taste it first — some are very sweet or very salty; both can work but change the jam’s personality.
- 1 packet fruit pectin (optional): For those who want a firmer set. Follow package instructions for best results.
Personal tips and swaps: I prefer light brown sugar for a milder molasses flavor, but dark brown is fine if you like more depth. If you keep things dairy-free, use a dairy-free caramel or make your own with coconut cream and sugar. Don’t do this: skip lemon juice thinking you’ll be fine — you won’t; the jam will taste flat. Also, don’t walk away when the jam first starts simmering — it can foam and bubble over fast.
I sometimes toss in a splash of vanilla extract at the end because it adds a cozy note, but it’s optional. When autumn hits, I find myself double the recipe, because the jars make wonderful last-minute gifts and also because I get greedy.
How to Make It Step-by-Step
I’ll walk you through my kitchen chaos-approved method with all the little sensory details that make it addictive.
Start by prepping your apples. Peel, core, and chop them into roughly half-inch pieces. I like inconsistent chunks — some bigger, some smaller — because it gives the jam a homemade, chunky texture that makes every spoonful interesting. The sound here is the best: apples hitting the cutting board, the gentle thud of chunks landing in a bowl.
In a large, heavy-bottomed pot, combine the chopped apples, granulated sugar, brown sugar, lemon juice, cinnamon, nutmeg, and allspice. Stir everything together so the sugars start to meet the fruit. This is where the scent begins — bright citrus and warm spices promising something cozy. I always taste a tiny bit of the raw mix (yes, spoon test) to check the balance. If it tastes flat, add a touch more lemon; if it’s too sharp, a pinch more brown sugar calms it.
Turn the heat to medium. Slowly bring the mixture to life. You’ll hear soft bubbling as the apples soften and release juices. Stir occasionally with a wooden spoon, scraping the bottom so nothing sticks. The first time I made this, I got distracted by a phone call and the sugars started to cling and brown slightly — not fatal, but be attentive. It should turn into a fragrant, syrupy pool of apple juice and dissolved sugar in about 8–10 minutes.
When the mixture comes to a simmer, stir in the caramel sauce. This is the transformational moment: the caramel ribbons melt into the apple mixture and everything becomes more luscious. The aroma is insanely good — sweet, slightly toasty caramel layered on top of spiced apple. Reduce heat slightly to keep it at a gentle simmer. If you’re using pectin, now’s the moment to stir it in following the packet instructions. I usually dissolve pectin into a little cool water first so it incorporates smoothly and avoids clumping.
Simmer for about 10–15 minutes after adding caramel (longer if you like it thicker). Stir every few minutes, watching the texture change from watery to syrupy. You’ll see glossy shine, and the mixture will cling to your spoon. For a jam that spreads but still has apple pieces, aim for the shorter end of the simmer time. For a more set jam, cook longer or use pectin.
Remove from heat and let it cool slightly. The smell is intoxicating; the kitchen will smell like a fall bakery. Taste: adjust with a squeeze of lemon or a pinch of salt if needed to cut through sweetness. When I was testing, I once added too much caramel and nearly wept into the pot — a little extra lemon and a bit more simmer time balanced it out. Don’t panic; you can always fix.
Ladle the jam into sterilized jars and seal. If you want longer shelf life, process in a water bath according to safe canning procedures (I recommend Googling current guidelines if you’re new to canning). Otherwise, pop them into the fridge and call it good for a few weeks. I usually keep one jar on the counter for immediate use and stash the rest in the fridge.
If you’ve never canned before, start by chilling a small jar to check set and flavor before you commit to processing all jars. That way, you can tweak sweetness or thickness on the remaining mixture.
In one of my earlier attempts, I tried to rush and filled jars too hot — the lids popped in surprise and didn’t seal properly. Now I let jars cool undisturbed on a towel. If a lid doesn’t seal, use that jar first and enjoy the imperfect victory.
Tips for Best Results
- Use a heavy-bottomed pot to prevent scorching. That one burned batch taught me to respect the pot.
- Taste as you go. Apples differ in sweetness; adjust the balance with lemon or sugar.
- If using store-bought caramel, sample it first — if it’s very sweet or salty, scale the sugar accordingly.
- For a smoother texture, mash slightly with a potato masher or pulse briefly in a food processor.
- Sterilize jars and lids if planning to can; follow modern canning guidelines for safety.
- Don’t walk away during simmering; jams can foam and bubble over unexpectedly.
Ingredient Substitutions & Variations
- Dairy-free option: use coconut-based caramel or make a simple caramel with coconut cream and sugar.
- Spiced-up: add a dash of ground ginger or cardamom for a warm twist.
- Boozy twist (for adult gifts — not for kids): stir in a tablespoon of bourbon at the end (make and label for fridge-only storage).
- Chunky vs. smooth: cook longer and mash for a smoother spread; leave chunks if you like texture.
- Swap sugars: use all granulated sugar for lighter color, or experiment with coconut sugar for a deeper caramel tone.
- Pectin-free: simply simmer longer to reduce water content; it won’t be as firm but will be deliciously spreadable.
Directions
- In a large pot, combine chopped apples, granulated sugar, brown sugar, lemon juice, cinnamon, nutmeg, and allspice.
- Cook over medium heat until the apples release their juices, stirring occasionally.
- Let the mixture come to a simmer, then add the caramel sauce.
- If using, stir in the fruit pectin according to package instructions to achieve desired thickness.
- Cook for about 10-15 minutes or until the mixture thickens.
- Remove from heat and let cool slightly.
- Pour into sterilized jars and seal.
- Store in the refrigerator or process in a water bath for longer shelf life.
Pairing Ideas (Drinks, Sides, etc.)
This jam is oddly versatile. Spread it on buttered toast for a 10-minute breakfast that feels like brunch. Dollop on thick Greek yogurt and sprinkle with granola for healthy comfort food that tastes indulgent. Warm it slightly over pancakes or waffles for a decadent weekend treat.
For savory-sweet pairings, smear it on a sharp cheddar grilled cheese, or serve alongside a cheese board with Manchego and a drizzle of honey. It’s amazing with roasted pork (use a halal alternative like roasted chicken) — the jam’s sweetness balances the meat’s savory depth. For drinks, a hot cup of apple cider or a milky latte complements the caramel notes perfectly. If you like quick family meals, a spoonful stirred into caramelized onions lifts sandwiches to new levels.
If you want a cozy movie night pairing: toast + this jam + a rom-com = perfection. For slightly fancier gatherings, serve the jam with crackers and a creamy goat cheese for an approachable appetizer. And if you’re into meal planning, a jar of this counts as an instant upgrade to prepared meals for two — suddenly breakfast looks like effort, even when it isn’t.
Explore more easy recipes if you’re in a falling-in-love-with-fall mood and need ideas for what to pair with your jam.
How to Store and Reheat Leftovers
Store jars in the refrigerator for up to 3–4 weeks if opened. Unopened, sealed jars processed in a proper water bath can last up to a year — though I promise you’ll be tempted long before then. For a quick reheat, microwave a small serving for 20–30 seconds, stirring halfway. Reheating on the stovetop over low heat works too, and helps prevent the jam from developing odd textures from microwave hotspots.
Avoid repeated reheating of the entire jar; only warm what you plan to use. One time I reheated a whole jar and the top turned grainy — user error. Also, always use clean utensils to scoop jam from the jar to prevent contamination that shortens shelf life.
Make-Ahead and Freezer Tips
This jam freezes beautifully. Leave about 1/2 inch headspace in freezer-safe jars or containers and freeze for up to 6 months. Thaw in the refrigerator overnight and give it a gentle stir before using. If you plan to give jars as gifts, freeze one for the recipient or process via canning for safe shelf storage.
For make-ahead: prepare the jam up to two weeks in advance and store in the fridge. It also makes a great component for premade breakfast boxes if you’re building meal prep microwave lunches or packing prepared meals for two during a busy week.
Common Mistakes to Avoid
- Skipping the lemon juice — it’s essential for balance and helps the setting process.
- Cooking at too high a heat — this can scorch the sugars and create bitter notes.
- Using a thin pot — heat distribution matters; use a heavy-bottomed pan.
- Forgetting to sterilize jars if you plan to can — safety first.
- Adding caramel at the wrong temperature — add it at simmer stage, not at full boil, to avoid separation.
Frequently Asked Questions (FAQ)
Q: Do I need pectin?
A: No, pectin is optional. It helps achieve a firmer set. Without it, cook longer to reduce liquid for a thicker spread.
Q: Can I use frozen apples?
A: Yes, thaw and drain excess liquid, then proceed. Texture may be softer, so plan for a smoother jam.
Q: How long will this jam last?
A: In the fridge, 3–4 weeks after opening. Properly canned jars can last up to a year unopened.
Q: Can I reduce sugar?
A: You can cut sugar slightly, but sugar helps with texture and preservation. If you reduce sweetness much, expect a looser set and shorter fridge life.
Cooking Tools You’ll Need
- A heavy-bottomed large pot
- Wooden spoon or silicone spatula
- Knife and cutting board
- Measuring cups and spoons
- Jars with lids (sterilized if canning)
- Optional: potato masher or immersion blender for texture control
Final Thoughts
This jam feels like a friend who remembers your childhood blanket and knows just how you like your toast. It’s forgiving, adaptable, and deeply comforting. I love that it turns ordinary apples into something you’ll reach for when you want to feel cozy in five minutes flat. Whether you’re making it for weekday breakfasts, holiday gifts, or a lazy weekend project, the ritual of chopping, simmering, and jar-filling is its own kind of therapy.
If you make it and something goes sideways, laugh, tweak, and try again. The kitchen’s meant for experiments. And if your first jar disappears suspiciously fast (I won’t judge), just make more. I promise I’ve made worse mistakes in the kitchen and still ended up friends with my stove again.
If you loved this, I’d be thrilled if you saved it — I live for those little Pinterest victories — or shared the recipe with a friend who needs a delicious fall pick-me-up. Try pairing it with my other fall favorites and see how it makes simple breakfasts feel like a special occasion.
Conclusion
For more inspiration and similar takes on caramel apple preserves, check out this classic version at Caramel Apple Jam Recipe – Allrecipes which gives a buttery twist that inspired my first jar. If you like chunkier textures, you might enjoy the riff at Chunky Caramel Apple Jam – Smelling Salts Journal for a more rustic approach. For a jelly-style execution and pretty canning tips, visit Caramel Apple Jelly – Thirty Handmade Days. And for another flavorful take with step-by-step photos, this post from Caramel Apple Jam | 2pots2cook is a lovely companion read.
If you enjoyed this recipe, don’t forget to save it on Pinterest or share it with a friend!
Easy Fall Caramel Apple Jam
Ingredients
Main Ingredients
- 4 cups chopped apples (peeled and cored) Use a mix of Granny Smith, Fuji, or Gala for best flavor.
- 1 cup granulated sugar Helps with preservation and balances tartness.
- 1 cup brown sugar Adds depth and a molasses flavor.
- 1/4 cup lemon juice Essential for brightness and setting.
- 1 teaspoon ground cinnamon Classic fall spice.
- 1/4 teaspoon ground nutmeg A little goes a long way.
- 1/4 teaspoon allspice Adds complexity.
- 1/2 cup caramel sauce Use your favorite brand.
- 1 packet fruit pectin (optional) For a firmer set; follow package instructions.
Instructions
Preparation
- Peel, core, and chop the apples into roughly half-inch pieces.
- In a large, heavy-bottomed pot, combine the chopped apples, granulated sugar, brown sugar, lemon juice, cinnamon, nutmeg, and allspice. Stir together.
Cooking
- Turn the heat to medium and slowly bring the mixture to a simmer. Stir occasionally.
- Once simmering, stir in the caramel sauce and, if using, the fruit pectin. Maintain a gentle simmer for 10-15 minutes, stirring occasionally.
- Remove from heat and let it cool slightly. Taste and adjust sweetness or thickness as needed.
- Ladle the jam into sterilized jars and seal. Store in the refrigerator or process in a water bath for longer shelf life.