
I’m not gonna lie: the first time I tried making bread without an oven, my smoke detector staged a coup. I was in college, living in a tiny apartment with a stovetop that had a personality disorder—hot spots here, ice here—and a roommate who treated the toaster like it owed him rent. I wanted something warm, buttery, and comforting after a long cram session, but the oven was on the fritz. Enter this goofy little no-oven stovetop bread — and suddenly my kitchen smelled like a bakery that had somehow moved into a dorm room.
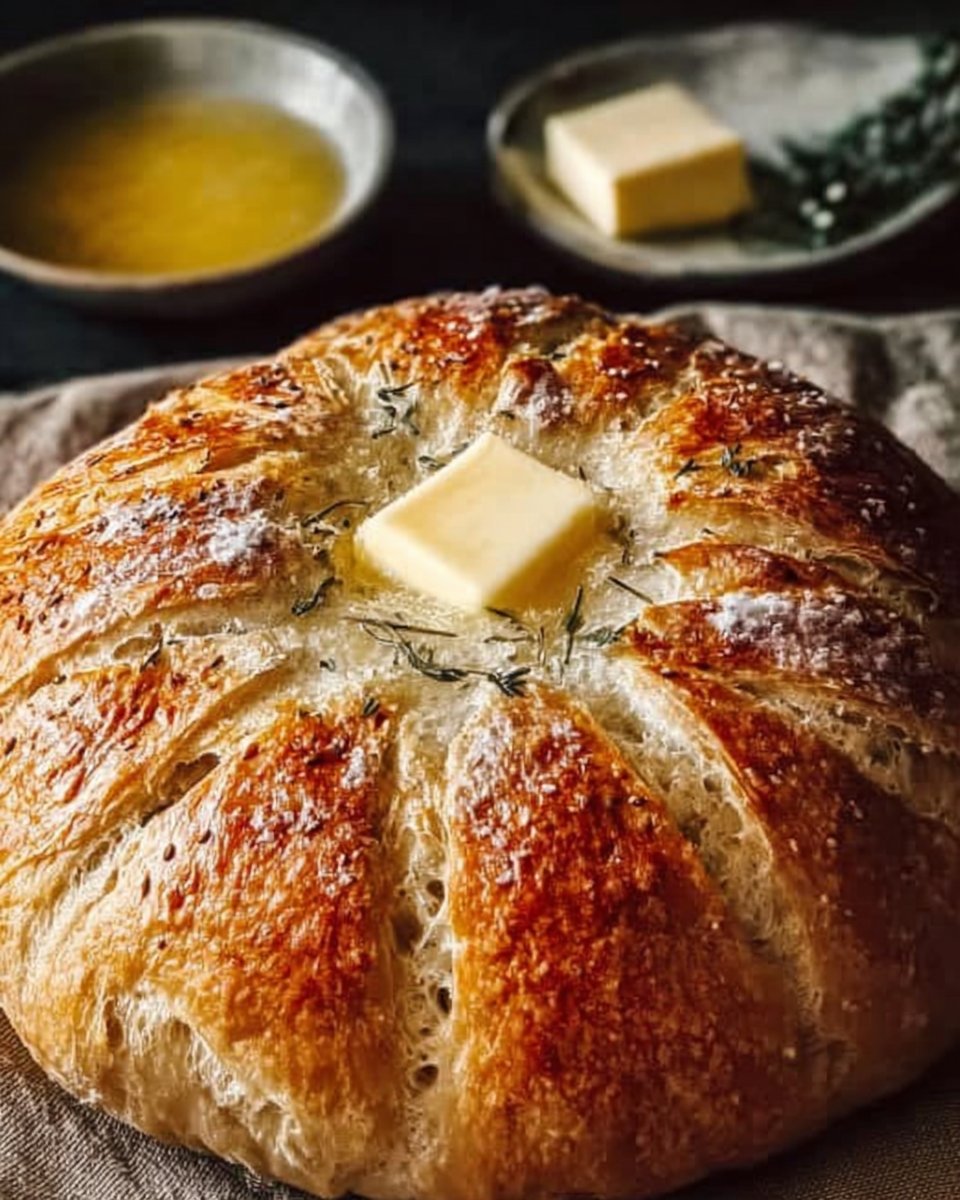
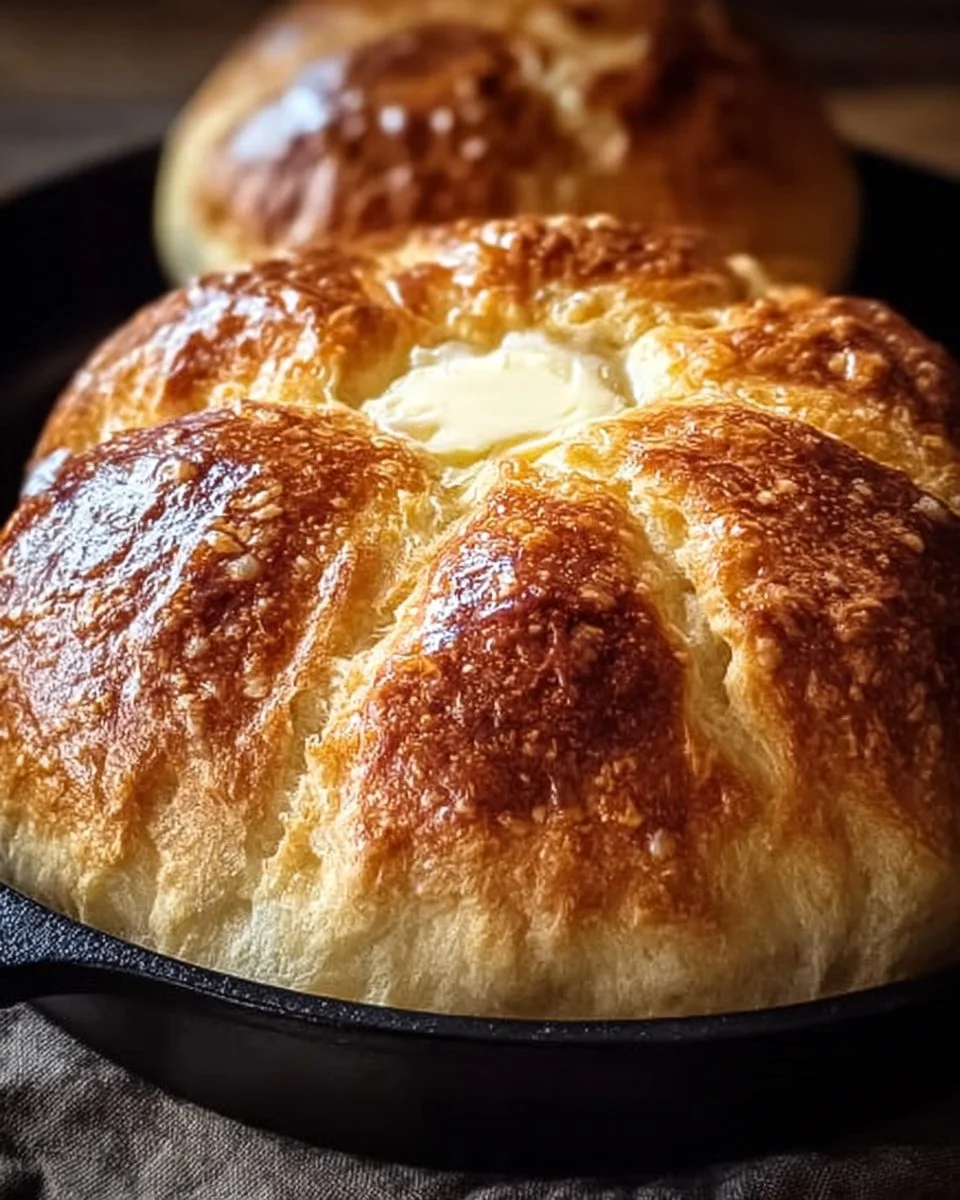
Honestly, this recipe is pure comfort: it’s one of those easy weeknight dinners stand-ins when you want carbs with a side of instant nostalgia. To be real, it’s not artisanal crusty bread worthy of a food magazine photo shoot. It’s homey, a little squishy in the middle, golden on the outside, and perfect for slathering with butter and honey. I had a moment the first time I flipped one in the pan and it puffed up like a tiny pillow—oops?—and I felt like I’d unlocked a tiny culinary superpower.
The smell will stop you dead. Warm flour, a hint of butter sizzling at the edges, a faint caramel note where the sugars hit the pan—suddenly the whole apartment feels cozy. It’s been my secret weapon for rainy nights, impromptu guests, and mornings when I desperately want something more interesting than a bagel. Plus, it fits that sweet spot between budget-friendly recipes and “I’m feeding a tiny army of hungry teenagers” —or in my case, one perpetually hungry husband and a cat who looks disappointed unless you’re holding a plate.
This recipe matters to me because it’s forgiving. I’ve stretched it, substituted milk for oat milk on a whim, and once used olive oil when I thought I was out of vegetable oil (it worked, but I will admit the flavor was a tiny surprise). It’s the kind of recipe you can do half-asleep and still impress someone who thinks store-bought bread is the height of culinary sophistication. It’s quick, it’s cozy, and it reminds me that sometimes the best dishes are the ones you can make while juggling life’s little chaos.
Why You’ll Love This Recipe
- It’s quick family meals magic—ready in about 20 minutes from start to finish.
- Super budget-friendly recipes—minimal ingredients that you probably already have.
- Crowd-pleaser: picky eaters adore the soft center and golden crust.
- Great for leftovers and reheats, which makes it perfect for meal prep microwave lunches or turning into sandwiches.
- Comforting and adaptable—think of it as healthy comfort food when paired with the right sides.
- No oven required: perfect for tiny kitchens, dorms, or the oven-is-broken emergency.
What Makes This Recipe Special?
This bread lives in the sweet spot between convenience and comfort. It’s not trying to be sourdough; it’s trying to be your best friend on a tired Tuesday. The trick is the pan—heat it right, and you get a thin, delish crust that gives way to a pillowy interior. The baking powder does the lift work, so there’s no waiting around for yeast to proof. That’s why this is my go-to for those “I want fresh bread now” moments.
I love that it’s forgiving. Overmixed? Still tasty. Slightly undercooked? Give it another minute. I’ve learned to trust the flip—if it’s golden and sounds like a little sizzle when you tap it, it’s probably ready. And the versatility? Endless. Eat it with butter and honey for a cozy breakfast, slap on hummus and salad for a light lunch, or use it as a side to a hearty soup for a real hug-in-a-meal moment.
Ingredients
- 2 cups all-purpose flour
- 1 tablespoon baking powder
- 1 teaspoon salt
- 1 tablespoon sugar
- 1 cup milk (dairy or unsweetened plant milk like oat or almond)
- 2 tablespoons vegetable oil (or neutral oil like canola)
- Butter and honey, for serving
Why these exact things? The flour is your structure. All-purpose gives you enough gluten for chew without becoming brick-like. Baking powder is the unsung hero—you get immediate lift without yeast shenanigans. Salt and a touch of sugar balance the flavors; sugar also helps the exterior brown nicely in the pan.
Milk adds tenderness and flavor; I’ve used whole milk, 2%, and plant milks. Whole milk gives a richer crumb, while oat milk makes the bread slightly sweeter and works beautifully if you’re avoiding dairy. Vegetable oil keeps the dough soft and flexible; I like canola or sunflower for neutrality. Butter and honey are optional but life-changing as a finishing move—warm butter melts into nooks, and honey adds the sticky contrast that makes you stop talking and start eating.
Personal tips: measure your flour properly—spoon it into the cup and level it off. I say that like a pro now, but my early disasters were from packing the flour like I was building a sandcastle. Also, don’t skimp on the pan heat. Too low and you get pale pancakes; too high and the outside burns before the middle cooks. I’ve learned the hard way. Oops.
Don’t-do-this warning: don’t try to sub in baking soda unless you change the acid in the recipe—baking powder is balanced for this exact mix. And don’t over-knead; it’s not pizza dough. A few minutes on a floured surface is perfect.
How to Make It Step-by-Step
I make this bread when I’m craving something warm and simple. You’ll be surprised how soothing the process is—no timers for proofing, just a little stirring and the satisfying thunk of dough on the counter.
-
Mix the dry stuff. In a mixing bowl, whisk together the 2 cups all-purpose flour, 1 tablespoon baking powder, 1 teaspoon salt, and 1 tablespoon sugar. It smells like promise: floury and slightly sweet. I always pause here to scrape down the sides of the bowl because I’m that person. If you’ve ever wondered whether to sift—don’t stress. Whisking does the job.
-
Combine the wet ingredients. In a separate bowl or measuring cup, pour 1 cup milk and whisk in 2 tablespoons vegetable oil. I like doing this in a measuring cup—it’s less mess. The oil creates that soft, almost pillowy texture in the crumb, and you’ll see the surface get a little glossy as you mix.
-
Bring them together. Gradually pour the wet into the dry, stirring with a wooden spoon until the dough comes together. It’ll look shaggy and maybe a bit sticky. That’s normal. Resist the urge to add more flour at this stage; the dough tightens up while you knead.
-
Knead lightly. Turn the dough onto a lightly floured surface. Knead for a minute or two—really, a short, gentle knead. You’re aiming for cohesion, not muscle-building. When it feels smooth and a little bouncy, you’re done. If it’s too sticky, dust with tiny amounts of flour; too dry, add a splash of milk.
-
Shape into discs. Divide the dough into 6–8 equal portions depending on how big you want your breads. I usually make 6 because my family loves bigger pieces. Roll each portion into a ball, then press gently into a round disc about 1/2-inch thick. They shouldn’t be perfect—think rustic, not Instagram-perfect. I love the little lumps and imperfect edges—they caramelize in the pan and become charming.
-
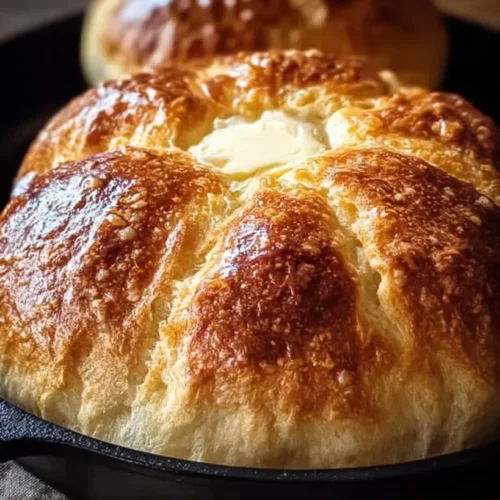
Heat the pan. Heat a heavy skillet over medium heat. Cast-iron works wonders for even browning, but a nonstick pan is fine too. Lightly grease with a tiny brush of oil or a pat of butter. The sound when the dough hits the hot pan is very satisfying—a soft hiss, like a welcome.
-
Cook and flip. Place 2–3 discs in the pan, depending on size. Cook for about 4–5 minutes on the first side. You’ll see little bubbles form and the edges start to set. Flip carefully with a spatula. The second side may cook a little faster; another 4–5 minutes should do it. The breads should be golden brown and smell slightly nutty from the caramelized surface.
-
Finish and serve. Transfer to a wire rack and brush with butter if you’re feeling decadent. Drizzle honey, slice, or eat warm with whatever makes your heart sing.
I learned a lot through trial. One time I left them too close in the pan and they steamed instead of browning—wet tops and sad edges. Next time, I spaced them out and the world made sense again. Another time I used olive oil and it made the bread taste fancy in a way I didn’t expect; it was good, just different. The point is: this recipe forgives mistakes. It will still hug you from the inside out.
Tips for Best Results
- Heat matters: medium heat is your friend. If smoke starts, lower it immediately.
- Don’t overcrowd the pan: give each disc a little space to breathe so it crisps.
- Keep shape consistent: similar-sized discs cook evenly. I use a measuring scoop to portion if I’m feeling precise.
- Butter finish: brush with butter right after cooking for extra shine and flavor.
- Rest on a wire rack: stacking them traps steam and ruins the crust. Let them cool a minute so the interior sets.
Ingredient Substitutions & Variations
- Milk swaps: use oat milk or almond milk for dairy-free options. Oat milk gives a slightly sweeter result.
- Flour variations: you can replace up to 1/4 cup of the all-purpose flour with whole wheat for a nuttier flavor; more than that will make the texture denser.
- Oil options: sunflower or canola keeps flavor neutral; use olive oil for a savory twist (it’s tasty with herbs).
- Flavor add-ins: stir in chopped rosemary, minced garlic, or grated cheese to the dough for a savory bread. For a sweet twist, fold in a tablespoon of cinnamon and a touch more sugar.
- Gluten-free: I’ve tested this with a cup-for-cup gluten-free flour blend—it works but is slightly more fragile, so handle gently.
Directions
- Combine dry ingredients in a bowl.
- Mix milk and oil in another bowl.
- Gradually stir wet into dry until dough forms; knead lightly.
- Divide and shape into discs.
- Heat lightly greased pan over medium heat; cook 4–5 minutes per side.
- Serve warm with butter and honey.
Pairing Ideas (Drinks, Sides, etc.)
This bread is a chameleon. For breakfast, it pairs perfectly with a mug of strong coffee or a milky chai. For lunch, turn it into a sandwich with roasted vegetables, hummus, or leftover chicken (or a plant-based protein). It plays nicely with a bowl of soup—tomato basil, lentil, or chicken noodle are all comfort classics.
If you’re leaning into the sweet side, serve with a smear of ricotta and a drizzle of honey or jam. For a fuller meal, add scrambled eggs and roasted tomatoes for a full english breakfast-inspired plate without the fuss. And here’s a fun one: make tiny discs and use them like naan with curry—serviceable and delightful.
How to Store and Reheat Leftovers
Store cooled bread in a paper bag or loosely wrapped in a clean kitchen towel for up to 2 days at room temperature. For longer storage, place in an airtight container and refrigerate for up to 4 days. Reheat in a skillet over low heat for 1–2 minutes per side to revive the crust. Microwaving works in a pinch—wrap in a damp paper towel and microwave for 20–30 seconds, but expect the exterior to be softer.
Mistakes to avoid when storing: don’t seal hot bread into a plastic bag—trap the steam and you’ll end up with soggy bread. Also, avoid stacking while warm; give them a minute to breathe on a rack.
Make-Ahead and Freezer Tips
You can freeze the shaped discs raw. Flash-freeze them on a baking sheet until firm, then transfer to a freezer bag for up to 2 months. When you’re ready, thaw in the fridge overnight or at room temperature for an hour, then cook in the skillet as directed. Cooked bread freezes well too—wrap individually and reheat in a toaster oven or skillet for best texture.
Pro tip: If you want to meal-prep, double the recipe and freeze half raw. That way, you always have fresh bread on demand.
Common Mistakes to Avoid
- Over-kneading: tough bread is real and unnecessary. Knead just until smooth.
- Too-high heat: burns the outside and leaves the center undercooked. Check your stove—medium, not high.
- Overcrowding the pan: prevents proper browning. Cook in batches.
- Adding too much flour: leads to dense, dry bread. Keep additions minimal and measured.
- Storing hot bread in plastic: leads to sogginess—cool first.
Frequently Asked Questions (FAQ)
Q: Can I make this gluten-free?
A: Yes—use a cup-for-cup gluten-free flour blend and handle gently. Expect a slightly different texture.
Q: Can I use water instead of milk?
A: You can, but milk gives better flavor and tenderness. If using water, add a tablespoon of oil and consider a splash of yogurt for richness.
Q: How many servings does this make?
A: It makes about 6 medium discs—adjust portions by making smaller or larger discs.
Q: Can I add herbs or cheese?
A: Absolutely. Fold in chopped herbs or grated cheese during mixing for savory variations.
Q: Is this recipe suitable for high protein meals or high carb high protein low fat meals?
A: This bread is primarily carb-focused. Pair it with high-protein sides like eggs, legumes, or grilled chicken (or plant-based proteins) to build a balanced high protein meals plate.
Cooking Tools You’ll Need
- Mixing bowl and whisk or wooden spoon
- Measuring cups and spoons
- Lightly floured surface for kneading
- Heavy skillet or cast-iron pan (nonstick works too)
- Spatula for flipping
- Wire rack for cooling
Final Thoughts
This little no-oven stovetop bread has saved more breakfasts than I can count. It’s imperfect, forgiving, and somehow always makes a meal feel intentional. I love that it turns pantry staples into something warm and memorable. It’s the kind of recipe that doesn’t judge you for using plant milk, or for burning one batch while the kids are screaming about who gets the last cereal box. It just keeps giving: comfort, nostalgia, and a warm slice that somehow feels like a hug.
If you try it, I want to hear your version—the rosemary twist, the cheesy flip, the one you fed to a skeptical sibling who then asked for seconds. Share a photo, tag me where you post, and let’s keep this cozy bread club alive.
If you enjoyed this recipe, don’t forget to save it on Pinterest or share it with a friend!
Conclusion
If you want ideas for similar skillet breads, check out this lovely I Heart Eating skillet bread recipe for inspiration. For a no-knead, oven-baked take that’s useful when your oven is actually working, this Dutch Oven No Knead Bread walkthrough is excellent. And for another stovetop approach with helpful photos, see Chef Lola’s guide on how to make bread rolls without an oven.
No-Oven Stovetop Bread
Ingredients
Dry Ingredients
- 2 cups all-purpose flour Provides structure.
- 1 tablespoon baking powder Immediate lift without yeast.
- 1 teaspoon salt Balances flavors.
- 1 tablespoon sugar Helps brown the exterior.
Wet Ingredients
- 1 cup milk (dairy or unsweetened plant milk) Adds tenderness and flavor.
- 2 tablespoons vegetable oil Keeps the dough soft.
For Serving
- Butter and honey Optional, for serving.
Instructions
Preparation
- In a mixing bowl, whisk together all-purpose flour, baking powder, salt, and sugar.
- In a separate bowl or measuring cup, combine milk and vegetable oil.
- Gradually stir the wet ingredients into the dry ingredients until the dough comes together.
- Turn the dough onto a lightly floured surface and knead gently for a minute or two.
Cooking
- Divide the dough into 6–8 equal portions and shape into discs.
- Heat a lightly greased pan over medium heat.
- Place 2–3 discs in the pan and cook for about 4–5 minutes on the first side until golden brown.
- Flip carefully and cook another 4–5 minutes on the second side.
- Transfer cooked discs to a wire rack and brush with butter if desired.