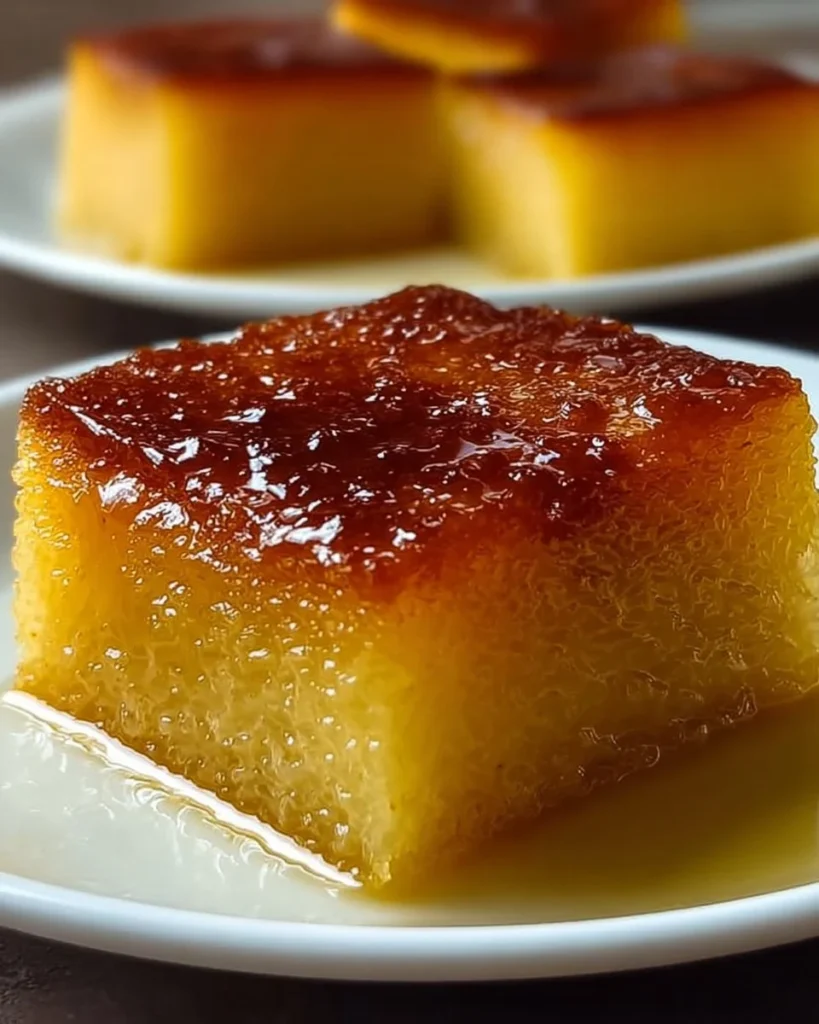
Easy and Delicious Steamed Cassava Cake: A Comforting Delight
There’s something magical about discovering a beloved family recipe tucked away in a handwritten book or jotted down on a scrap of paper. For me, that discovery came when I stumbled upon my grandmother’s recipe for Steamed Cassava Cake. The moment I saw those familiar ingredients—grated cassava, coconut milk, and condensed milk—nostalgia washed over me. I could almost hear the gentle bubbling of the steam pot and smell the sweet, nutty aroma wafting through the kitchen.
Growing up in a family with a rich culinary history, recipes often felt like heirlooms passed down through generations. The tradition of making this cake was no exception. I remember gathering around the table, excitedly waiting for the soft, creamy slice of cassava cake to emerge, warm and inviting. It was always a cozy evening filled with laughter, stories, and of course, a few kitchen mishaps. And, oh boy, as I experimented with this recipe over the years, there were many of those!
Now, every time I make this cake, it feels like a warm hug—perfect for when you want to create those heartfelt moments, whether during a rainy afternoon or a festive family gathering. The best part? It’s surprisingly easy to whip together, making it an ideal choice for those busy weeknights when you still crave something comforting and delicious.
And while it may seem like a dessert, this Steamed Cassava Cake can pull double duty. It works beautifully as a snack or a light breakfast—yes, please! So, trust me when I say, you’ll want to keep this recipe on hand. Let’s dive into the delightful world of steaming cassava!
Why You’ll Love This Recipe
- Ease of Preparation: This recipe is perfect for busy weeknights, taking just 15 minutes to prep before it goes into the steamer.
- Comforting Texture: With its tender, moist consistency, a slice of this cake feels like hugs from the inside out.
- Coconut Flavor: The combination of coconut milk with grated cassava creates a unique flavor that’s hard to resist.
- Family-Friendly: Even the pickiest of eaters will find delight in its subtle sweetness and familiar textures.
- Meal Prep Win: This cake can be enjoyed warm or at room temperature, making it a fantastic addition to lunch boxes or snack times.
- Leftovers to Savor: If there are any leftovers (which is rare!), they store well and taste just as amazing the next day!
What Makes This Recipe Special?
Each ingredient in Steamed Cassava Cake carries its own significance, and the fusion of flavors and textures creates a one-of-a-kind experience. The tender cassava forms the base that’s not only gluten-free but also filled with nutrients. Coconut milk ramps up the tropical vibes while providing a rich creaminess. The condensed milk adds a sweetness that can almost make you swoon. Honestly, it’s like a mini vacation each time you take a bite.
And the best part? You don’t have to be a gourmet chef to nail this cake. If I’m being real, my first attempt was… well, let’s just say it looked like a hot mess. But that’s the beauty of cooking—there’s always room for improvement and tweaking until you find your groove.
Ingredients
-
2 cups grated cassava: The heart of the dish, this starchy root vegetable gives the cake its signature texture. Make sure to use freshly grated cassava for the best results, as frozen can sometimes yield excess moisture.
-
1 cup coconut milk: This not only adds flavor but also moisture. Use full-fat coconut milk for a richer taste. (Side note: I once tried low-fat coconut milk out of sheer optimism, and well, let’s just say it wasn’t my best idea. Don’t do that!)
-
1 cup condensed milk: Sweet, luscious, and utterly delightful. This ingredient is a game changer that brings everything together, balancing the flavors beautifully. Don’t skimp on this! Your taste buds will thank you.
-
1/2 cup sugar: It’s always a fine line deciding how sweet to make anything, and the combination of both sugar and condensed milk gives this cake that ideal hit of sweetness.
-
1 teaspoon vanilla extract: This ingredient adds depth to the flavor profile and helps bring out the fragrant notes of the coconut and cassava.
-
1/2 teaspoon salt: This little gem is crucial! It enhances all the other flavors, and let me tell you, a pinch of salt in desserts is the secret superhero that nobody talks about.
How to Make It Step-by-Step
Alright, get ready to roll up those sleeves! Here’s how to tackle this recipe.
Step 1: Grate the Cassava
Everything starts with our star ingredient. Grab a box grater (or a food processor if you want to save yourself from arm workouts). Personally, I prefer using a grater because it feels more hands-on, but a processor can save time. You’ll want to make sure you’ve got a cozy 2 cups of freshly grated cassava.
Step 2: Mix It All Together
Now, grab a mixing bowl (not the fancy one, we don’t need that pressure!). Combine your grated cassava, coconut milk, condensed milk, sugar, vanilla extract, and salt. Mix until everything looks nicely blended. As I stirred, the sweet aroma of coconut wafted through my kitchen like a warm invitation, making me a bit giddy.
Step 3: The Steaming Setup
Pour this glorious mixture into a greased steaming dish. I usually use a round cake pan for this. Make sure it’s well greased; we don’t want any surprises! If you’re like me and tend to forget, your cake will stick, and then the whole sliding-out moment becomes an episode of “Oops – Fail!”
Now, let’s get our steamer ready. If you don’t have a steamer, you can create one with a pot and a heat-proof rack or even a saucer—just place your dish on that. Fill the pot with enough water to steam but not so much that it’ll splash into your cake mixture.
Step 4: Steam It Up
Cover your steamer (or pot) and start the heat. Let it steam for about 45-60 minutes. The key here is checking it at the 45-minute mark. You want it firm and a toothpick inserted in the center to come out clean. I once lost myself in binge-watching a series and forgot about the cake. Let’s just say, it emerged more like a pancake than a cake.
Step 5: Let It Cool
When it’s done, let your beautiful cake cool for a few minutes before you dig in. Remember, patience is a virtue! The warm, pillowy texture can be so tempting, but giving it a moment to cool gives your taste buds the best experience.
Tips for Best Results
-
Use Fresh Cassava: Freshly grated cassava can make a huge difference in taste and texture, so avoid the frozen stuff if you can.
-
Watch the Steam: If you notice excessive steam escaping, keep an eye on the water level to prevent it from running dry.
-
Sweetness Level: Adjust the sugar according to your taste, especially if you want it less sweet and more cassava-forward.
Ingredient Substitutions & Variations
Feeling adventurous? You can customize this cake in so many delightful ways! Here are some ideas:
- Add Flavors: A touch of grated lemon or orange zest can elevate the flavor, giving it a citrusy freshness.
- Nut Allergies: For those allergic to coconut, consider using oat or almond milk—though it will give a different flavor profile, it still works.
- Toppings: Serve warm with a drizzle of coconut cream on top or even a sprinkle of toasted shredded coconut for that extra crunch.
Directions
- In a mixing bowl, combine grated cassava, coconut milk, condensed milk, sugar, vanilla extract, and salt. Mix until well combined.
- Pour the mixture into a greased steaming dish.
- Steam over boiling water for about 45-60 minutes or until the cake is firm and a toothpick inserted in the center comes out clean.
- Allow the cake to cool slightly before serving. Enjoy your delicious steamed cassava cake!

Pairing Ideas (Drinks, Sides, etc.)
Pair this beautiful steamed cassava cake with a warm cup of tea or coffee. It’s perfect for brunch or dessert. Now picture this: you, snuggling up on the couch with a slice of cake and your favorite rom-com. Absolute perfection, right?
How to Store and Reheat Leftovers
If you’ve got leftovers (the dream), store pieces in an airtight container in the fridge. They usually last about 3-4 days—if they last that long, that is!
To reheat, just pop a slice in the microwave for about 20-30 seconds. If you like a slight crust on your slice, you can warm it gently in a skillet.
Make-Ahead and Freezer Tips
This cake can be prepped a day in advance and stored in the fridge before steaming. Just steam it the next day for fresh, warm delight!
If you want to freeze it, let the cake cool completely, then wrap it tightly in plastic wrap and place it in a freezer-safe bag. It’ll keep for up to a month. When you’re ready to enjoy, let it thaw in the fridge overnight and steam to warm it back up.
Common Mistakes to Avoid
- Overcooking: Pay attention to the steaming time; overcooking can lead to a dry cake.
- Inadequate Greasing: If you don’t grease your dish well, you may have a cake that’s not coming out easily. Trust me, scraping it out can be a nightmare!
Frequently Asked Questions (FAQ)
Q: Can I use frozen cassava?
A: You can, but make sure to drain excess moisture. Fresh is best for texture.
Q: How do I know when it’s done?
A: The cake will be firm, and a toothpick should come out clean when inserted in the center.
Q: Can I add other flavors?
A: Absolutely! Feel free to experiment with spices or citrus to your liking.
Q: What if I can’t find cassava?
A: Alternatives include sweet potatoes or even a mix of flour and starch, though flavors will differ.
Q: Can I make this vegan?
A: Sure! Use plant-based versions of condensed milk and coconut milk.
Cooking Tools You’ll Need
- Grater or Food Processor
- Mixing Bowl
- Steaming Dish (round cake pan or suitable steaming dish)
- Steamer setup (pot with a lid)
- Toothpick for testing doneness
Final Thoughts
This Steamed Cassava Cake holds a special place in my heart and my stomach! Each bite reminds me of family gatherings, laughter, and a hint of chaos in the kitchen. There’s something so comforting and nostalgic about replicating a dish that’s woven into your memories, and I dare say, it might just become a staple in your home too.
If you decide to give it a shot, I’d love to hear your stories and variations! Food unites us, don’t you think?
And if you enjoyed this easy and delicious recipe, don’t forget to save it on Pinterest or share it with a friend!
Conclusion
In this journey of making Steamed Cassava Cake, we’ve not only embraced the flavors of tradition but also the joy of creating something special that unites us all. Remember, every kitchen moment is an opportunity for laughter, learning, and love. If you’re curious for further recipes or want additional takes on this classic, check out the detailed guide on Steamed Cassava Cake by Panlasang Pinoy. Explore more flavors and techniques with Crafts to Crumbs, or dive deeper into the heritage of Filipino desserts with the Cassava Cake Recipe from Panlasang Pinoy. Join me in cooking, and let’s create more delicious memories together!