
I still remember the first time I tried to make mochi at home. It was a rainy Tuesday, the kind that makes your apartment smell like wet sweaters and ambition. I had two perfectly ripe mangoes wobbling on the counter and a craving that felt equal parts tropical vacation and cozy kitchen therapy. Honestly, I thought, how hard could it be? I’d seen those glossy rounds at the Asian bakery downtown and figured, in that impulsive, overly optimistic way only cooks do, that I’d whip up a batch between emails and laundry. Spoiler: there was a flour dust storm at 2 a.m. and a dough that threatened to glue my rolling pin to my hand. Oops.
But that messy, sticky night is exactly why this Easy, Delicious, Quick homemade mango mochi recipe has a permanent spot in my brain and my fridge. There’s comfort in the absurd — the tiny disaster turned into a triumph. That first failed fold (I ended up making a mango rice-ball blob) taught me to respect the dough: not too hot, not too dry, and never treated like cookie dough. Mochi is humble, forgiving, and a lot like a good friend — a little chewy, sweet, and always there when you need something soft and uplifting.
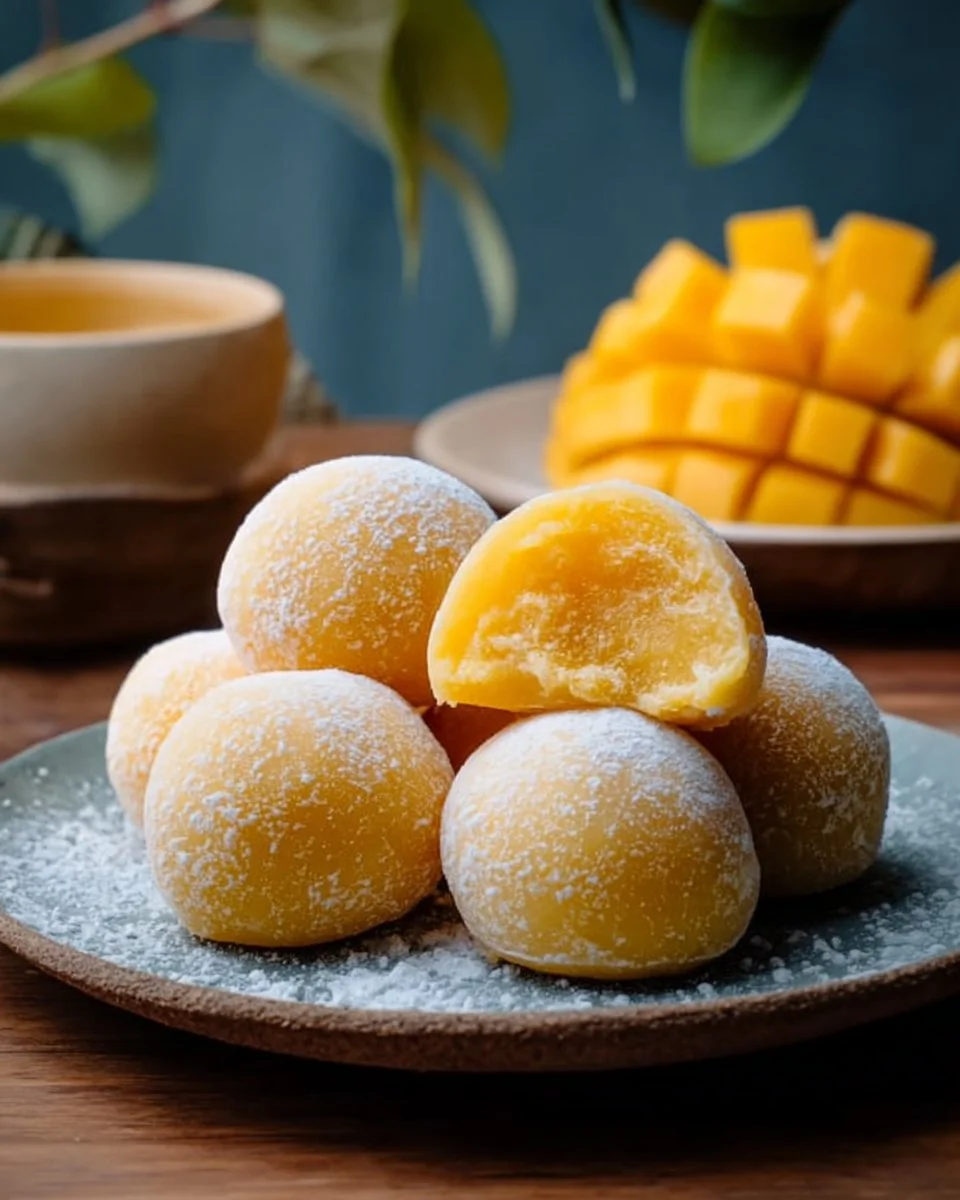
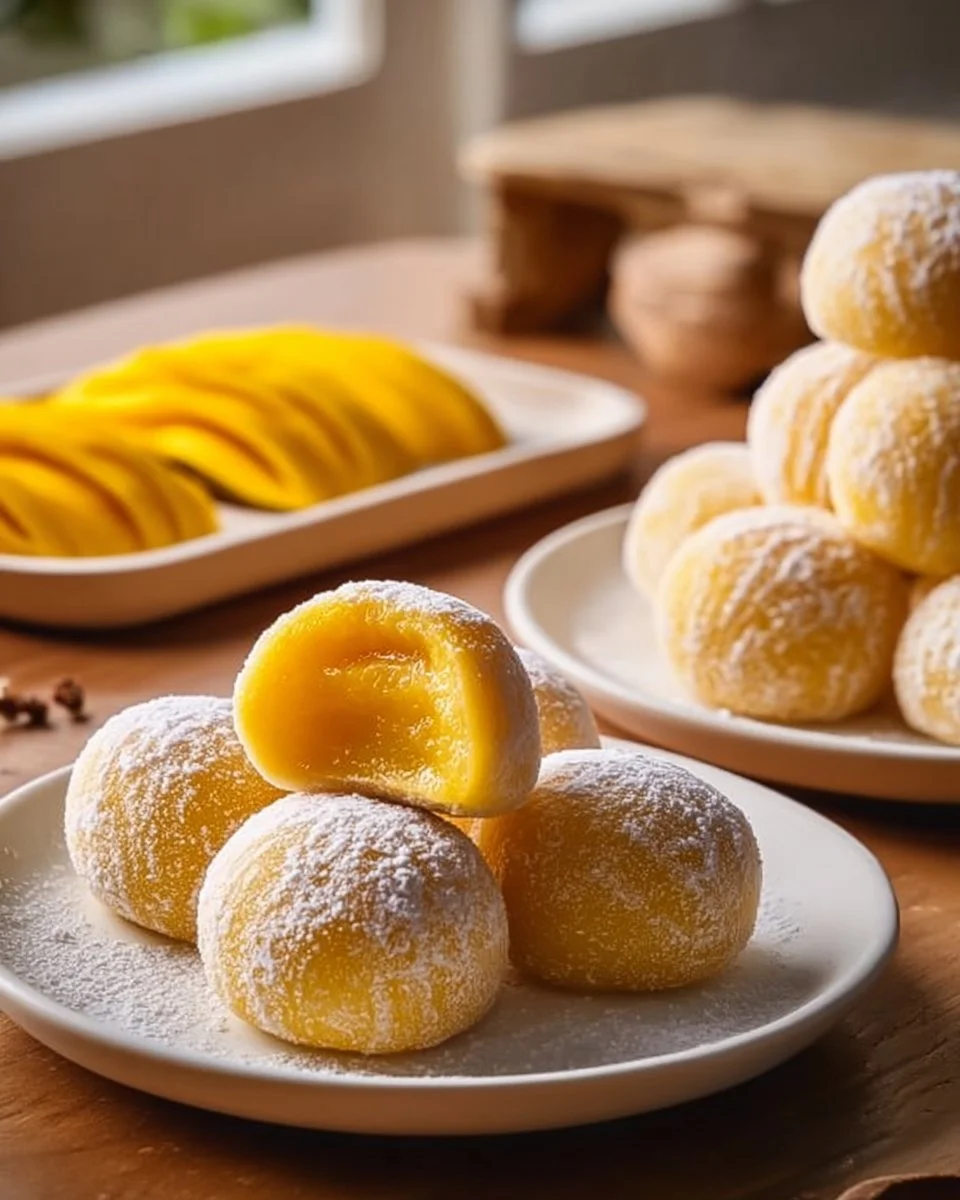
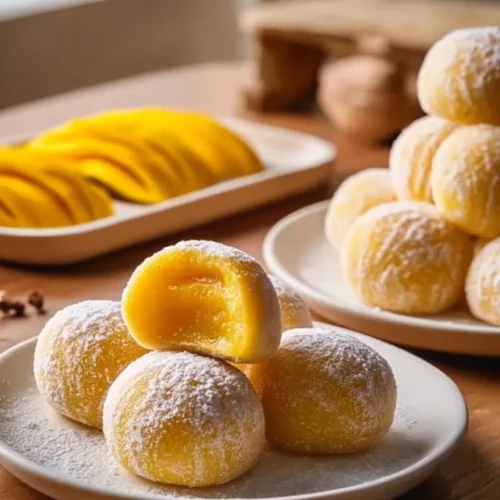
If you’re coming for a sweet bite with minimal fuss, this is your jam. Or rather, mango. The aroma when you pierce open the finished mochi — bright mango, a whisper of sugar, and the warm, yeasty hint of freshly steamed rice — is small, domestic magic. You’ll hear the slight squish as you bite in, feel the pillowy chew, and taste that sunny mango center explode on your tongue. It’s such a small thing, but it has the power to flip a mood.
This recipe is microwave-friendly, quick, and approachable even if your kitchen confidence is still a work in progress. It pairs perfectly with a cozy blanket, a badly dubbed rom-com, or the triumphant silence after you’ve finally conquered a sticky, rebellious dough. Also? It’s surprisingly Pinterest-friendly — those pastel rounds make for gorgeous flat-lay shots even when your apron is splattered. If you’re into budget-friendly recipes, easy weeknight dinners (yes, mochi can be a dessert after dinner), or sneaking healthy comfort food moments into the week, you’re in the right place.
Why this recipe matters to me: it saved a sorrowful Tuesday, became my go-to party trick, and taught me how to embrace kitchen chaos. So let’s get to it — mango in hand, cornstarch at the ready, and a few honest warnings: you will get sticky, you will laugh at yourself, and you will eat more than you intended. To be real, that’s half the fun.
Why You’ll Love This Recipe
- It’s simple: just a handful of ingredients and a microwave — perfect for quick family meals and those late-night cravings.
- It’s comforting: pillowy, chewy, and sweet, like a hug in dessert form — feels like healthy comfort food even when you know it’s a treat.
- Great for leftovers: keeps well in the fridge for a few days and makes lunchbox magic for two — ideal if you’re into prepared meals for two or premade lunch meals.
- Kid-approved: the bright mango center and playful texture turn picky eaters into enthusiastic tasters.
- Budget-friendly: uses pantry staples and ripe fruit, so it checks the budget-friendly recipes box without compromising flavor.
- Fancy-enough for guests: looks artisanal on a dessert plate but takes less time than a tray of cookies.
What Makes This Recipe Special?
The charm is in the contrast: the soft, slightly elastic mochi exterior versus the juicy mango center. That temperature and texture play — cool fruit inside warm, chewy dough — is a tiny drama every time you bite into one. My secret trick (learned through trial and many sticky palms) is using the ripest mangoes for puree and cornstarch for dusting generously; it prevents the dough from clinging to everything like a needy friend. I also adore this recipe because it’s flexible: swap fillings, tweak sweetness, and microwave in small batches. It’s a dessert that feels both indulgent and approachable, like wearing pajamas to a dinner party and somehow getting away with it.
Ingredients
Let me paint the pantry picture. You’ll need only a few things, and each plays a clear role. The ingredient simplicity is what makes this recipe so forgiving and easy to scale for easy high protein high calorie meals fans who want a sweet side (add a protein-rich yogurt dip, if you must).
- 2 ripe mangoes, pureed — This is the flavor star. Use mangoes that give slightly to the touch and smell sweet at the stem. If you try to save money and use underripe mangoes, the filling will be dull and tart. Don’t do that. If mango season is over, frozen mango chunks work after thawing.
- 1 cup glutinous rice flour — Not regular rice flour; this one gives the stretchy, chewy texture that defines mochi. Brands vary a little, but most Asian grocery stores and many mainstream supermarkets stock it.
- 1/4 cup sugar — Balances the mango acidity and sweetens the dough. If you prefer less sugar, you can start with 3 tablespoons and taste the puree.
- 1/2 cup water — Hydrates the flour to form the sticky dough. Add in small increments if your dough feels too dry. Remember, microwave times and flour absorption vary.
- Cornstarch for dusting — Non-negotiable in my book. It keeps the mochi from demolishing your hands, your counter, and your dignity. Use potato starch as an alternative if you prefer.
Personal tips: I like to use a silicone microwave-safe dish to reduce sticking and make cleanup easier. If you’re brand-loyal, I’ve had great luck with Koda-brand glutinous rice flour and Bob’s Red Mill’s cornstarch for dusting. Also, when pureeing the mango, don’t overblend to soup — a little texture in the filling is delightful. If your mango is ultra-sweet, cut the sugar slightly.
Substitutions: if you’re avoiding refined sugar, try a natural sweetener like maple syrup, but reduce the water by a tablespoon if it’s very runny. For a dairy-free twist, nothing to swap here — this recipe is already vegan-friendly (and gentle on budgets).
Don’t do this: try to handle the dough without dusting. Also, don’t rush cooling; if the dough is too hot when you knead, the mango will melt and make a juicy disaster. Trust me — I learned that the sticky, hard way.
How to Make It Step-by-Step
This is the part where I get messy and honest. I’ve done this a dozen times and each batch tells me something new — like how my microwave likes to overcook in three-minute chunks and how I always forget to set a timer when I’m distracted by a good (bad?) reality TV moment.
-
Prepare your mango puree.
Peel and chop the mangoes, then pulse in a blender until smooth. I like my puree bright, not ultra-syrupy. The scent at this stage is intoxicating — sunny and floral. Taste it; if your mangos are shy on sugar, add a teaspoon or two. A little texture here is cozy and keeps the filling from becoming one-note. -
Mix dry ingredients.
In a mixing bowl, whisk together 1 cup glutinous rice flour and 1/4 cup sugar. This is when you’ll wonder if you measured correctly. You did. Breathe. Add 1/2 cup water and stir until the batter looks smooth and glossy. It should resemble thick pancake batter more than bread dough. If it’s lumpy, keep stirring; a few lumps will melt in the microwave. -
Microwave the dough.
Pour the mixture into a microwave-safe dish and cover with plastic wrap. Microwave on high for 2 minutes, then take it out and stir furiously with a silicone spatula (this is the part where your countertop might end up with a dusting of sugar — again, normal). Microwave for another minute or until it becomes a sticky, translucent dough that pulls away from the sides. Microwaves are temperamental: my old microwave needed 3 minutes total, my new one is more impatient. Check early. If you overcook, the dough will dry out and crack, which is… not ideal. -
Cool slightly, then dust and knead.
Let the dough cool until it’s warm but not burning. This is where I failed the first time — I tried to knead it too hot and ended up with a molten mango-smeared mess. When cool, sprinkle a generous layer of cornstarch on a clean surface and dump the dough out onto it. Dust your hands and the dough heavily. Knead gently; you’re not making pizza dough, so you only need to fold it a few times to get it pliable and smooth. -
Divide and flatten.
Pinch off small portions (roughly 12-16 pieces depending on desired size). Roll them into balls, then flatten each one into a disc about 2-3 inches wide. Keep the cornstarch as your friend here. If your discs spring back, sprinkle a touch more cornstarch and try again. -
Fill and seal.
Place about a teaspoon of mango puree in the center. Be careful: too much filling and the mochi refuses to cooperate. Fold the edges up like you’re tucking in a fitted sheet, pressing gently to seal. This is the satisfying part — the fold, the pinch. If the puree leaks, you know you were too generous. Learn for next time. -
Final dust and rest.
Roll each finished mochi in cornstarch to prevent sticking. Tap off excess. Arrange them on a plate, and give them a few minutes to settle so the mango center firms up slightly. If you try one right away, it’s divine and dangerously squishy. If you’re serving later, refrigerate lightly — they’re best at cool, not cold.
Throughout this process, smell the mango each time you open the blender. Listen for the hush when the house settles and you’re the only one awake, rolling little mango pillows. Feel the dough — it’s forgiving and soft. Taste a tiny bit of raw dough for curiosity (not recommended in large amounts). Laugh at your first few ugly mochi and know they taste the same.
I’ve made these in batches for potlucks and as midnight therapy. Once, I forgot to label them and brought them to a brunch where a friend mistook them for a savory dumpling. She took a big bite, paused, and then laughed so hard she almost apologized to the plate. That memory? Worth every sticky finger.
Tips for Best Results
- Use ripe mangoes. If they’re firm and stubborn, the filling won’t have that bright, tropical pop.
- Don’t skip the cornstarch. It’s the difference between surviving the process and needing new hands.
- Be conservative with the mango filling. Less is more; you can always add more next time.
- Microwave times vary. Start with 2 minutes total and add 30-second increments if needed.
- Work quickly but calmly. Mochi hates humidity and extreme temperature swings; keep your kitchen at a comfortable room temp.
- If your dough is sticky even with cornstarch, chill it briefly for 10 minutes to make it more manageable.
Ingredient Substitutions & Variations
- Sugar alternatives: Maple syrup or agave can work, but reduce water slightly. For a sugar-free version, try monk fruit or erythritol, and taste the mango to see if extra sweetener is needed.
- Fruit swaps: Swap mango for strawberry puree, lychee, or even a mixed berry compote for a tart-sweet twist.
- Textured filling: Fold a few small mango chunks into the puree for a juicy, pleasant surprise.
- Flavor boosts: Add a few drops of lime zest or a pinch of salt to the puree to brighten the sweetness.
- Gluten-free note: Glutinous rice flour is naturally gluten-free despite the name; if you have celiac disease, ensure cross-contamination is avoided.
- For a protein boost (if you’re into high protein microwave meals), serve with a Greek yogurt dip or fill with a thickened protein pudding — it’s odd but satisfying.
Directions
- Combine glutinous rice flour, sugar, and water in a bowl; whisk until smooth.
- Pour mixture into a microwave-safe dish and cover with plastic wrap.
- Microwave on high for 2–3 minutes, stirring halfway through, until the mixture forms a sticky, translucent dough.
- Allow the dough to cool slightly. Dust a clean surface with cornstarch and knead dough until pliable.
- Divide into small balls, flatten each piece, spoon a small amount of mango puree in the center, and fold edges to seal.
- Dust each finished mochi in cornstarch to prevent sticking. Serve immediately or refrigerate.
Pairing Ideas (Drinks, Sides, etc.)
Mango mochi is a delicate dessert that pairs well with simple, soothing companions. Try it with jasmine tea to complement the floral mango notes, or a fizzy yuzu soda if you want to keep things bright and festive. For a richer pairing, a scoop of coconut ice cream creates a dreamy tropical duo — think of it as healthy comfort food with a side of indulgence. Serve alongside a small plate of fresh fruit for a color-contrasting platter at your next brunch. If you like easy weeknight dinners, this little dessert makes a great finish to something like a light fish or tofu bowl.
How to Store and Reheat Leftovers
Store mochi in an airtight container in the refrigerator for up to 3 days. Don’t stack them too tightly; they’ll fuse into one another if smooshed. To revive the chewiness, let them come to room temperature for 20–30 minutes before eating. If they’re fridge-cold and you want a warm center, microwave a mochi for 6–8 seconds — careful, it heats quickly. Avoid freezing filled mochi; ice crystals can break the mango’s texture. If you must freeze, freeze individually on a tray, then transfer to a bag; thaw in the fridge overnight.
Make-Ahead and Freezer Tips
You can make the mochi dough ahead and store it unfilled in the fridge for up to 24 hours, dusted in cornstarch. When ready to serve, divide and fill with fresh mango puree. For longer storage, freeze unfilled discs separated on a baking sheet, then bag them; thaw in the fridge and fill right before serving. Filling frozen dough leads to soupy results, so patience is required.
Common Mistakes to Avoid
- Overfilling: Too much mango = leaking, sticky fingers, and sad mochi.
- Under-dusting: Skipping cornstarch leads to dough sticking everywhere.
- Kneading while too hot: You’ll melt the filling and make the dough gummy.
- Overcooking in the microwave: The dough can dry and crack, losing that lovely chew.
- Using underripe mangoes: This ruins the flavor profile — don’t be thrifty here.
Frequently Asked Questions (FAQ)
Q: Can I bake or steam this dough instead of microwaving?
A: Yes, steaming is traditional and yields a slightly different texture. Steam the batter in a heatproof dish for about 15–20 minutes until translucent.
Q: Is glutinous rice flour the same as sticky rice flour?
A: Yes — it’s the flour made from sweet rice and gives mochi its signature chewiness. Don’t substitute with regular rice flour.
Q: Can I make these ahead for a party?
A: Make the dough and puree separately, then assemble a few hours before serving. Keep refrigerated until just before guests arrive.
Q: Are these vegan?
A: Yes, the base recipe is vegan and dairy-free.
Q: How many does this recipe serve?
A: With the quantities given, expect about 12–16 small mochi, depending on how large you make them.
Cooking Tools You’ll Need
- Blender or food processor for puree
- Microwave-safe dish (silicone recommended)
- Silicone spatula
- Measuring cups and spoons
- Cornstarch for dusting
- Clean countertop or pastry mat
- Small spoon or piping tool for filling (optional)
Final Thoughts
There’s a small, ridiculous joy in turning two fruit, a cup of flour, and a microwave into something that makes people pause and smile. This homemade mango mochi has saved quiet nights, impresssed brunch guests, and taught me patience — and also that it’s okay to laugh at a kitchen mishap. The squishy, chewy exterior gives way to bright mango in a way that feels celebratory and domestic at the same time. If you’re someone who wants a dessert that’s both easy and show-off-able, this one fits the bill: it’s fast, forgiving, and full of heart.
Try it on a rainy night, or make a batch when you need to prove to yourself you can make something beautiful from a little chaos. And if your first attempt looks like an abstract sculpture, know this: you will still love it. It’s the taste that matters, and the memory of that silly, mango-scented kitchen.
If you enjoyed this recipe, don’t forget to save it on Pinterest or share it with a friend!
Conclusion
I love how different creators interpret mango mochi; the basic idea is the same, but the tiny techniques matter. For a simple microwave version and visual step-through, I found a helpful guide at Mango Mochi (Easy Microwave Recipe) – The Foodie Takes Flight. For inspiration on whole mango presentations and plating ideas, see Whole Mango Mochi – Constellation Inspiration. If you want another take with vibrant photos and tips, check out Mango Mochi – Juicy, Chewy & Tropical Sweetness. For a naturally sweet, gluten-free version that swaps sugar options, this recipe offers great alternatives: Gluten-Free Mango Mochi Recipe (Naturally Sweetened).
Mango Mochi
Ingredients
Filling
- 2 pieces ripe mangoes, pureed Use ripe mangoes for the best flavor.
Dough
- 1 cup glutinous rice flour Not regular rice flour; it gives mochi its chewy texture.
- 1/4 cup sugar Adjust sugar based on mango sweetness.
- 1/2 cup water Add in small increments if the dough feels too dry.
- as needed tablespoon cornstarch For dusting to prevent sticking.
Instructions
Preparation
- Peel and chop the mangoes, then pulse in a blender until smooth.
- In a mixing bowl, whisk together glutinous rice flour and sugar. Add water and stir until smooth.
- Pour the mixture into a microwave-safe dish and cover with plastic wrap. Microwave on high for 2-3 minutes, stirring halfway through.
- Let the dough cool slightly, then dust a clean surface with cornstarch and knead until pliable.
Assembling Mochi
- Divide the dough into small balls and flatten each into a disc.
- Place a teaspoon of mango puree in the center of each disc and fold the edges to seal.
- Dust each mochi in cornstarch to prevent sticking, then serve immediately or refrigerate.