
Easy Delicious Key Lime Pie
I still remember the first time I tried to make a Key lime pie. I thought it would be a two-step affair: zest, squeeze, mix, done. Nope. Oven drama, curdled custard, and a graham-cracker avalanche later, I had a very edible—but laughably uneven—pie that taught me more than any cooking class ever could. Honestly, that slightly wobbly, tart masterpiece tasted like sunshine after a storm. It was comfort and chaos all at once.
If you’re craving something that feels like a hug on a dessert plate, this version of Key Lime Pie is your ticket. It’s fast enough to slide into easy weeknight dinners plans if you’re hosting last-minute, and indulgent enough to star at a weekend dessert table. I use pantry staples and simple tools so it’s practically a dessert you can pull together while listening to a podcast. Plus, it fits nicely with budget-friendly recipes—no obscure ingredients, no fancy equipment, just good flavors. It’s also a sweet follow-up to your quick family meals when someone asks, “Is there room for dessert?” (Answer: always yes.)
This pie smells like kitchen citrus: bright lime oil from the zest, warm buttered crumbs singing from the oven, and that gentle dairy sweetness that makes every bite sneak from tart into creamy. The contrast between the crisp graham crust and the silky lime filling is the real magic. To be real, I’ve learned to embrace the mess—crumbs on the counter, sticky fingers, and the inevitable finger-licking that happens when the whipped cream hits the spoon.
There’s something nostalgic about Key lime pie that makes me think of porch swings, late summer storms, and road trips with a cooler full of snacks. This recipe is forgiving. It’s bold, comforting, and just a little cheeky—tart enough to wake you up, sweet enough to soothe you. If you’re in the mood for something that’s equal parts impressive and achievable, read on. You’ll laugh. You’ll probably make a mess. You’ll definitely make something delicious.
Why You’ll Love This Recipe easy weeknight dinners
- It’s seriously simple: minimal ingredients, minimal fuss, maximum payoff. Great when you’d rather be watching TV than fussing over layers of pastry.
- It’s a crowd-pleaser: bright lime flavor and creamy texture get nods from kids and grown-ups alike—handy after a round of quick family meals.
- It stretches well: a little goes a long way, so leftovers (if you have them) still feel special.
- It’s budget-friendly: uses pantry staples and one canned ingredient—hello, budget-friendly recipes.
- Versatile for make-ahead plans: perfect for stacking into a dessert rotation with meal prep microwave lunches and other prepped eats.
- Feels fancy but behaves like comfort food—like a citrusy hug after a long day.
What Makes This Recipe Special? healthy comfort food
This pie nails a rare balance: tartness that wakes up your palate, and a custardy richness that calms it back down. The lime juice provides bright, clean acidity while sweetened condensed milk gives the filling an impossibly silky texture without casing a million bowls of heavy cream. The crust is a simple buttery graham base, toasty and just crunchy enough to give the filling something to lean on.
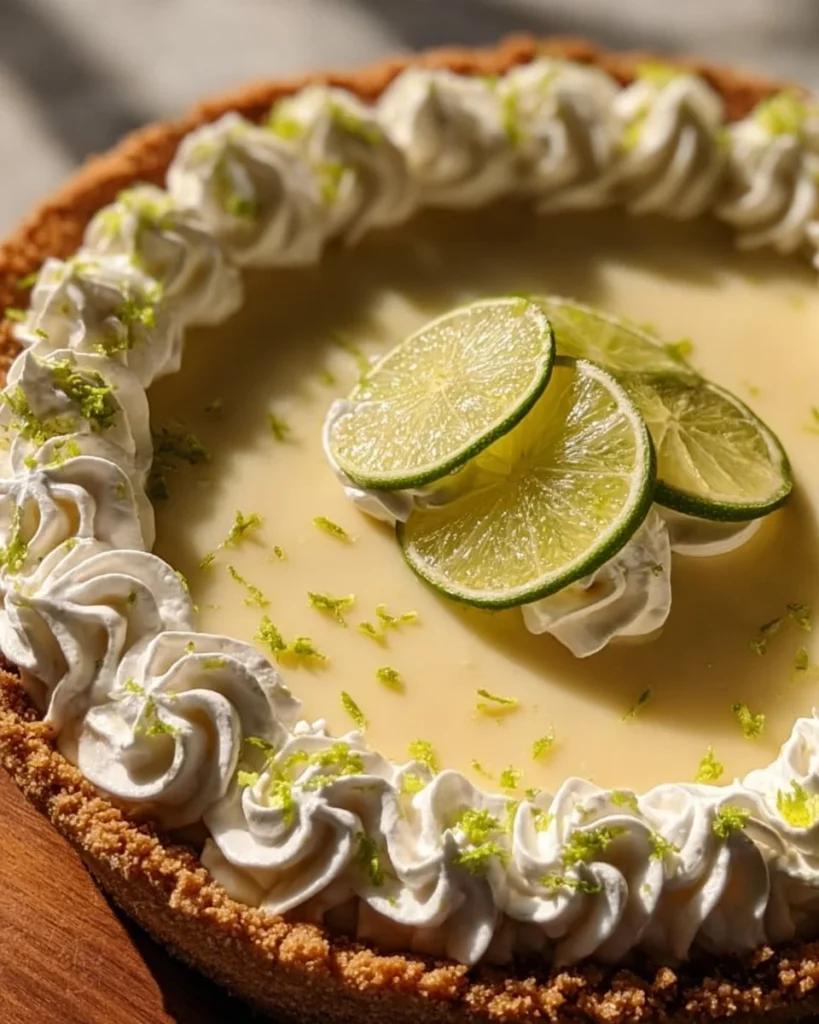
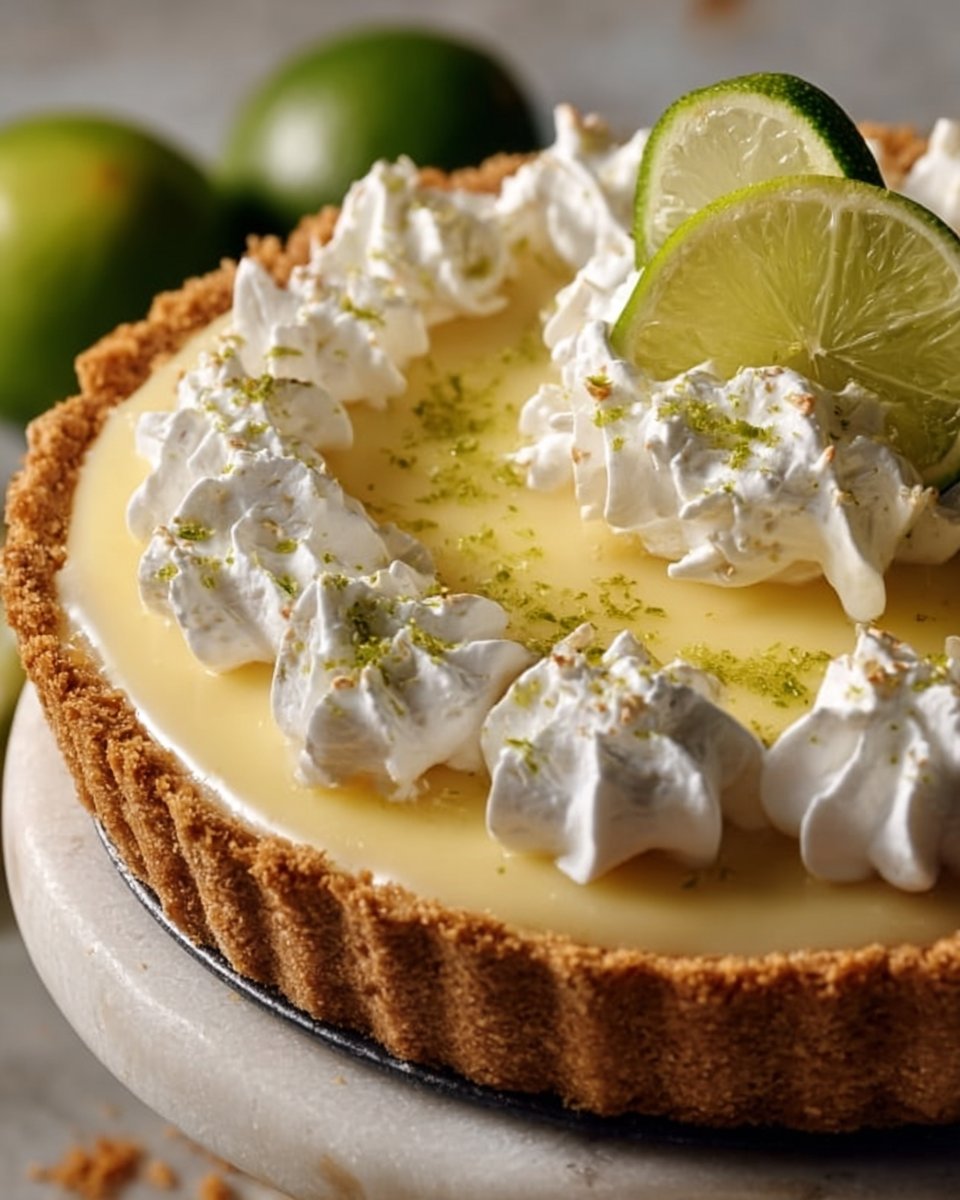
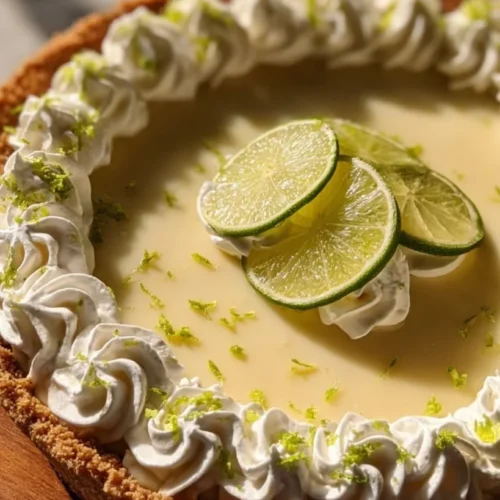
I like to think of the pie as the dessert equivalent of a well-loved cardigan—comfortable, dependable, and warmed through with personality. Small tricks make the difference: using fresh lime zest (not bottled), pressing the crust firmly so it won’t crumble, and not overbaking the filling so it stays tender. And yes, that whipped cream on top? Not optional. It’s a fluffy, cooling counterpoint to the lime, and it makes each slice Instagram-ready—if you care about that sort of thing.
Ingredients
This is one of those recipes where the ingredients list feels humble, but each item does a very specific job. I like simple, honest pantry ingredients, and I’ll tell you what each brings to the party and how to avoid common slip-ups.
- 1 1/2 cups graham cracker crumbs — The backbone of the crust. I buy whole crackers and blitz them in a food processor for the best texture, but you can use store-bought crumbs in a pinch. Toast them lightly if they feel stale.
- 1/3 cup sugar — A little sweetness to balance the lime. If you prefer a slightly less sweet crust, reduce to 1/4 cup.
- 1/2 cup butter, melted — Binds the crumbs and delivers that lovely toasty butter flavor. Use unsalted if you watch sodium; if using salted, taste the final filling before adding more sugar.
- 4 large egg yolks — They make the filling luxuriously thick and custardy. Save the whites for an omelet or meringue cookies—don’t waste those.
- 1 (14 oz) can sweetened condensed milk — This is the pie’s creamy sweet heart. Do not swap this for evaporated milk—this one is sweet and thick on purpose.
- 1/2 cup fresh lime juice — Fresh is non-negotiable. Bottled lime juice lacks the brightness and aroma you want.
- Zest of 2 limes — So much flavor sits in that green skin; don’t skip it. I use a Microplane and zest just the bright green part.
- 1 cup heavy cream — For the whipped topping. If you’re feeling decadent, use vanilla bean paste (a tiny scrape) while whipping.
- 2 tablespoons powdered sugar — Stabilizes the whipped cream and adds a touch of sweetness. Sift it to avoid lumps.
- Lime slices for garnish — Because presentation counts. Thin slices or wedges look lovely, and the aroma is a finishing flourish.
Personal notes: I’m picky about graham crackers—Nabisco is my fallback because they stay crisp and have a reliable flavor. For lime variety, if you can find Key limes (tiny and more aromatic), use them for the juice and zest; but regular Persian limes work wonderfully and are easier to find. Don’t over-zest—avoid the white pith, which is bitter. And a “don’t do this” warning: don’t substitute lemon juice and call it the same thing—limes are the point.
How to Make It Step-by-Step
I’ll walk you through this the way I make it—messy countertops and all. Expect sensory descriptions because that’s half the fun: the smell of butter toasting crumbs, the thump of the whisk, the quiet moment when the filling settles into the crust.
Preheat and prep. I always preheat the oven to 350°F (175°C) and set a sheet pan on the center rack. There’s nothing worse than preheating and realizing you’ve stacked bowls in the sink. Grab a 9-inch pie pan, a fork, a whisk, a mixing bowl, and your Microplane. If you’re like me, you’ll smear a little butter on the pan first so nothing gets dramatic.
Make the crust. In a medium bowl I combine 1 1/2 cups graham cracker crumbs, 1/3 cup sugar, and 1/2 cup melted butter. The texture should be like damp sand—stick together when pressed but not soupy. I like to press the mixture firmly into the pan bottom and up the sides with the bottom of a measuring cup. Firm pressing equals fewer crumbs later. If you press too lightly, the crust will disintegrate when you cut it—trust me, I learned that the hard way (and had a slice that resembled a crumble more than a pie).
Bake the crust for 8–10 minutes until lightly golden. The oven will perfume your kitchen with toasted graham and butter—so good. Remove it and let it cool briefly while you make the filling. Cooling prevents the custard from overcooking at the edges.
Make the filling. In a large bowl whisk together 4 large egg yolks until pale and slightly thick. Add the 14 oz can of sweetened condensed milk and whisk until smooth. I always scrape the can with a spatula because that stuff clings to the sides and I’m not about to waste it. Add 1/2 cup fresh lime juice and the zest of 2 limes, and whisk until the whole bowl is glossy and a little bit mousse-like. The mixture will smell intensely citrusy and sweet—like summer turned into dessert.
Pour the filling into the cooled crust. It should settle into place, filling every nook. If you’re nervous about spills, put the pie pan on a baking sheet—less stress later.
Bake for an additional 10 minutes. Yes, ten minutes. The filling doesn’t need to set like a cake; it just needs to firm up a touch at the edges. You’ll know it’s ready when the center jiggles slightly but doesn’t look raw. Overbake and you get curdled, rubbery filling. Underbake and it won’t slice prettily. This is a delicate balance, so I lean to slight wobble and trust the chill.
Cool and chill. Remove the pie from the oven and let it cool to room temperature, then refrigerate for at least 2 hours. If I’m prepping ahead, I’ll refrigerate overnight. Chilling helps the filling set and allows the flavors to meld. The first time I skipped the chill, I ended up with a sloppy pie and a very unforgiving Instagram photo. Learned my lesson.
Whip and top. Before serving, whip 1 cup heavy cream with 2 tablespoons powdered sugar until soft peaks form—don’t overwhip, or you’ll end up with butter. I like to spread the cream in a cloud over the pie, or I pipe it with a star tip if I’m feeling fancy (rare). Garnish with lime slices. The aroma right before the first forkful? Bright lime, softened cream, and a hint of butter. It’s a promise.
Serve and savor. Cut with a sharp knife, clean the blade between slices for neat edges, and watch people’s faces when they take a bite. That zing followed by creaminess is basically dessert theater. I often hear “I didn’t expect that” or “This tastes homemade!” which, to be real, is exactly the goal.
Common oops I’ve had: Once I forgot to cool the crust and poured hot filling into it, leading to a slightly soggy edge. Another time I overwhisked the cream and nearly made butter. Small errors become good stories—just don’t let them be yours every time.
Tips for Best Results
- Use fresh lime juice and zest. Bottled juice lacks brightness and the essential lime aroma that makes this pie sing. Fresh zest is flavor gold.
- Press the crust firmly. I say this twice because it matters. Use the bottom of a measuring cup to compact the crumbs into an unshakeable base.
- Don’t overbake the filling. Look for a slight jiggle in the center; that’s perfect. Overbaking equals dry, chalky texture.
- Chill thoroughly. At least two hours, preferably overnight, gives the filling a better slice and deeper flavor.
- Whip cream to soft peaks. Stop before it feels stiff. Taste and adjust sweetness—some people like it sweeter, some prefer the contrast of tart lime with lightly sweetened cream.
- Clean your knife between slices. It makes the presentation so much prettier.
Ingredient Substitutions & Variations
- Crust swaps: Use crushed shortbread or vanilla cookies for a richer crust, or gluten-free graham-type crackers for dietary needs. Almond flour mixed with butter makes a nutty alternative.
- Sweetener adjustments: If you want less sugar, reduce crust sugar slightly and whip the cream with a sugar substitute recommended for baking. Note: sweetened condensed milk is essential for texture and sweetness—there’s no direct sugarless one-for-one without altering texture.
- Dairy-free option: Use full-fat coconut milk (refrigerated so the cream separates) whipped for topping and a dairy-free condensed milk alternative for filling—results will be different but tasty.
- Boozy twist: Stir a teaspoon of coconut rum into the whipped cream for an adult-only kick—just a whisper.
- Key lime upgrade: If you can find Key limes, use their juice and zest for a more floral, intense lime flavor.
Directions
- Preheat oven to 350°F (175°C).
- Combine 1 1/2 cups graham cracker crumbs, 1/3 cup sugar, and 1/2 cup melted butter; press into a 9-inch pie pan.
- Bake crust 8–10 minutes; cool.
- Whisk 4 egg yolks, 14 oz sweetened condensed milk, 1/2 cup fresh lime juice, and zest of 2 limes until smooth.
- Pour filling into cooled crust and bake 10 minutes.
- Cool to room temperature, then chill at least 2 hours.
- Whip 1 cup heavy cream with 2 tbsp powdered sugar to soft peaks; spread or pipe over pie.
- Garnish with lime slices and serve.

Pairing Ideas (Drinks, Sides, etc.)
This pie pairs beautifully with a light coffee—an espresso cut the tart sweetness perfectly the last time I served it. For non-coffee drinkers, try a cold sparkling water with a lime wedge to echo the citrus notes. If you want a cocktail pairing, a crisp gin and tonic complements the lime without stealing the show. For a cozy night in, slice this with a scoop of vanilla bean ice cream or alongside a simple bowl of berries. And if you’re assembling a dessert spread after meal planning chicken dinner prep, this pie is a bright, refreshing finale.
How to Store and Reheat Leftovers
Store the pie covered in the refrigerator for up to 3–4 days. I use a pie saver dome or a loose tent of plastic wrap—avoid pressing wrap onto the whipped cream. The filling holds well but the whipped cream will relax and soften over time. If you want to refresh the topping, whip a little more cream and pipe a border before serving.
Don’t freeze a pie with whipped topping; the texture becomes unpleasant. You can freeze the baked, un-topped pie (wrapped tightly in plastic and foil) for up to one month. Thaw overnight in the fridge and add fresh whipped cream before serving. I once tried microwaving a slice to warm it; the filling turned into a weird custard soup, so do not microwave.
Make-Ahead and Freezer Tips
This pie is a make-ahead dream. Bake the entire pie a day ahead, chill overnight, and add the whipped cream just before serving for the freshest look and texture. If you’re prepping even earlier, you can freeze the baked, un-whipped pie tightly wrapped for up to a month. Thaw in the fridge slowly and top with freshly whipped cream. Pro tip: make extra crust crumbs in advance; they store well in an airtight container and speed up future pie-building sessions.
Common Mistakes to Avoid
- Overbaking the filling: results in a cracked, rubbery texture. Stop when the center still jiggles slightly.
- Using bottled lime juice: it flattens the flavor. Fresh is non-negotiable for brightness.
- Pressing crust too lightly: leads to crumbly slices. Press firmly and evenly.
- Overwhipping cream: you’ll end up with butter. Watch for soft peaks and stop.
- Forgetting to chill: the filling needs time to set; skipping this step makes serving messy.
Frequently Asked Questions (FAQ)
Q: Can I use regular limes instead of Key limes?
A: Yes—regular Persian limes are fine and easier to find. Key limes are more aromatic, but the recipe works with either.
Q: Can I make this without eggs?
A: The egg yolks give the filling its custardy texture. For an egg-free version, look for recipes using gelatin or agar to set a lime curd—texture will differ.
Q: How can I make the pie less sweet?
A: Reduce the crust sugar slightly and whip the cream with less powdered sugar. Be cautious: the sweetened condensed milk is integral to the filling’s balance.
Q: Can I freeze the pie?
A: You can freeze the baked pie without whipped cream for up to a month. Thaw in the refrigerator and top with fresh whipped cream before serving.
Cooking Tools You’ll Need
- 9-inch pie pan
- Food processor or sturdy bag + rolling pin (for crushing graham crackers)
- Mixing bowls (medium and large)
- Whisk and rubber spatula
- Measuring cups and spoons
- Microplane zester
- Hand mixer or stand mixer for whipping cream
- Baking sheet (to catch spills)
- Sharp knife for slicing
Final Thoughts
This Key lime pie recipe is one of those rare things that feels both special and absolutely comfortable. It has the bold citrus personality of summer and the cozy custardy warmth of a homemade dessert. I love that I can pull it together with pantry staples and that each step teaches me a little more about balance—how acid and sweetness can be best friends, how a firm crust makes all the difference, and how a perfectly whipped cloud of cream can turn a simple pie into a party.
I’ve made this pie for birthdays, tiny celebrations, and quiet Sunday suppers when I needed something bright and satisfying. I’ve burned a crust, underbaked once in a panicked rush, and had a cream that turned into an accidental butter. Those mistakes are part of the memory—part of what makes the dish mine. If you make it and anything goes sideways, laugh, fix what you can, and try again. That’s the joy of cooking.
If you enjoyed this recipe, don’t forget to save it on Pinterest or share it with a friend!
Conclusion
For more ideas and variations, check out Easy Key Lime Pie Bars – Easy Recipe – Sally’s Baking Addiction for a portable twist you can bring to potlucks. If you’re curious about creative takes on the bars form, this version from Key Lime Pie Bars – Scientifically Sweet has fun technique notes. And if you want another classic take on Key lime pie, I like this straightforward version at My Best Key Lime Pie (7 Ingredients) – Sally’s Baking Addiction.
Key Lime Pie
Ingredients
For the crust
- 1.5 cups 1 1/2 cups graham cracker crumbs Use whole crackers or store-bought crumbs.
- 1/3 cup 1/3 cup sugar Reduce to 1/4 cup for a less sweet crust.
- 1/2 cup 1/2 cup butter, melted Use unsalted if watching sodium.
For the filling
- 4 large 4 large egg yolks Save the whites for another use.
- 14 oz 1 (14 oz) can sweetened condensed milk Do not swap for evaporated milk.
- 1/2 cup 1/2 cup fresh lime juice Fresh is non-negotiable.
- 2 limes Zest of 2 limes Use a Microplane to zest the green part only.
For the topping
- 1 cup 1 cup heavy cream Use vanilla bean paste for extra flavor if desired.
- 2 tablespoons 2 tablespoons powdered sugar Sift to avoid lumps.
- as needed Lime slices for garnish Presentation is key.
Instructions
Preparation
- Preheat the oven to 350°F (175°C) and set a sheet pan on the center rack.
- In a medium bowl, combine graham cracker crumbs, sugar, and melted butter. Press firmly into a 9-inch pie pan.
- Bake the crust for 8–10 minutes until lightly golden. Remove and let cool briefly.
- In a large bowl, whisk together egg yolks until pale. Add sweetened condensed milk and whisk until smooth.
- Stir in lime juice and zest until mixed. Pour filling into cooled crust.
- Bake for an additional 10 minutes until the edges are set but the center jiggles slightly.
- Let cool to room temperature, then refrigerate for at least 2 hours.
- Before serving, whip the heavy cream with powdered sugar until soft peaks form.
- Spread or pipe the whipped cream over the pie and garnish with lime slices.